Integrate azure AD with LDAP
Configure secure LDAP for Azure Active Directory Domain Services and integrate it into your application.
Overview: This article helps to enable LDAPS (Secure LDAP) on Azure Active Directory and integrate it into your application. It guides you through configuring secure LDAP for Azure Active Directory Domain Services to ensure secure, encrypted communication between your application and the directory service.
Refer to this article to Integrate Azure AD in Ezeelogin jump server
Make your Azure Active Directory Domain Service more secure and connect external systems easily with LDAPS. Follow the steps to enable LDAPS and test LDAP queries from an external system.
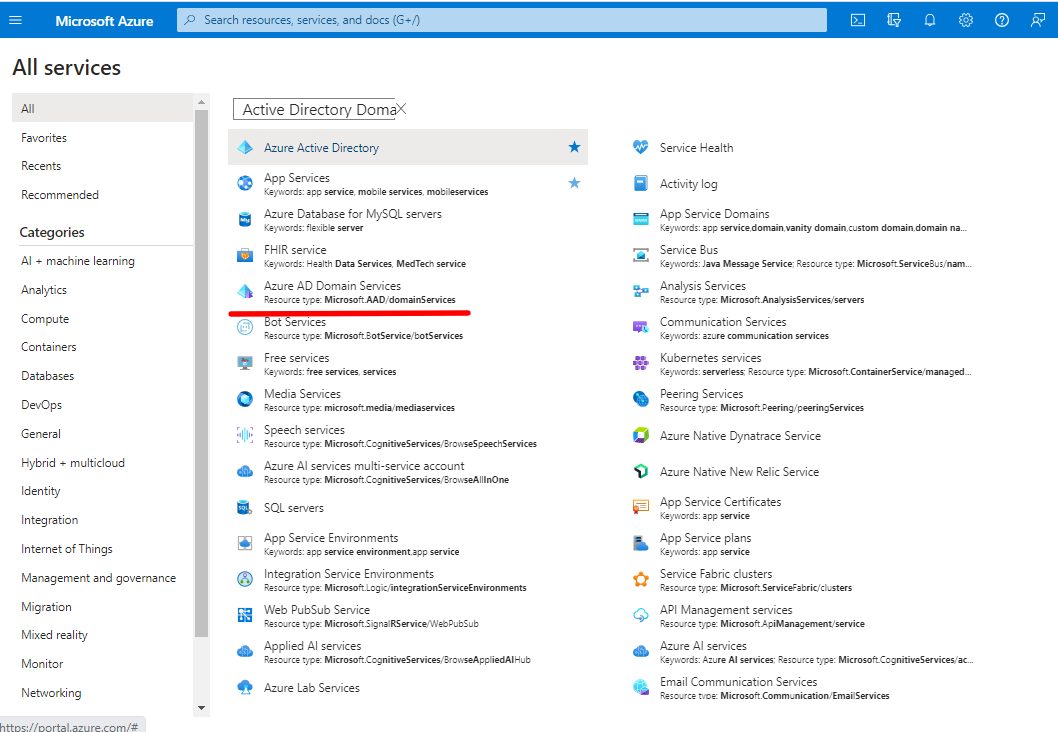
Step 1: Log into the Azure portal, Search, and Select Azure AD Domain Services
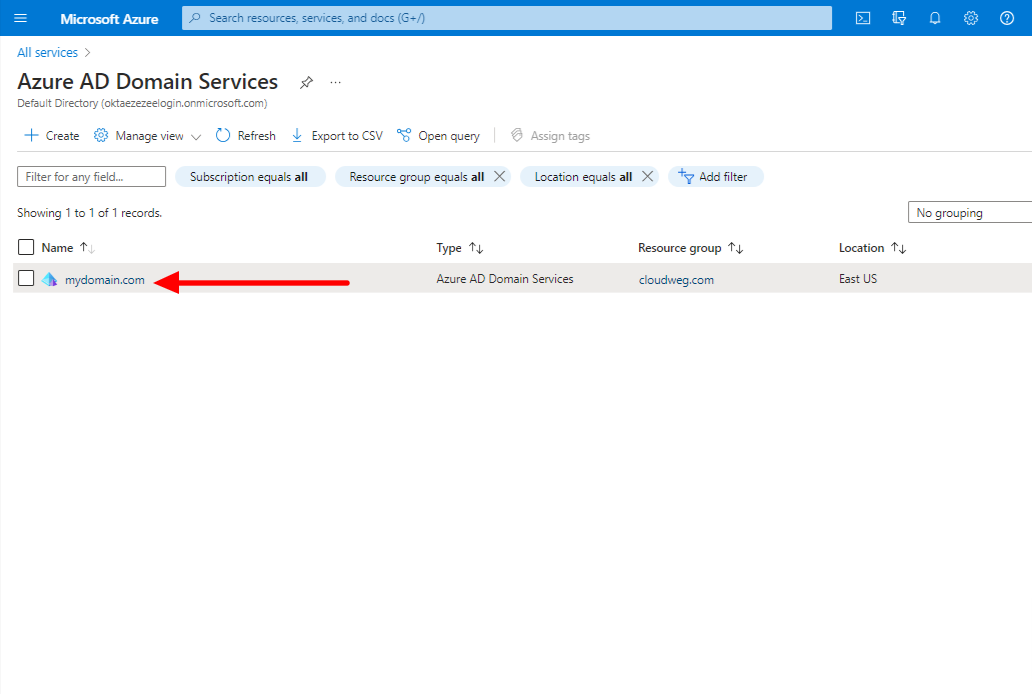
Step 2: Select your Managed Domain service
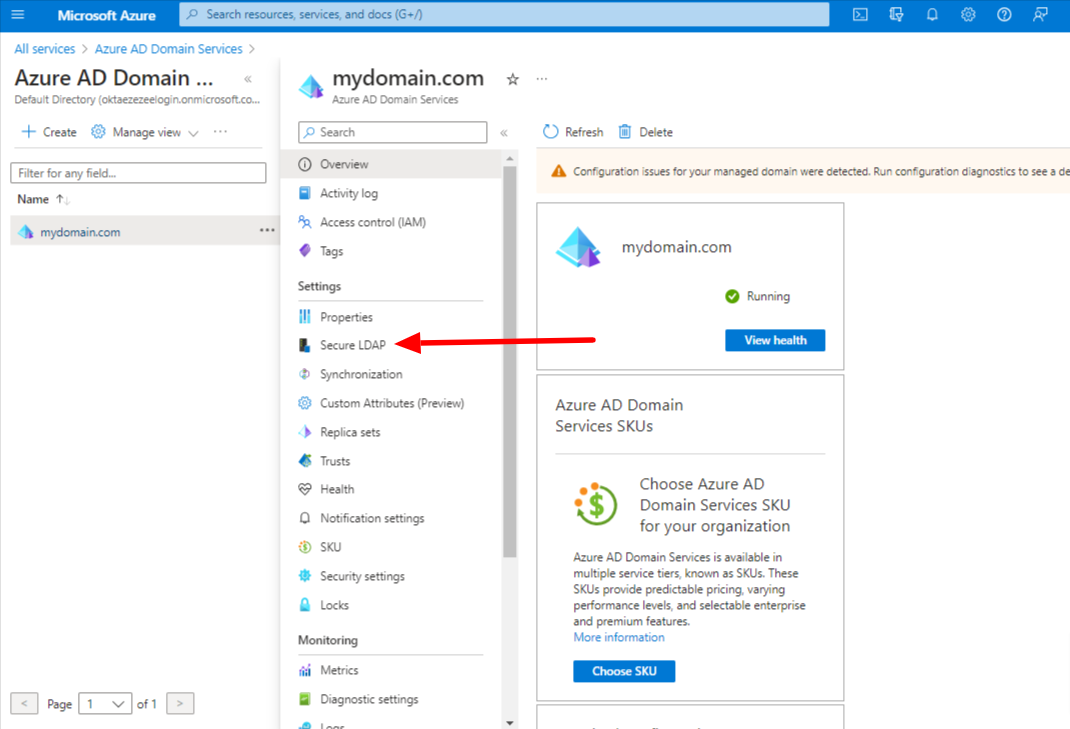
Step 3: Select Secure LDAP
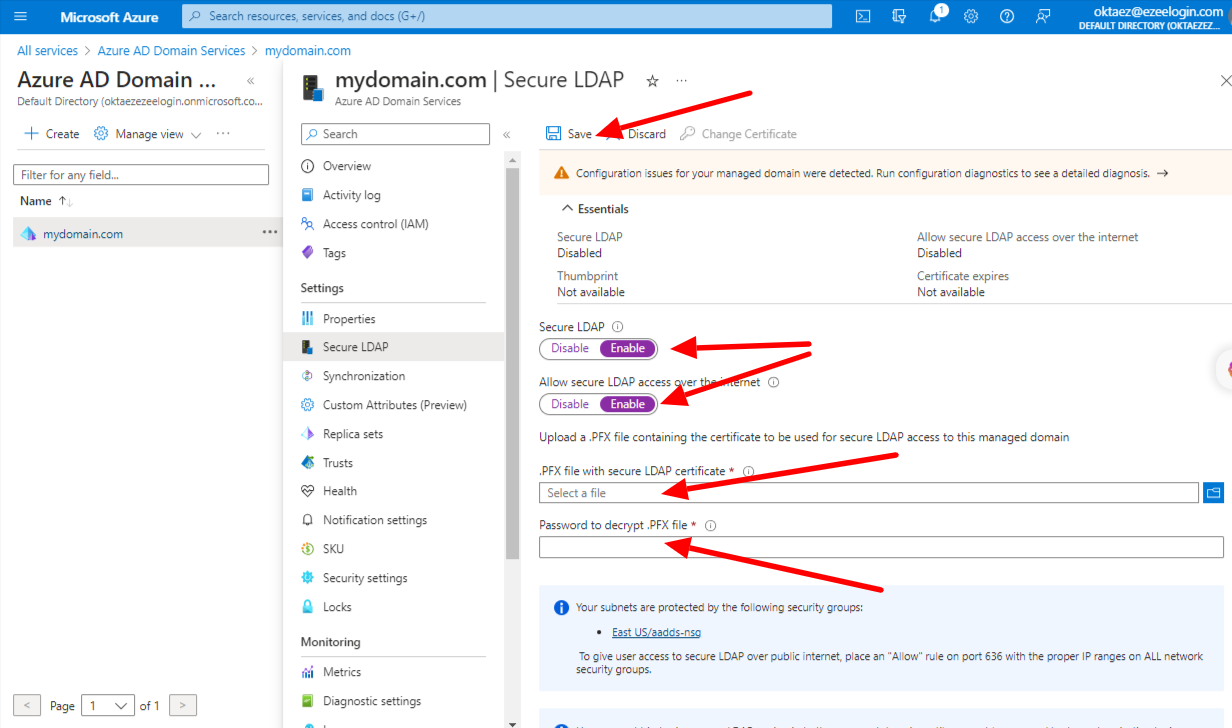
Step 4: Enable secure LDAP and Allow secure access over the Internet
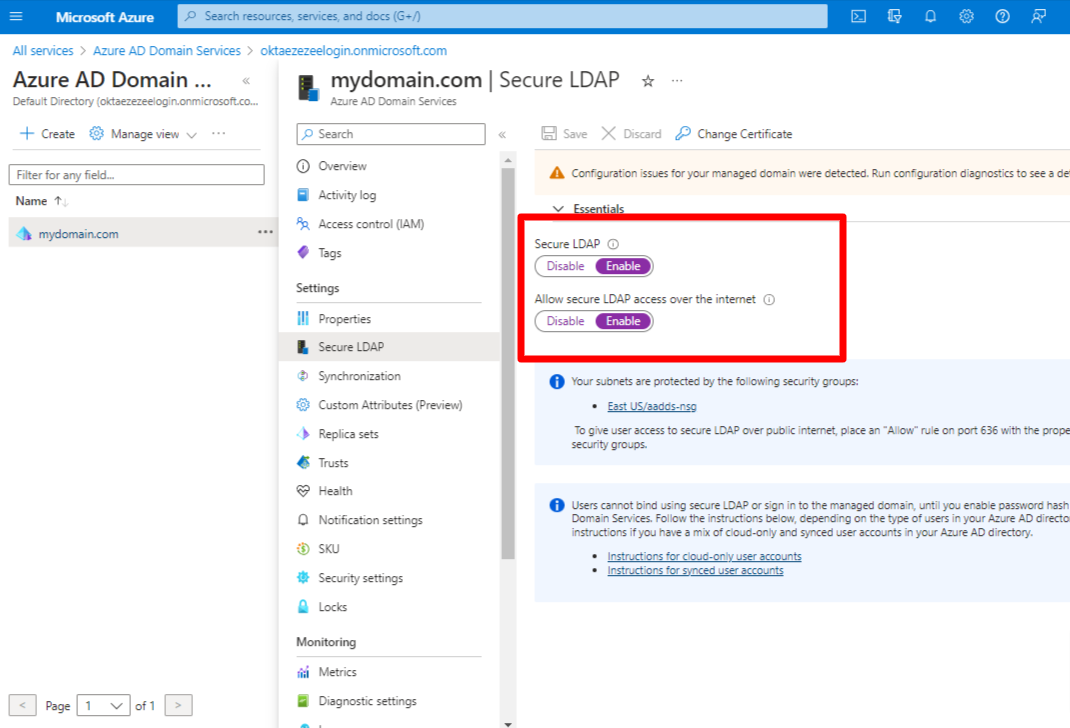
A digital certificate is required to encrypt the communication to use secure LDAP. The certificate can be obtained from a public certificate authority (CA) or an enterprise CA or a self-signed certificate
Step 5: Follow the instruction to create and export a self-signed certificate
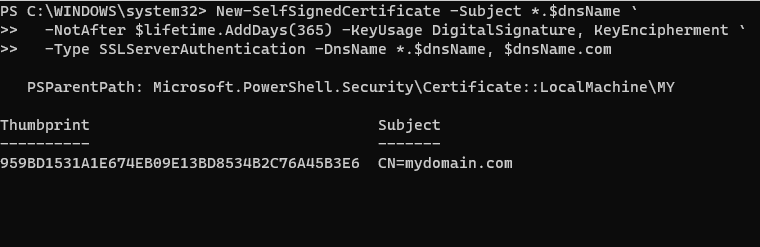
Step 5(A): Open a PowerShell window as Administrator and run the following commands. Replace the $dnsName variable with your managed domain, For example mydomain.com
#Define your own DNS name used by your managed domain
$dnsName="mydomain.com"
#Get the current date to set a one-year expiration
$lifetime=Get-Date
#Run the command to generate the certificate
New-SelfSignedCertificate -Subject *.$dnsName `
-NotAfter $lifetime.AddDays(365) -KeyUsage DigitalSignature, KeyEncipherment `
-Type SSLServerAuthentication -DnsName *.$dnsName, $dnsName
You can view the following output if the certificate was successfully created
Step 5(B): Export a certificate for Azure AD DS
- Open run on windows machine and enter mmc , press ok
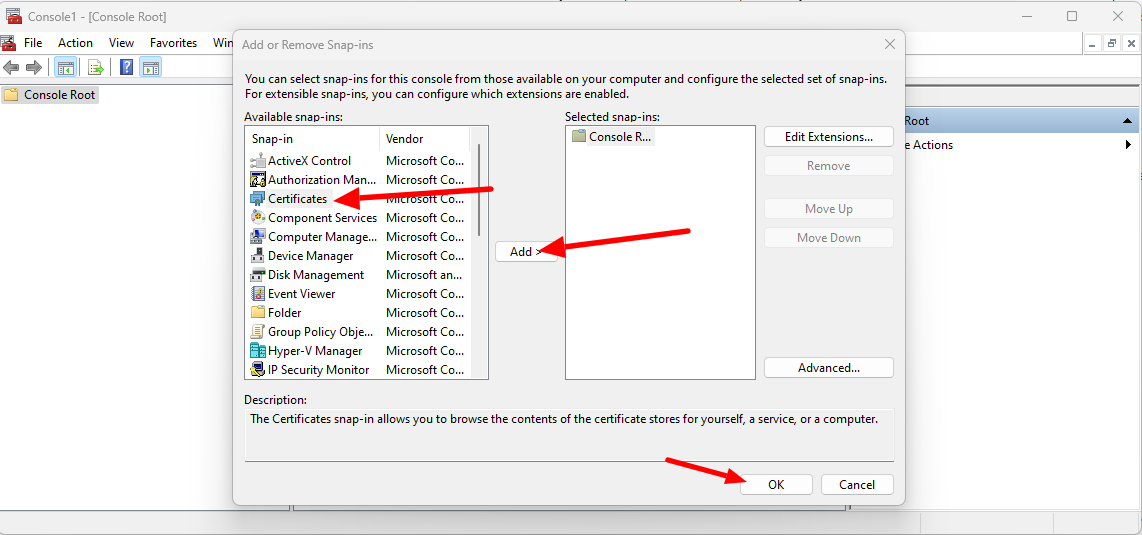
- Click on the File and select Add/Remove Snap-in
- Select certificates and click on Add , click ok
- Then select Local computer: (the computer this console is running on) , then click Finish .
- In the MMC window, expand Console Root. Select Certificates (Local Computer), then expand the Personal node , followed by the Certificates node.
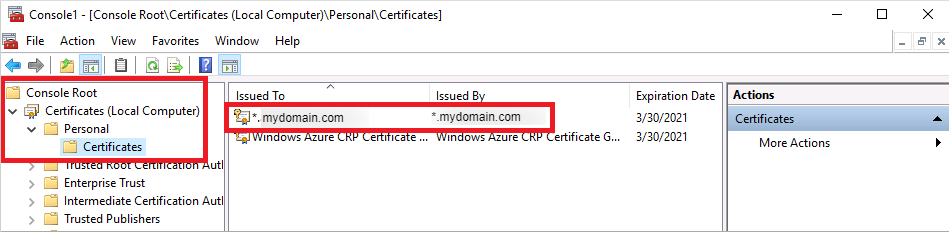
- Right-click on this certificate, then choose All Tasks > Export
- Export Private Key page, choose Yes, export the private key, then select Next .
- Select Personal Information Exchange - PKCS #12 (.PFX) as the file format for the certificate. Check the box for Include all certificates in the certification path if possible
- Click Next and type a password and follow the prompts
You will get the certificate exported in pfx format. Now you can continue on Azure portal
Step 6: Select the folder icon next to .PFX file with secure LDAP certificate. Browse to the path of the .PFX file you exported in the previous step and enter the password to decrypt which you have used while exporting and save.
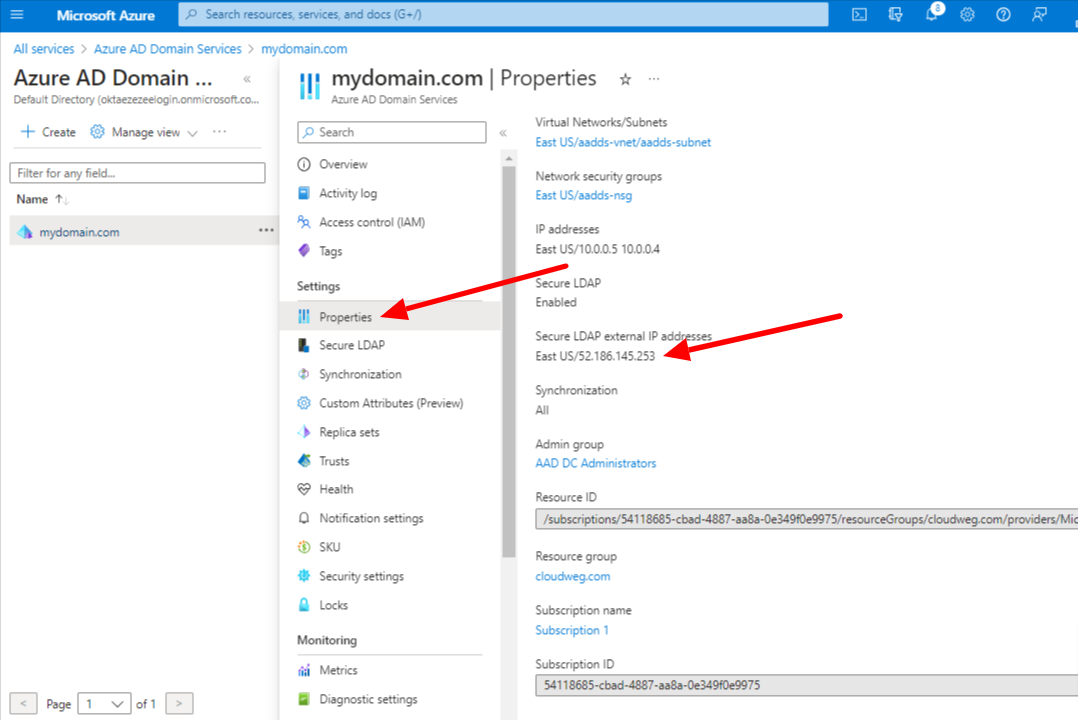
Step 7: Click on Properties and configure your DNS provider to create a host record to resolve to this Secure LDAP external IP address. You can configure this to your Local DNS forwarder or to your system host to resolve locally for testing.
Test the LDAPS queries from an external system
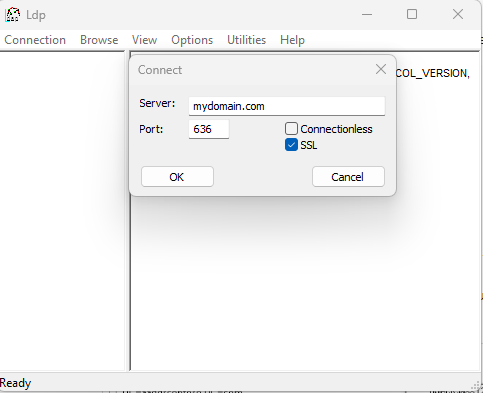
Step 1: Add the following Secure LDAP external IP address to your host file on the system
52.186.145.253 mydomain.com
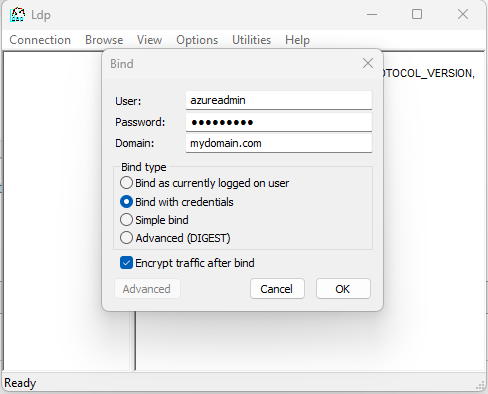
Step 3: Open Connection > Bind, Select Bind with credentials and input your Username, Password, and Domain of the Azure Bind User
Step 4: Open View -> Tree will list the entire Active Directory Tree.
Step 5: Check LDAPS from terminal
Step 5.a: Run LDAPSEARCH from the terminal as follows. Use "LDAPTLS_REQCERT=never" if you are using a self-signed certificate.
john@dellpc:~# LDAPTLS_REQCERT=never ldapsearch -H ldaps://mydomain.com:636 -D "[email protected]" -W -b "DC=mydomain,DC=com"
Step 5.b: Run LDAPSEARCH from the terminal as follows if you are using valid certificate.
john@dellpc:~# ldapsearch -H ldaps://mydomain.com:636 -D "[email protected]" -W -b "DC=mydomain,DC=com"
Step 5.c: Run LDAPSEARCH from the terminal as follows if you want to force TLS connection.
john@dellpc:~# ldapsearch -H ldaps://mydomain.com:636 -D "[email protected]" -W -b "DC=mydomain,DC=com" -ZZ
Related Articles:
Can we map existing user group in ldap to ezeelogin as ezeelogin user group ?