Create load balancer in AWS for Ezeelogin Cluster
How to create load balancer in AWS for Ezeelogin Cluster setup for HA?
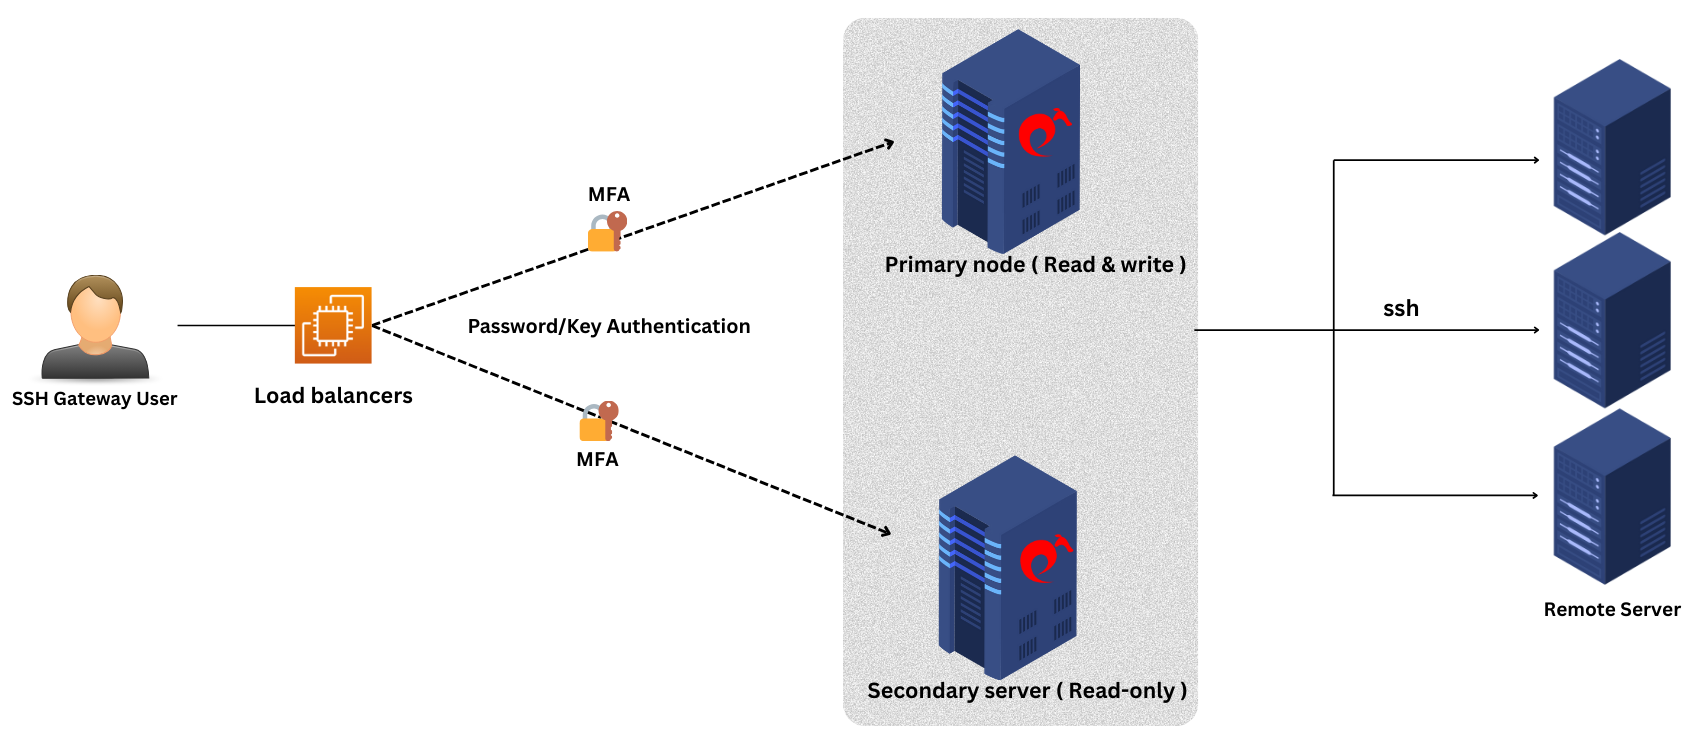
Overview: This article describes how to set up a Network Load Balancer (NLB) in AWS to support High Availability (HA) for Ezeelogin cluster node, enabling traffic distribution between primary and secondary nodes.
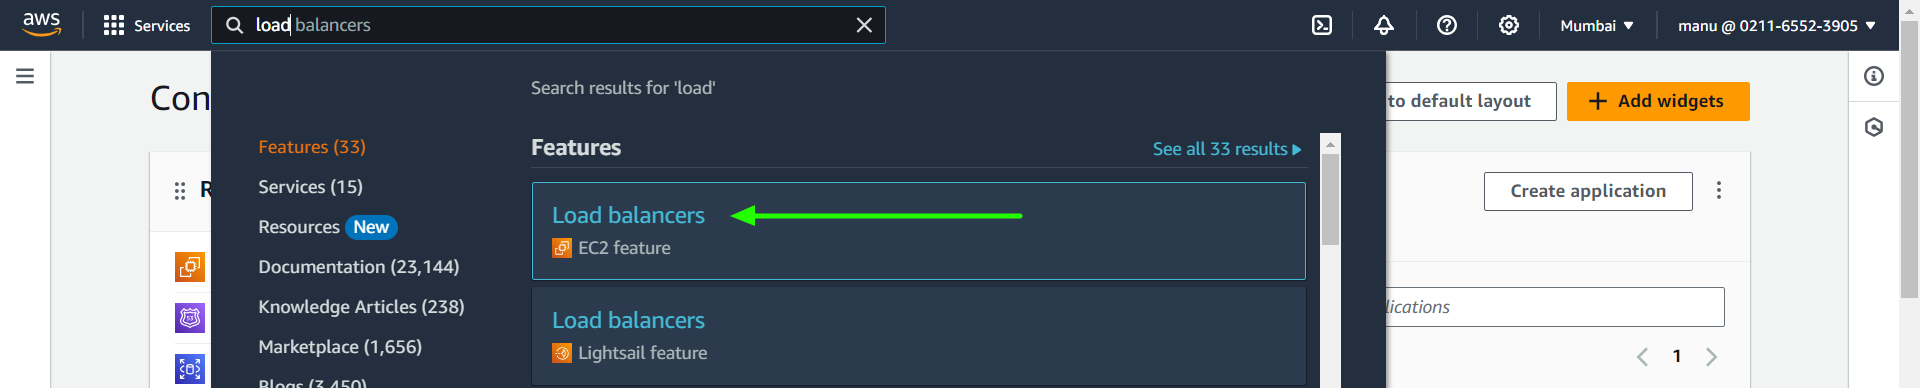
Step 1: Login to the AWS account and search for load balancer with EC2 feature.
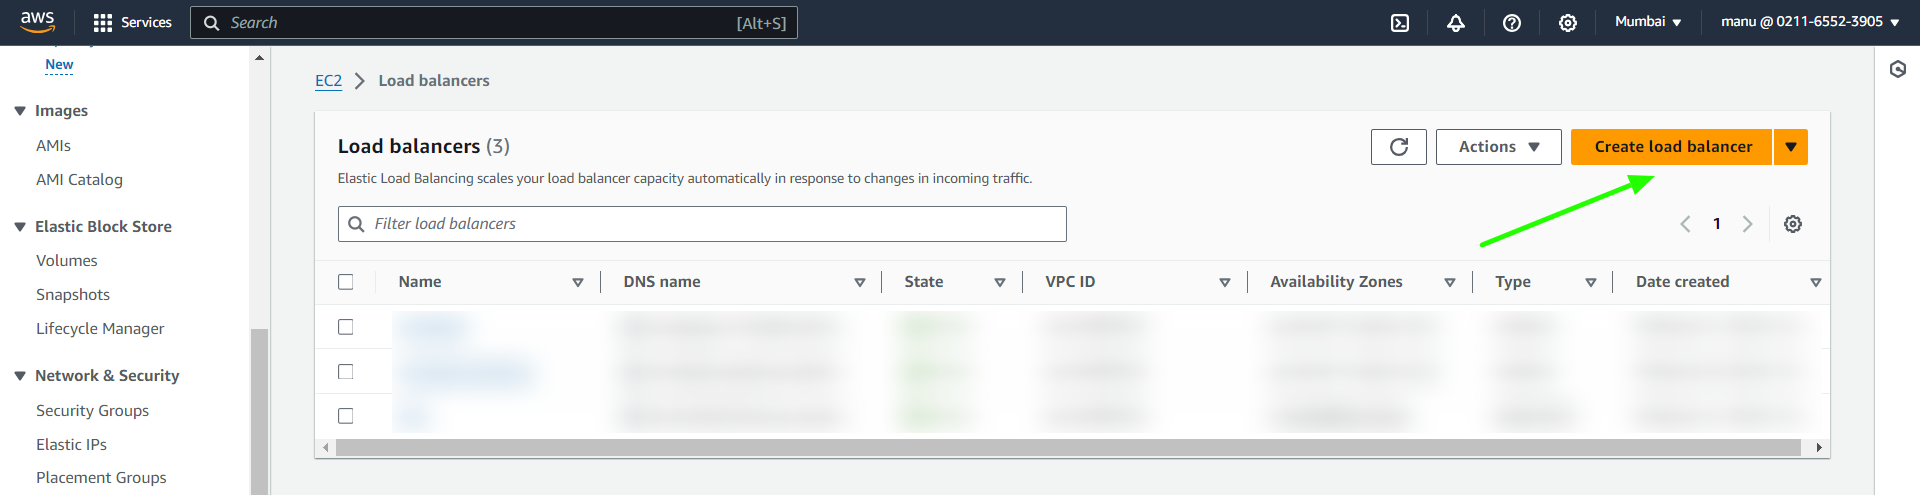
Step 2: Create new load balancer.
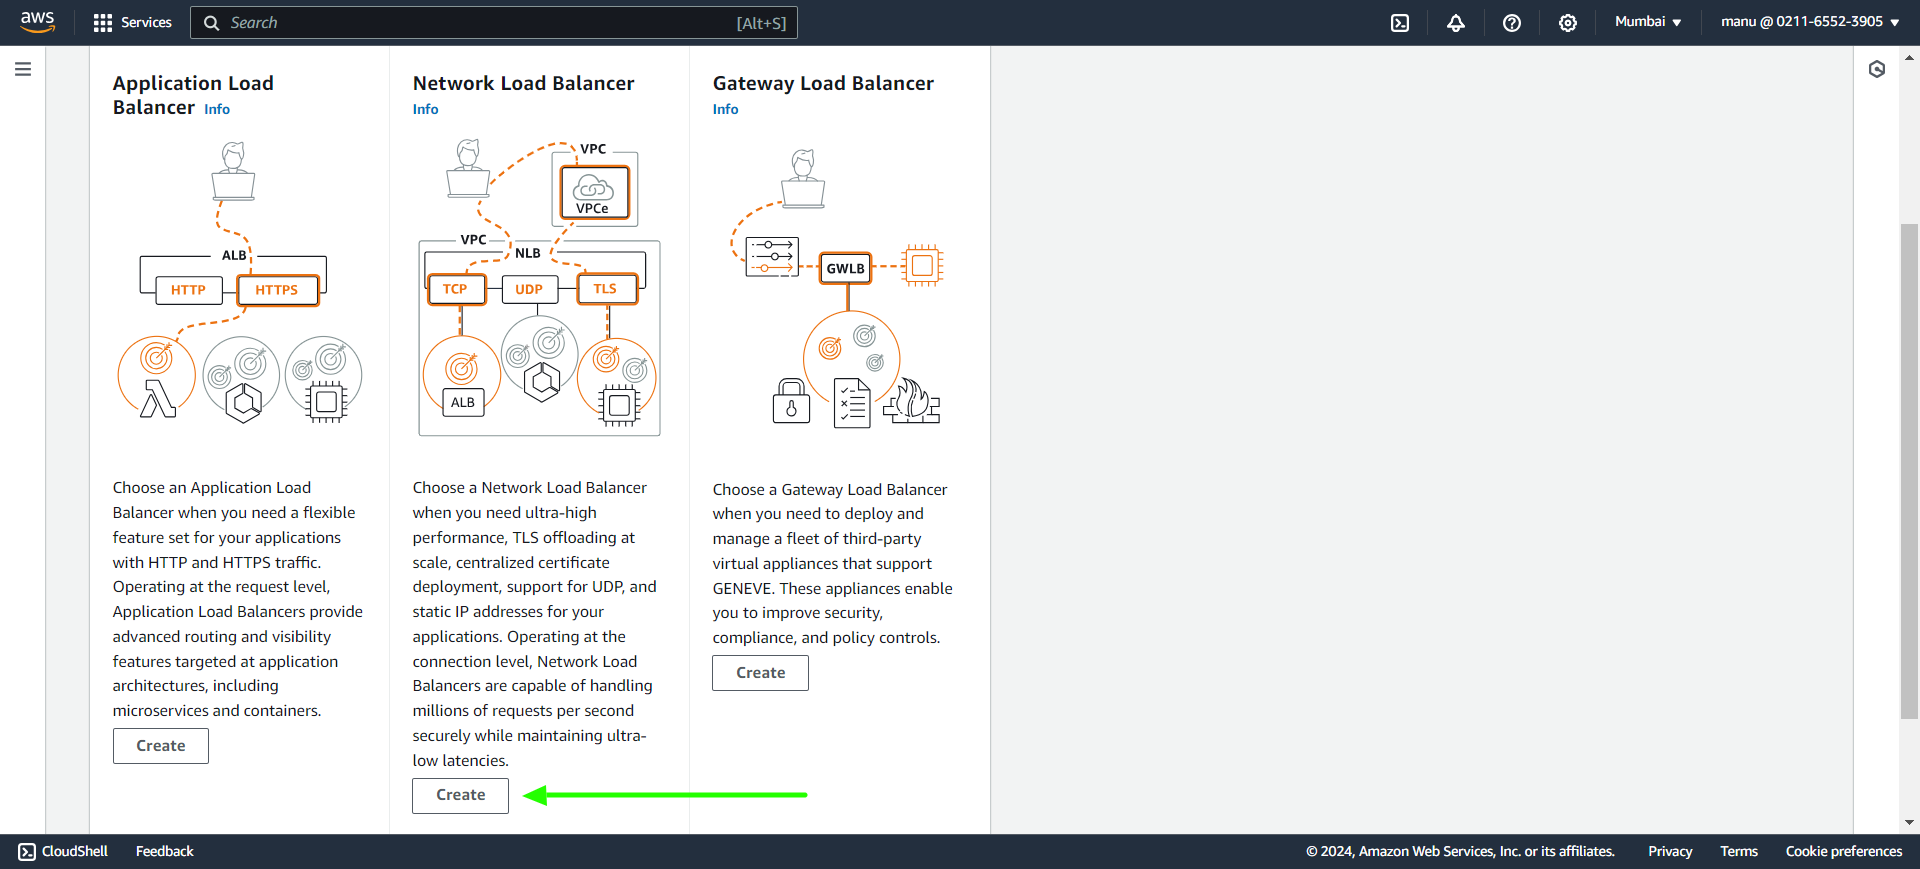
Step 3: Create Network Load Balancer from the three option.
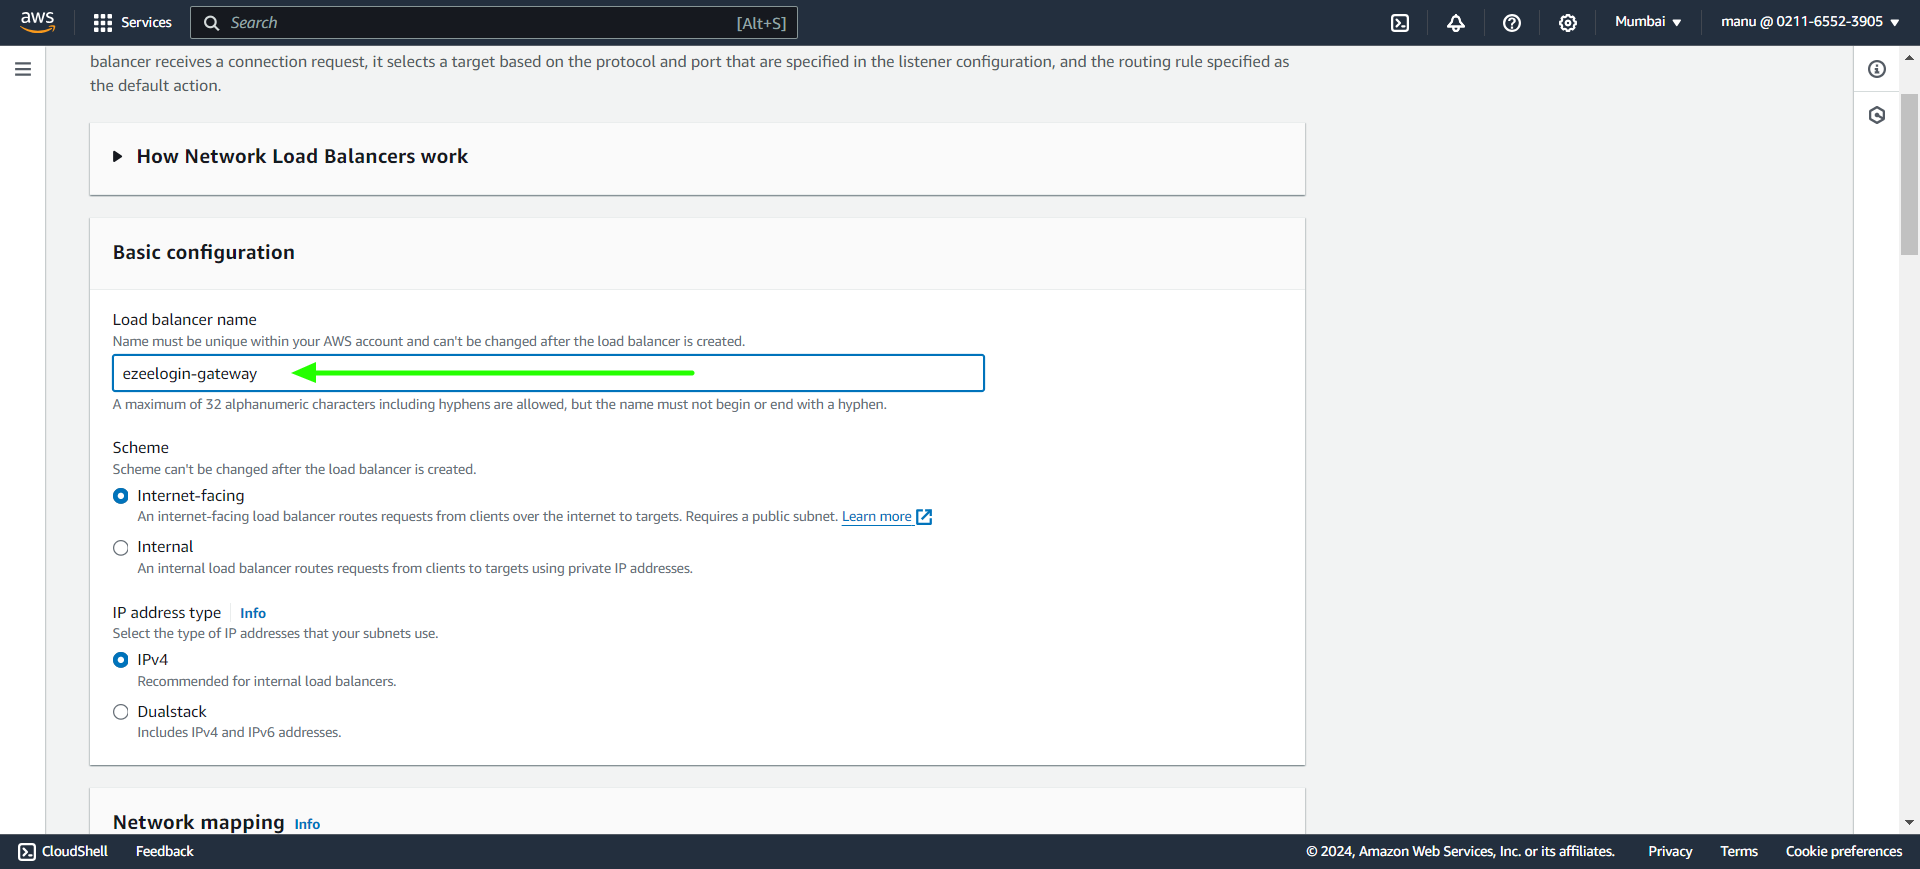
Step 4: In the basic configuration provide load balancer name.
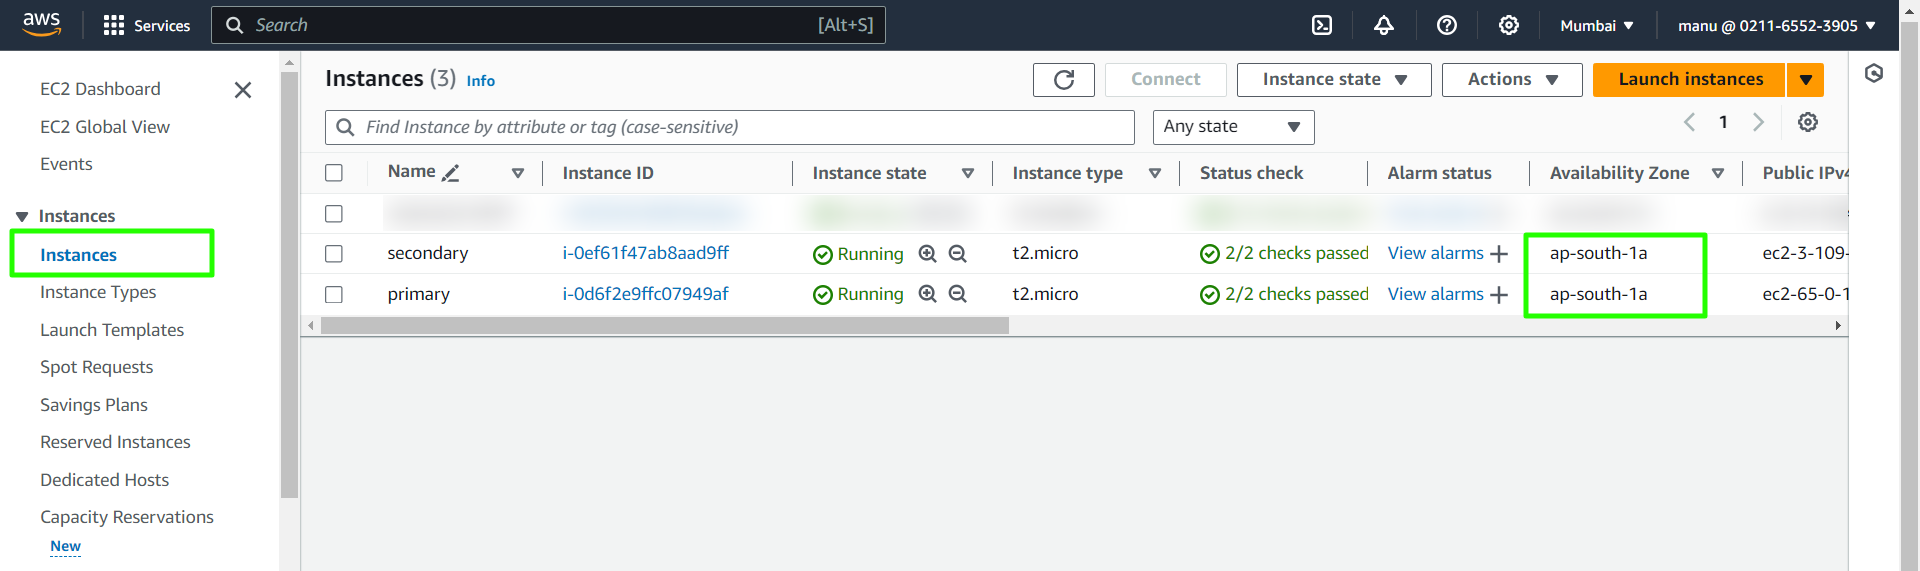
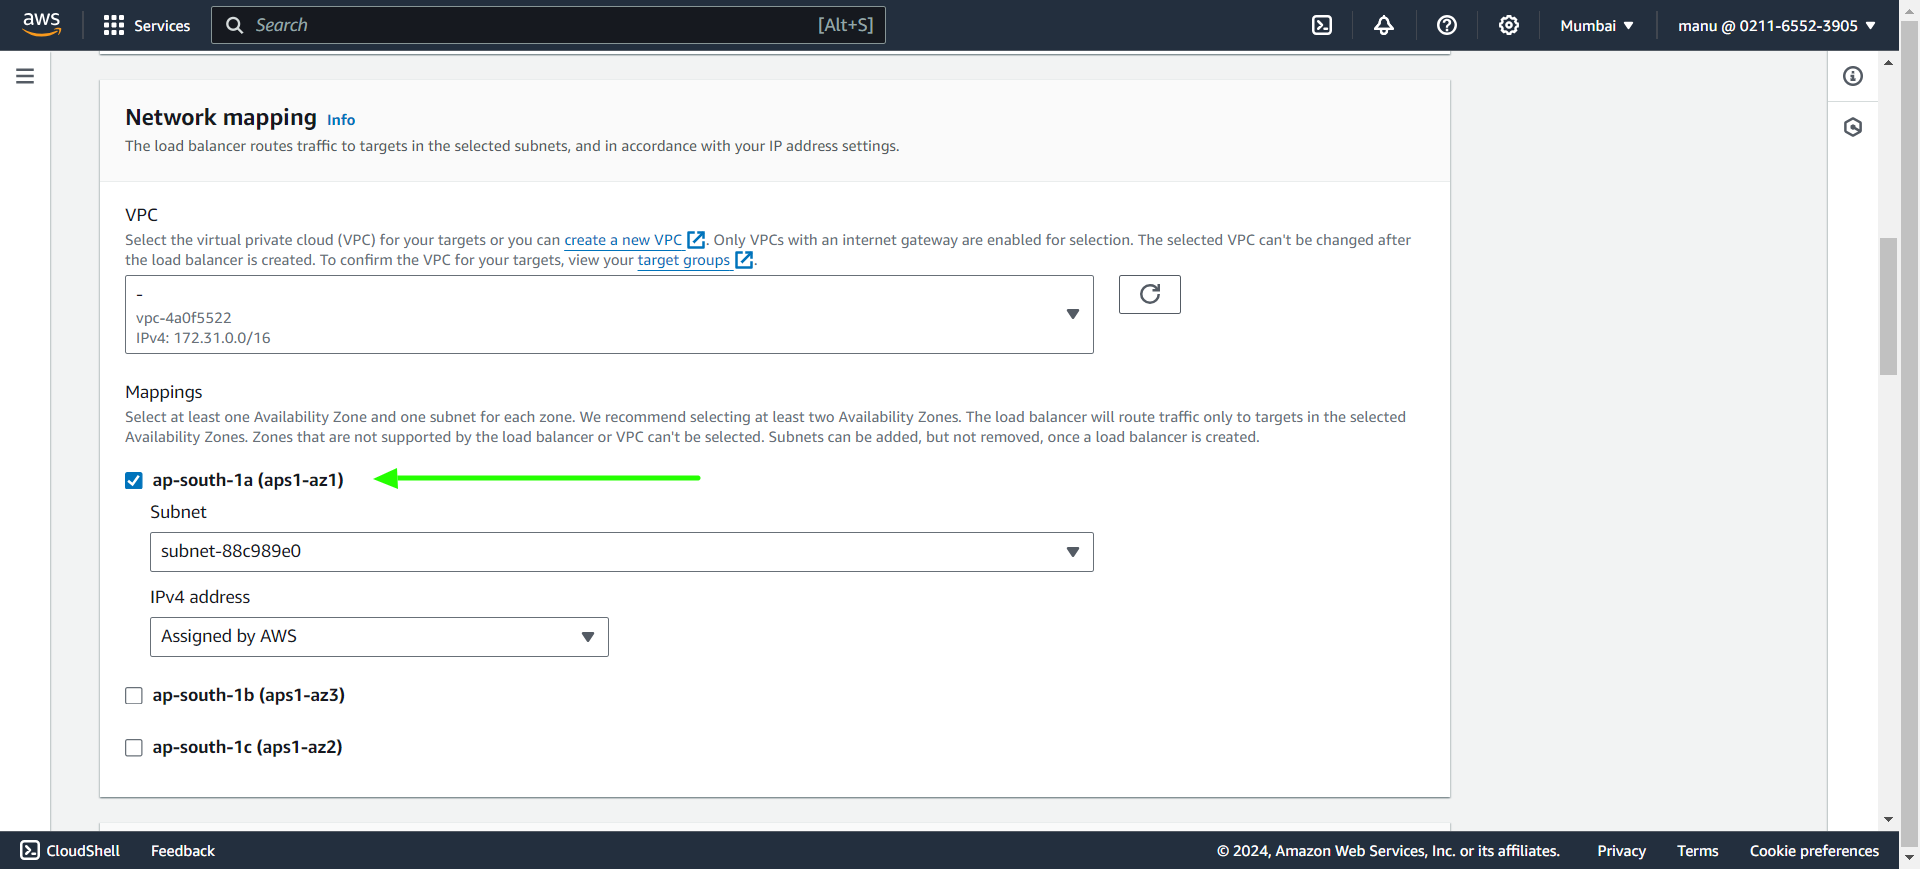
Step 5: Click on instance tab with another browser tab and check for the availability zone of the both primary and secondary.
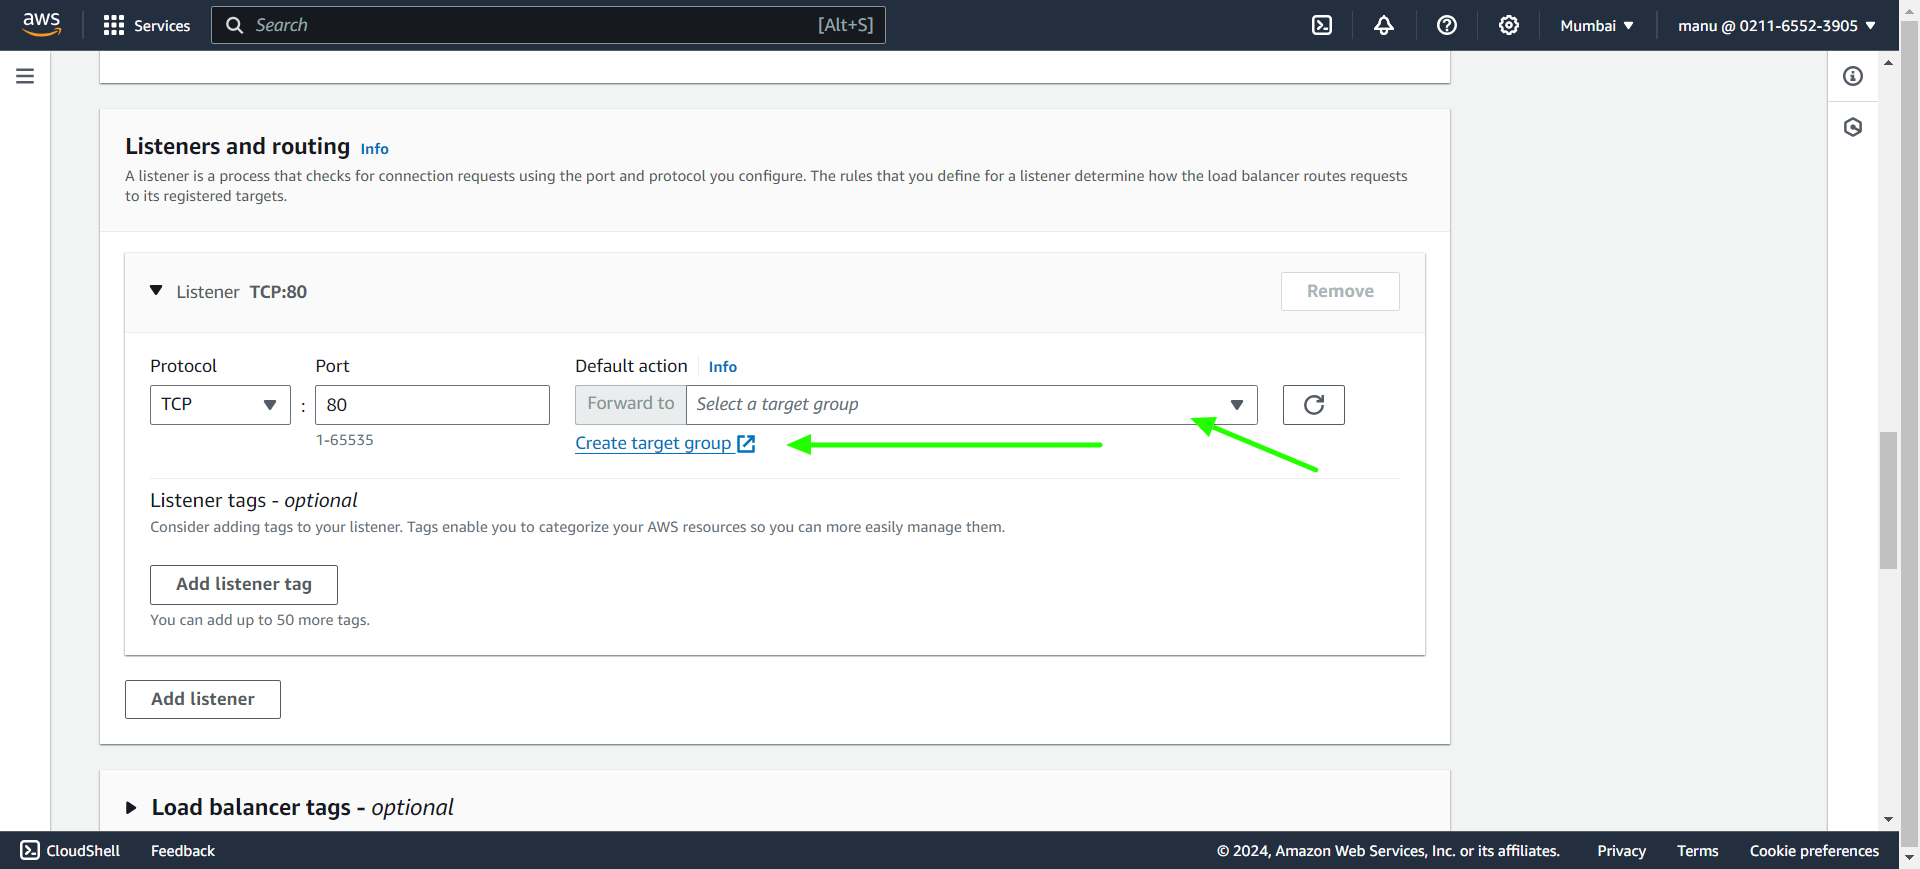
Step 6: Create target group using the link below Default action.
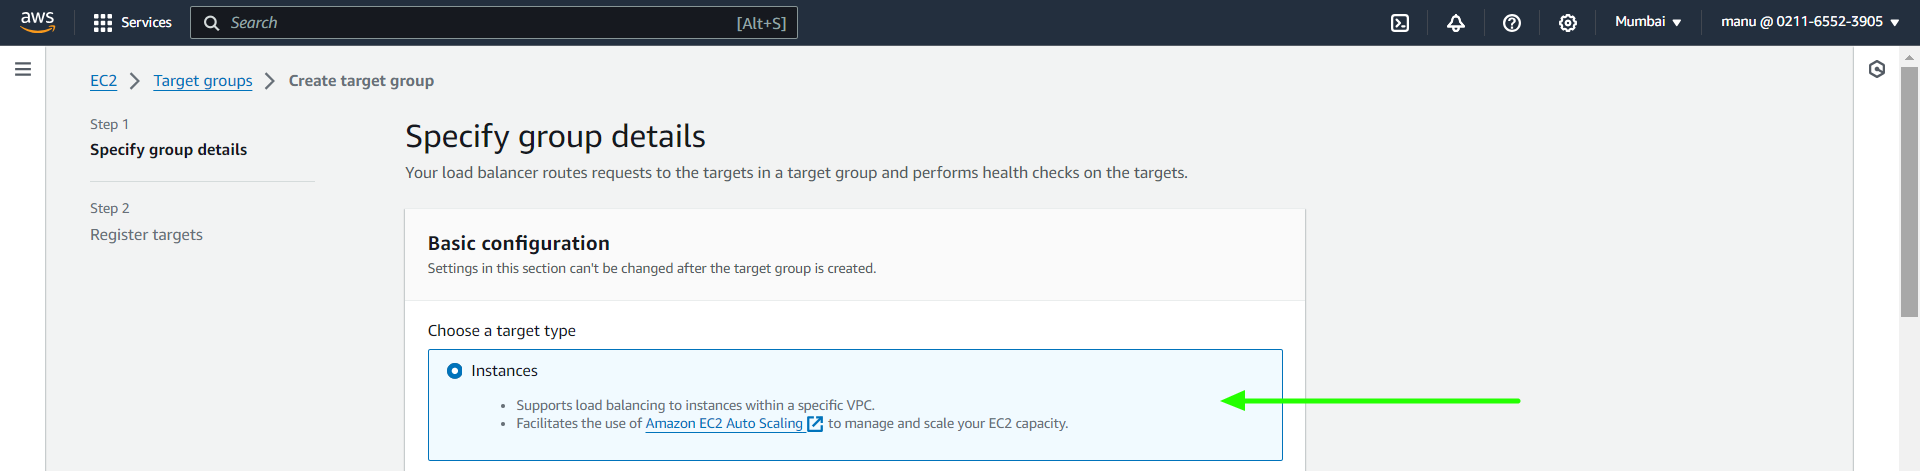
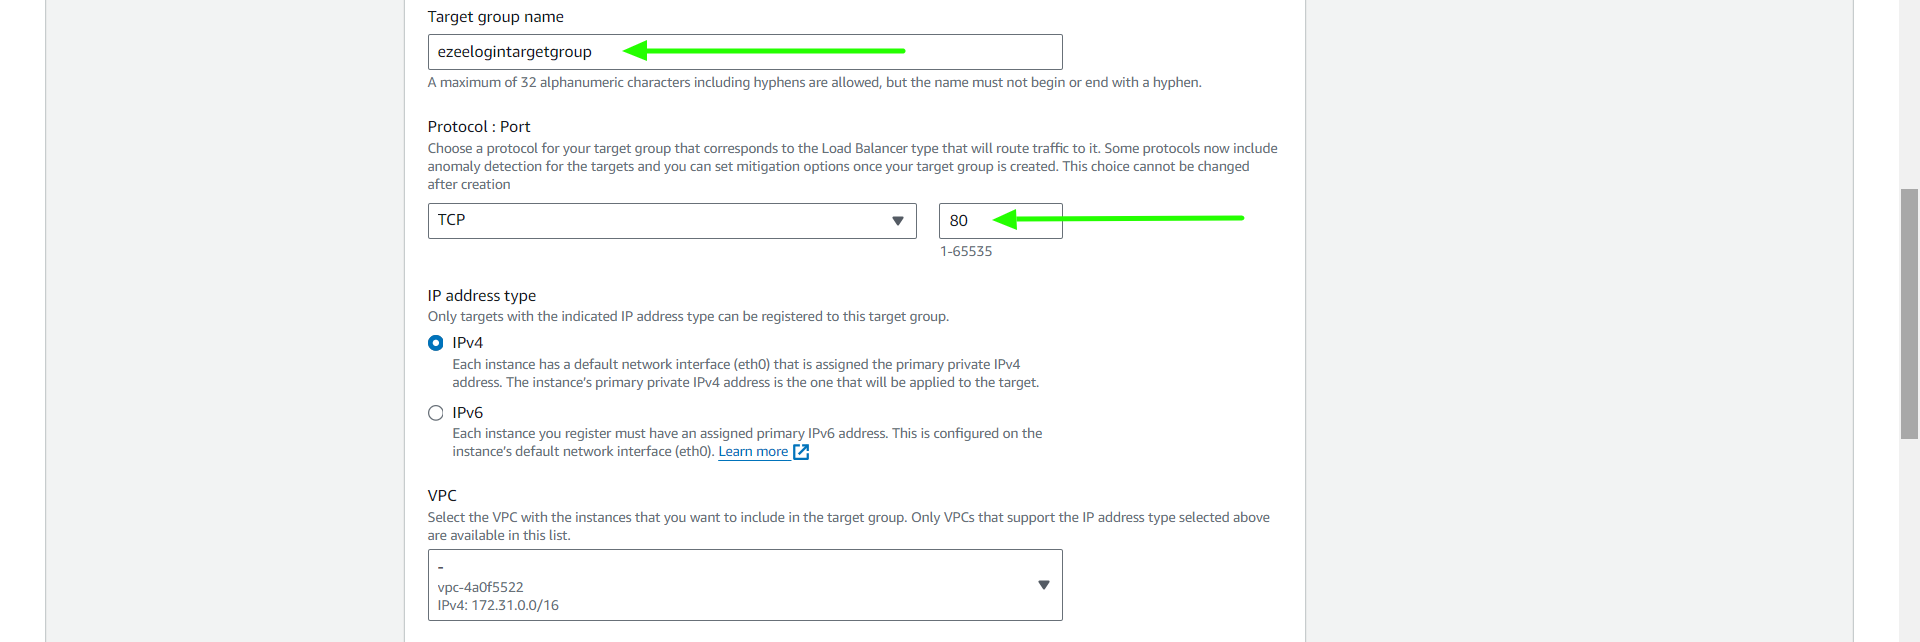
Step 6 (A): In basic configuration select Instances, provide a group name and specify port number.
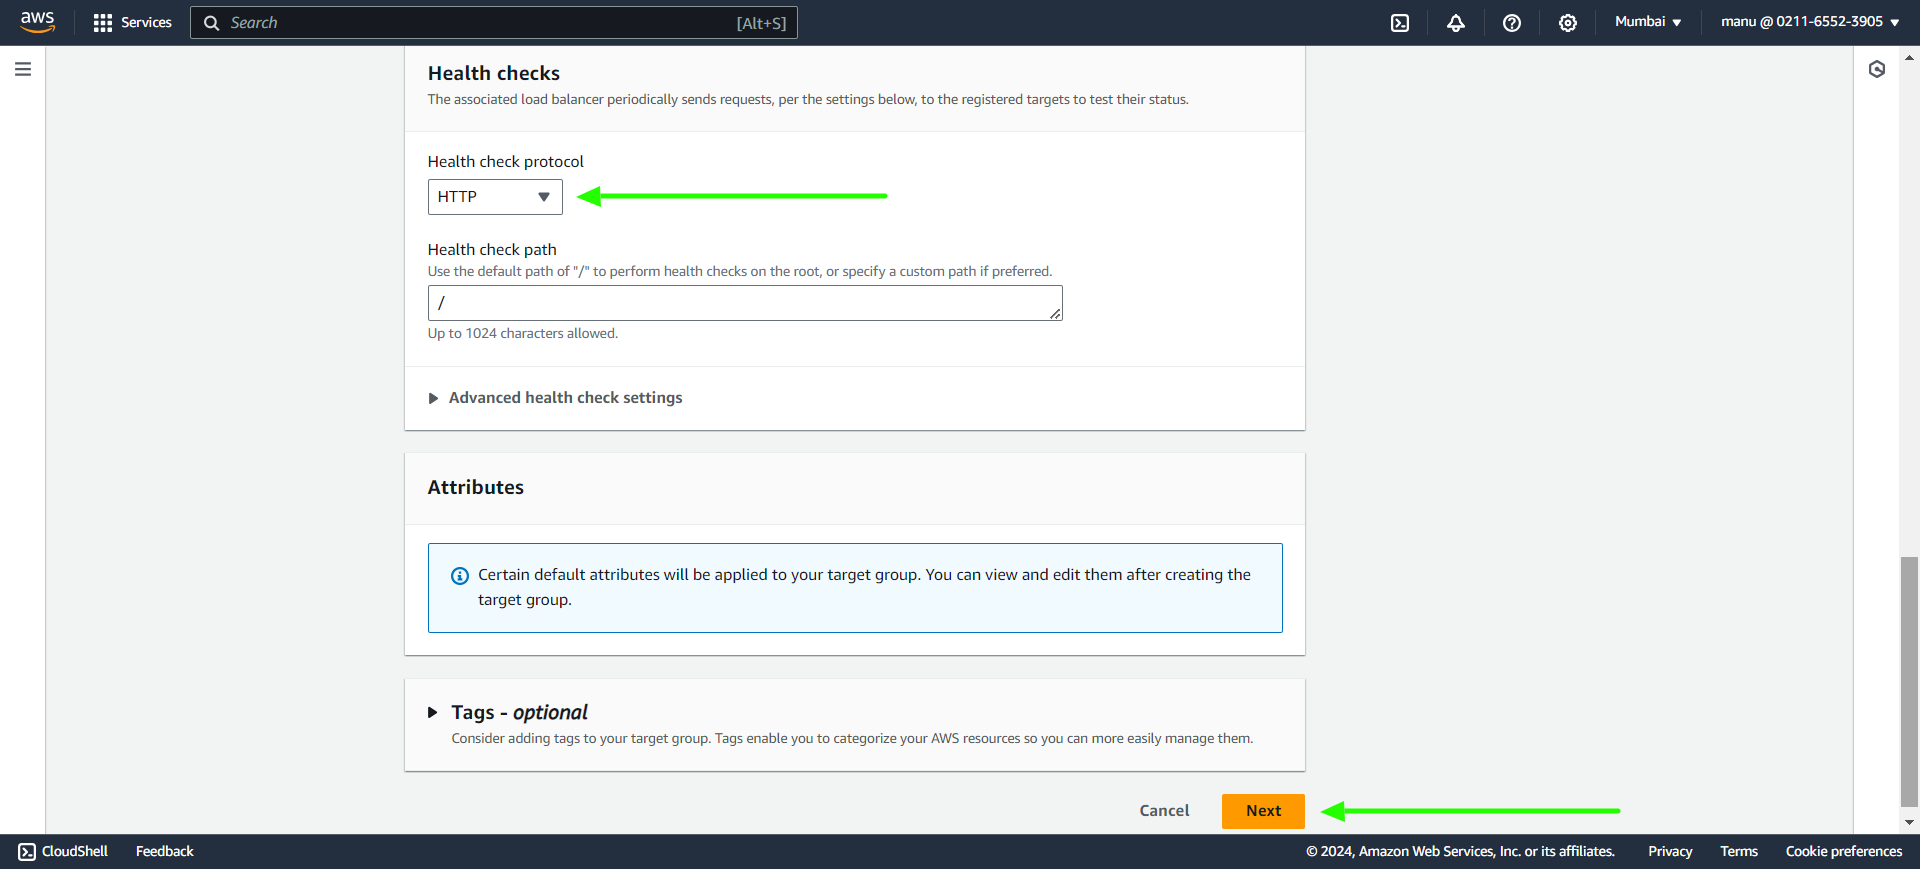
Step 6(B): In Health checks select protocol from drop down option and click on next.
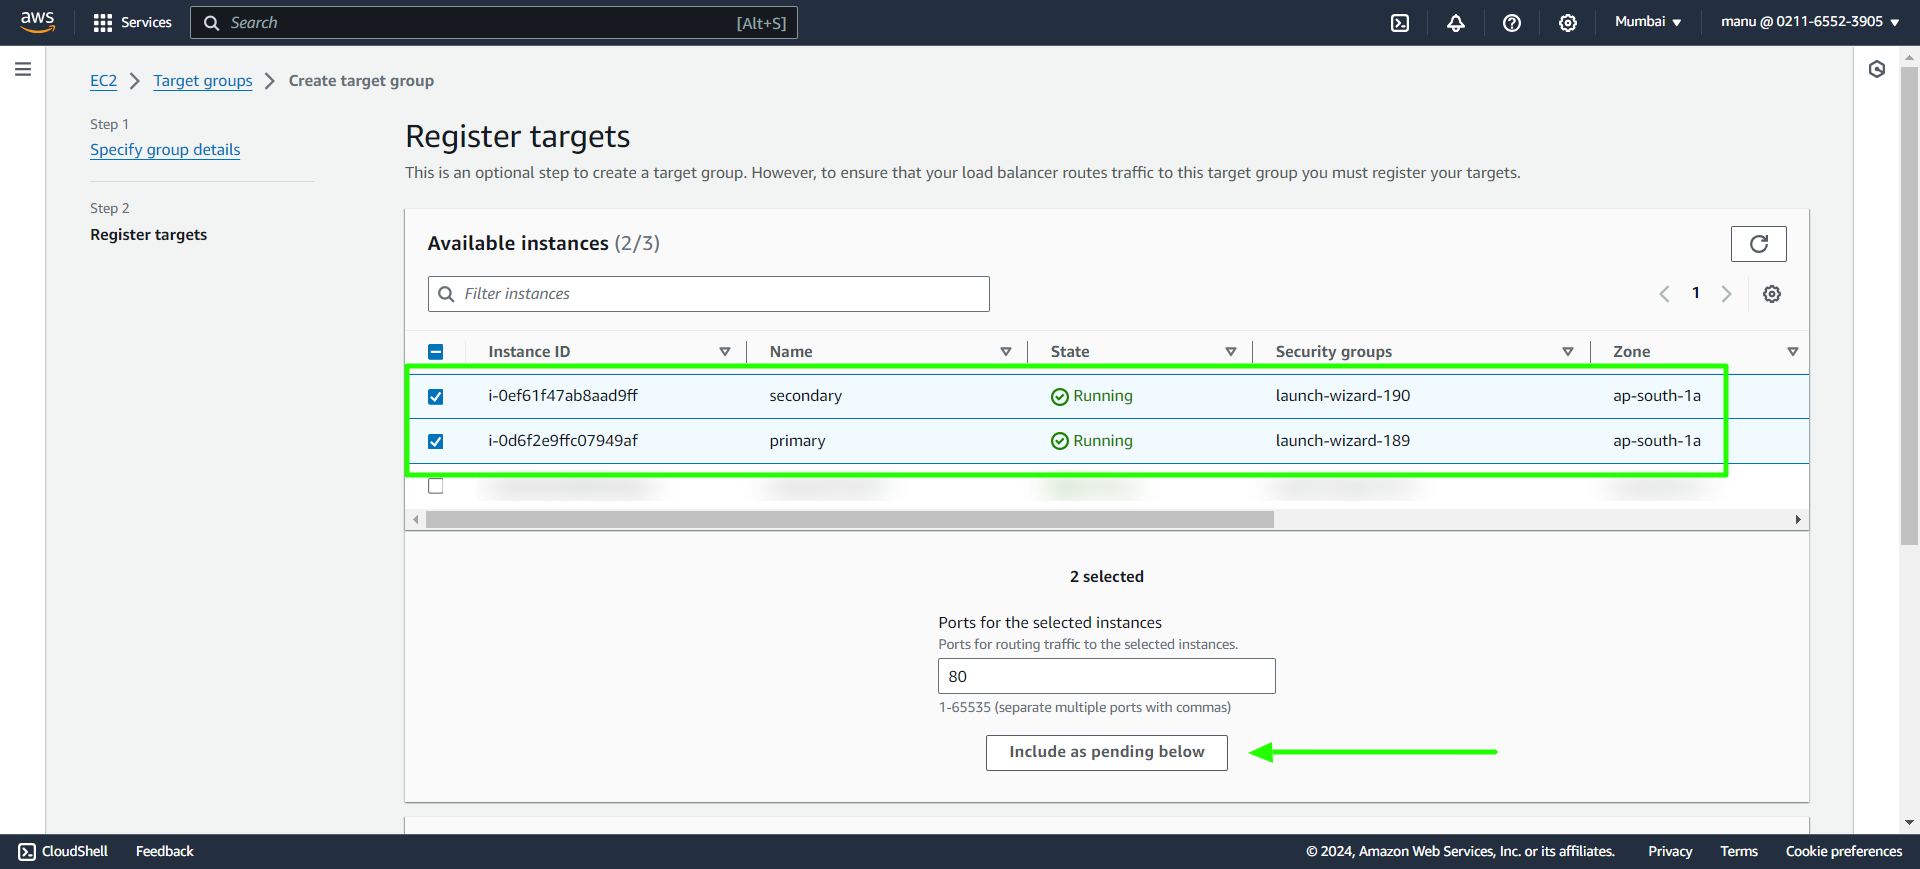
Step 6(C): Select both the primary and secondary instances and click on Include as pending below and create target group.
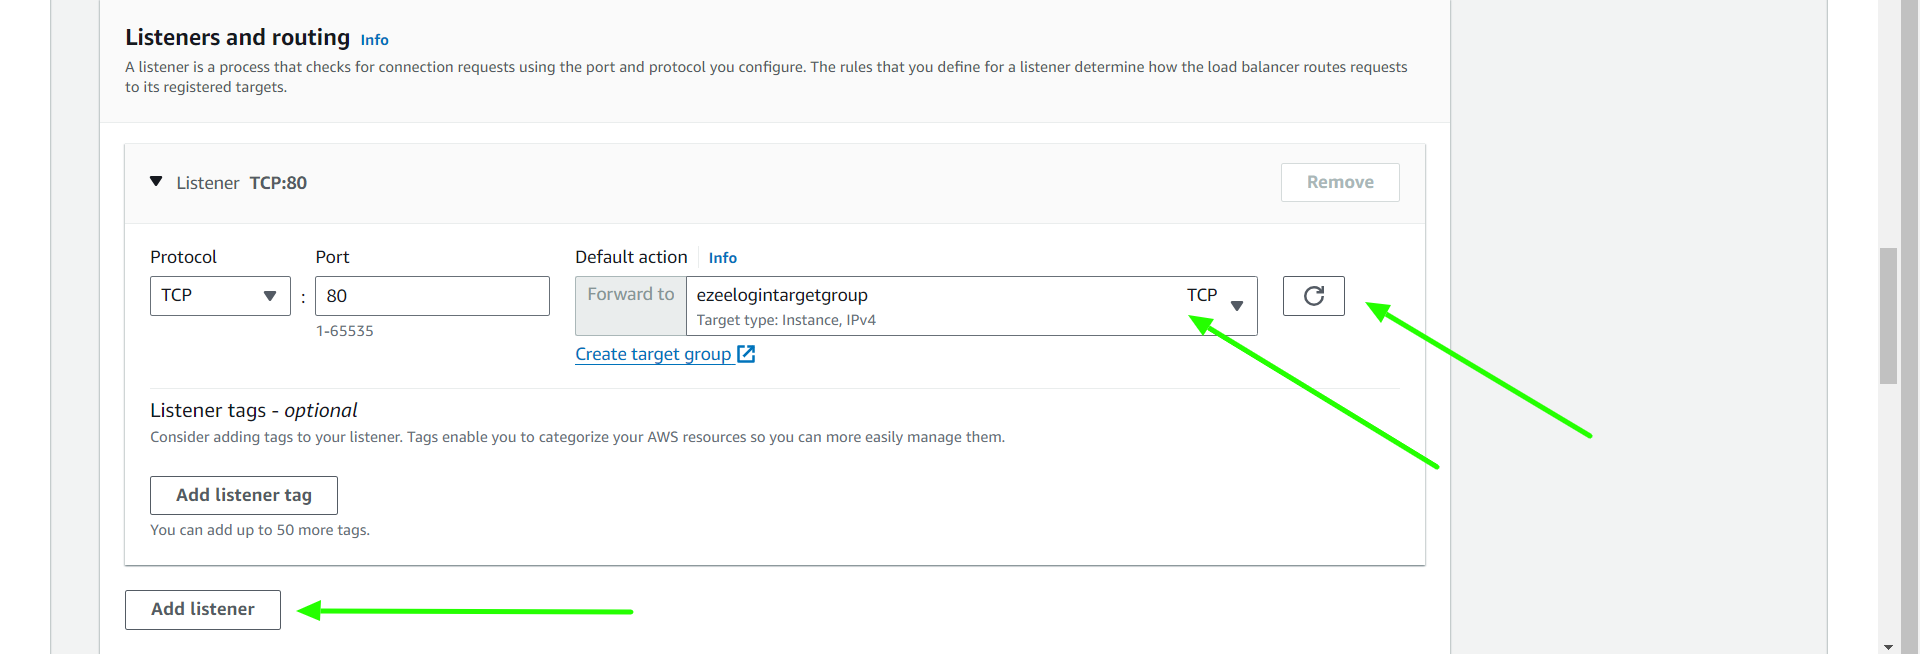
Step 7: Click on refresh icon and select the new target group name. Create new listeners if you need to map more ports and scroll down to the bottom and click on create load balancer.
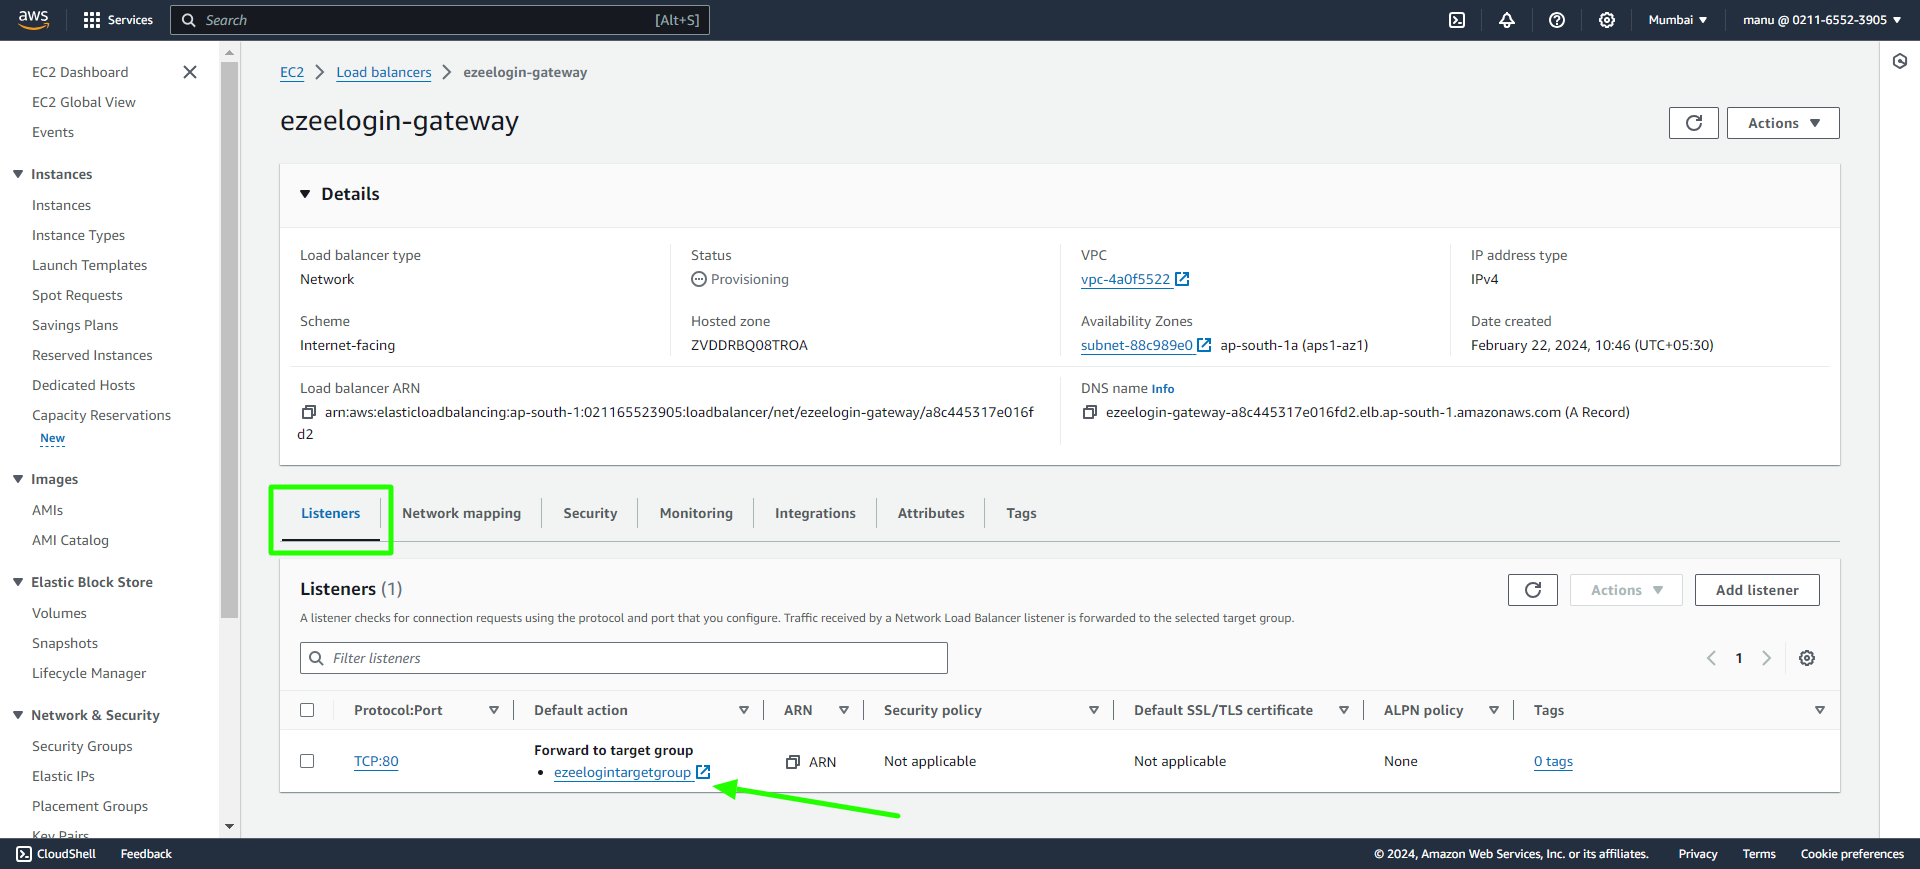
Step 8: In the load balancer click on the Listeners tab and click on target group name.
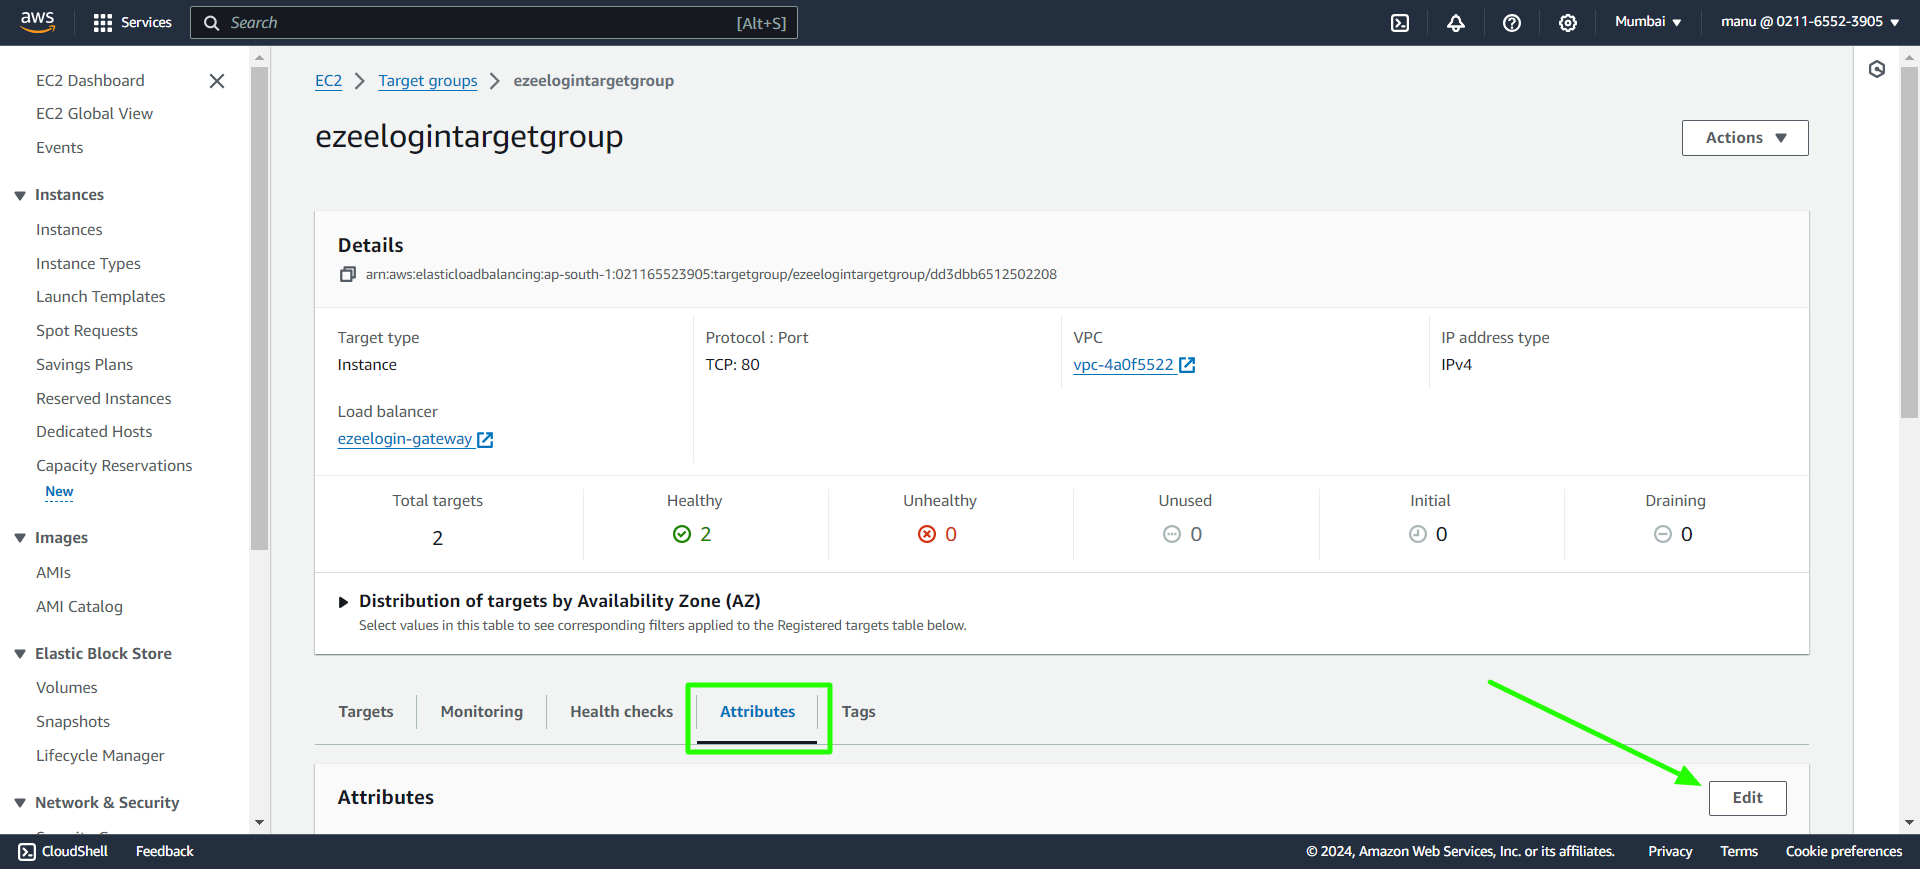
Step 9: In target groups click on Attributes and then edit attributes.
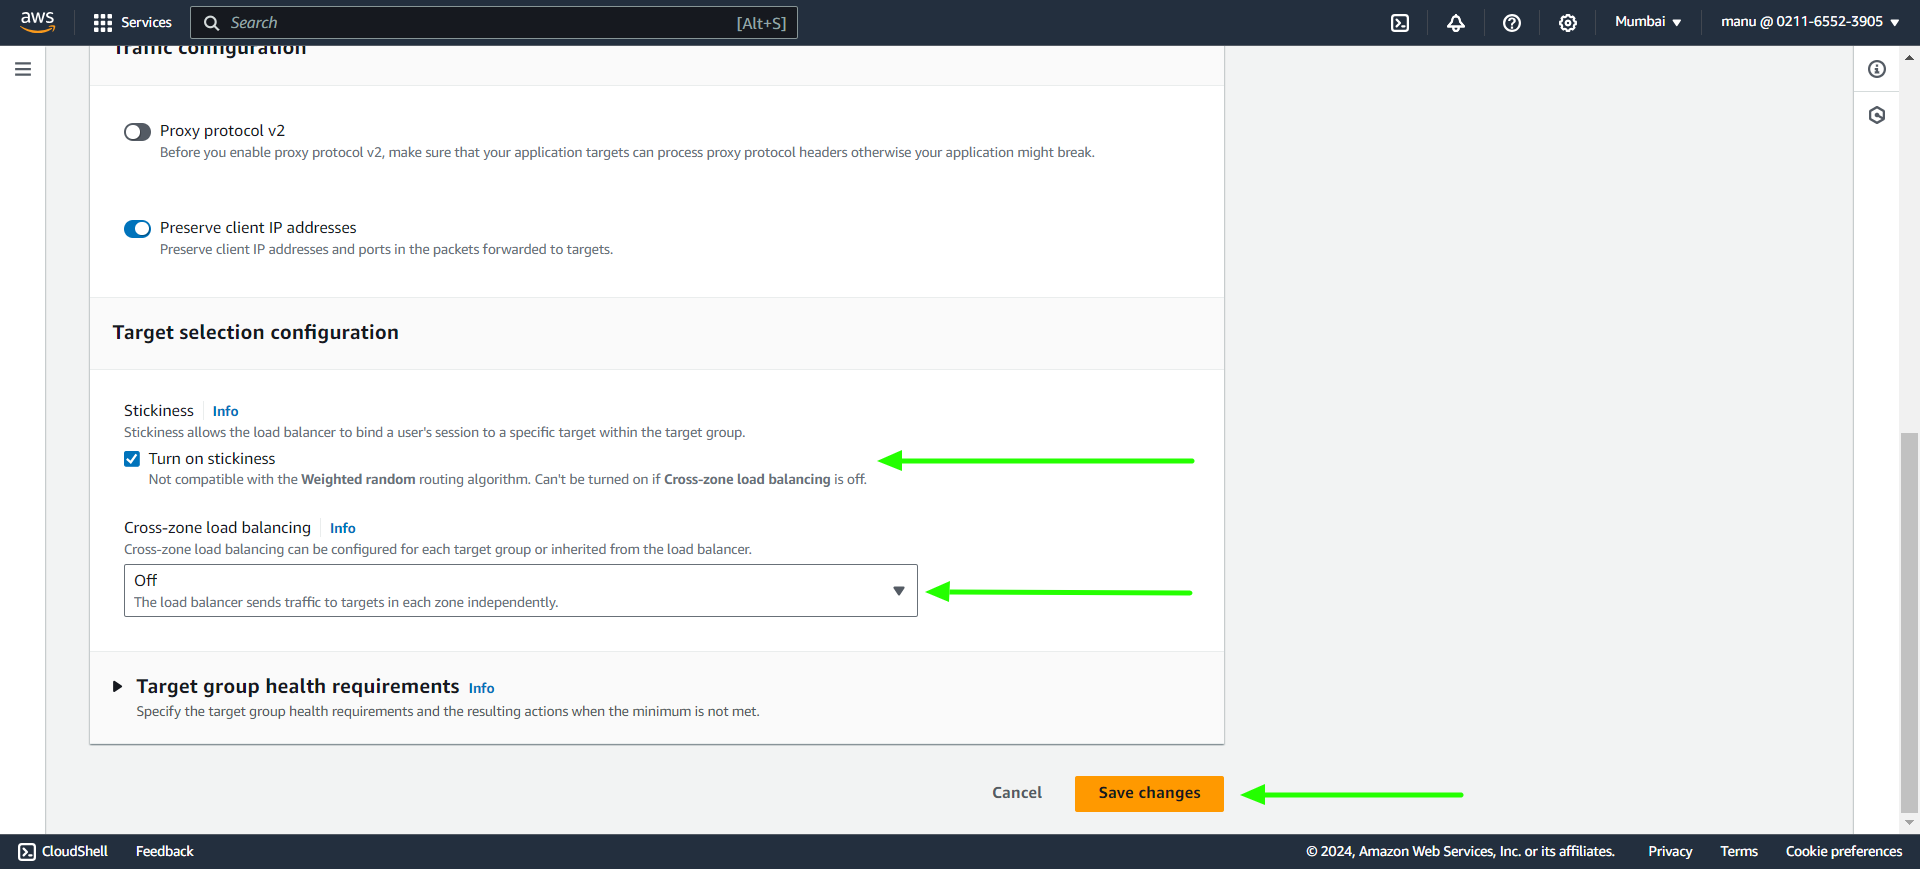
Step 10: Enable stickiness and Cross-zone load balancing to off and save changes.
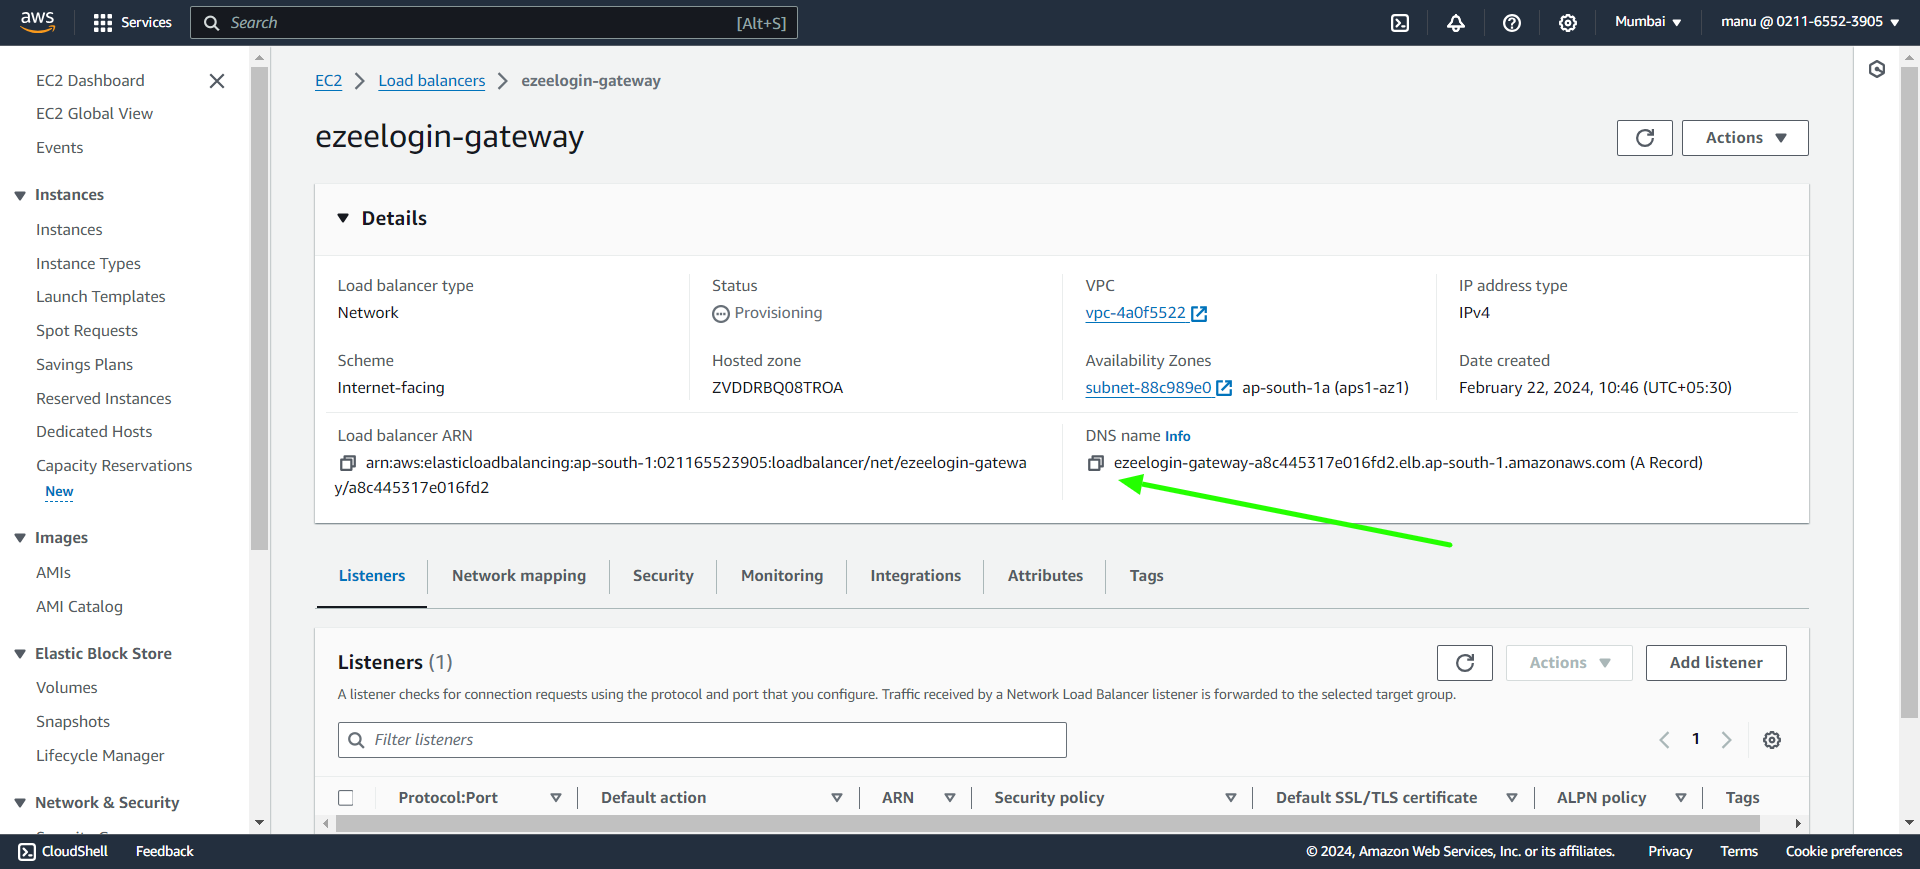
Step 11: In the load balancers, copy the DNS name and access the link with a browser. It will direct to the primary or secondary node based on the server load.
Related Articles:
Configure Jumpserver to use SSL for AWS RDS.