Adding Webmin as control panel
How to add Webmin as control panel
Overview: This article outlines the steps to integrate Webmin with Ezeelogin software as ControlPanel.
Step 1: Setup Webmin.
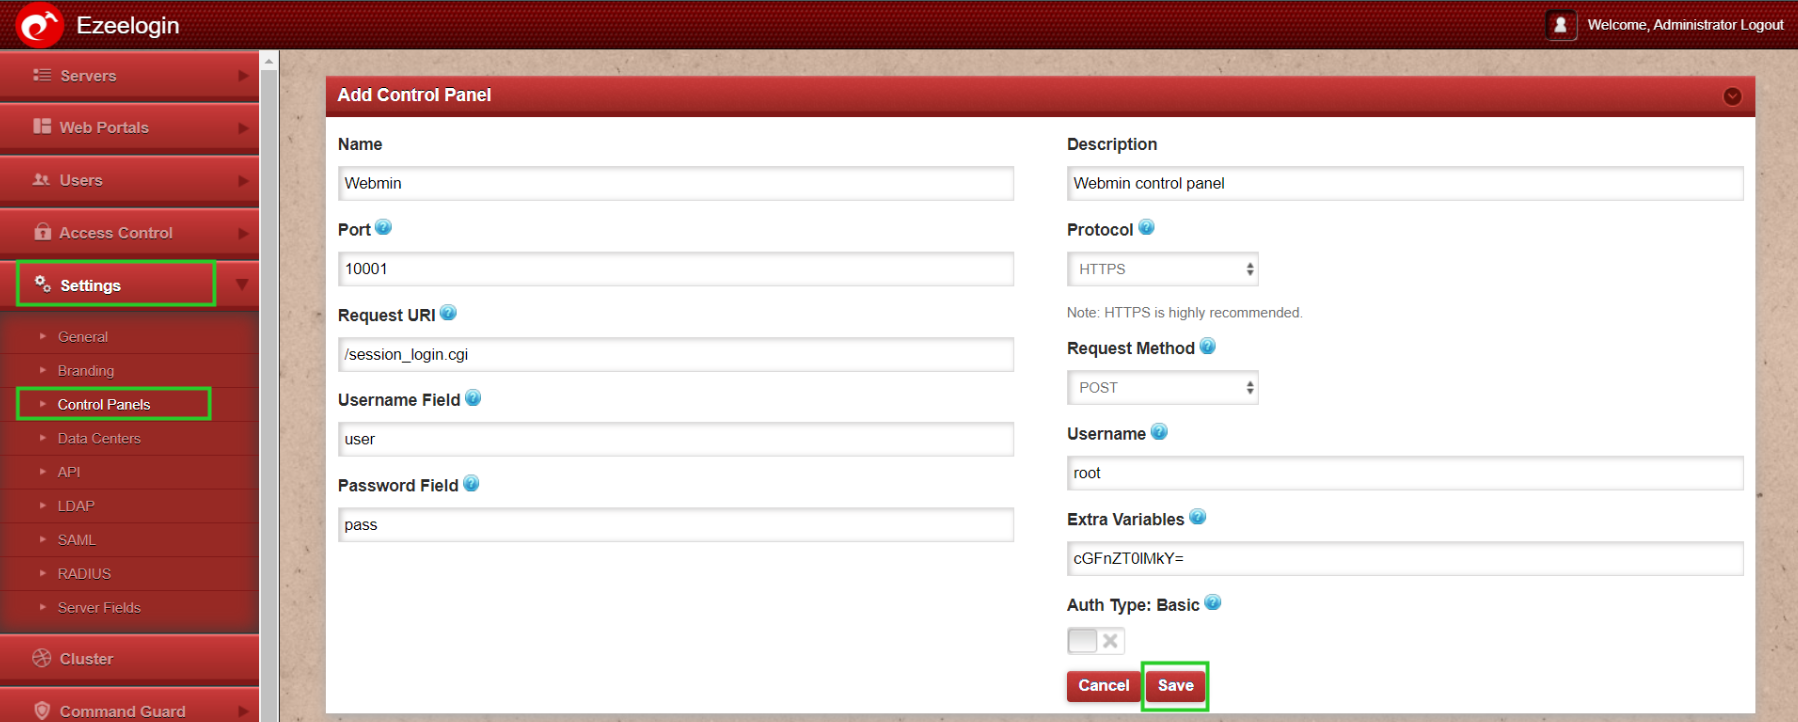
Step 2: After setting Webmin. Login to Ezeelogin GUI -> Settings -> Control Panel. You can use the screenshot below as an example to configure Webmin.
Step 3: After Adding the ControlPanel accordingly, Go to the Servers tab and select the control panel Webmin. that you have added as shown below:
Go to the Servers tab and add the Webmin installed server as shown below:
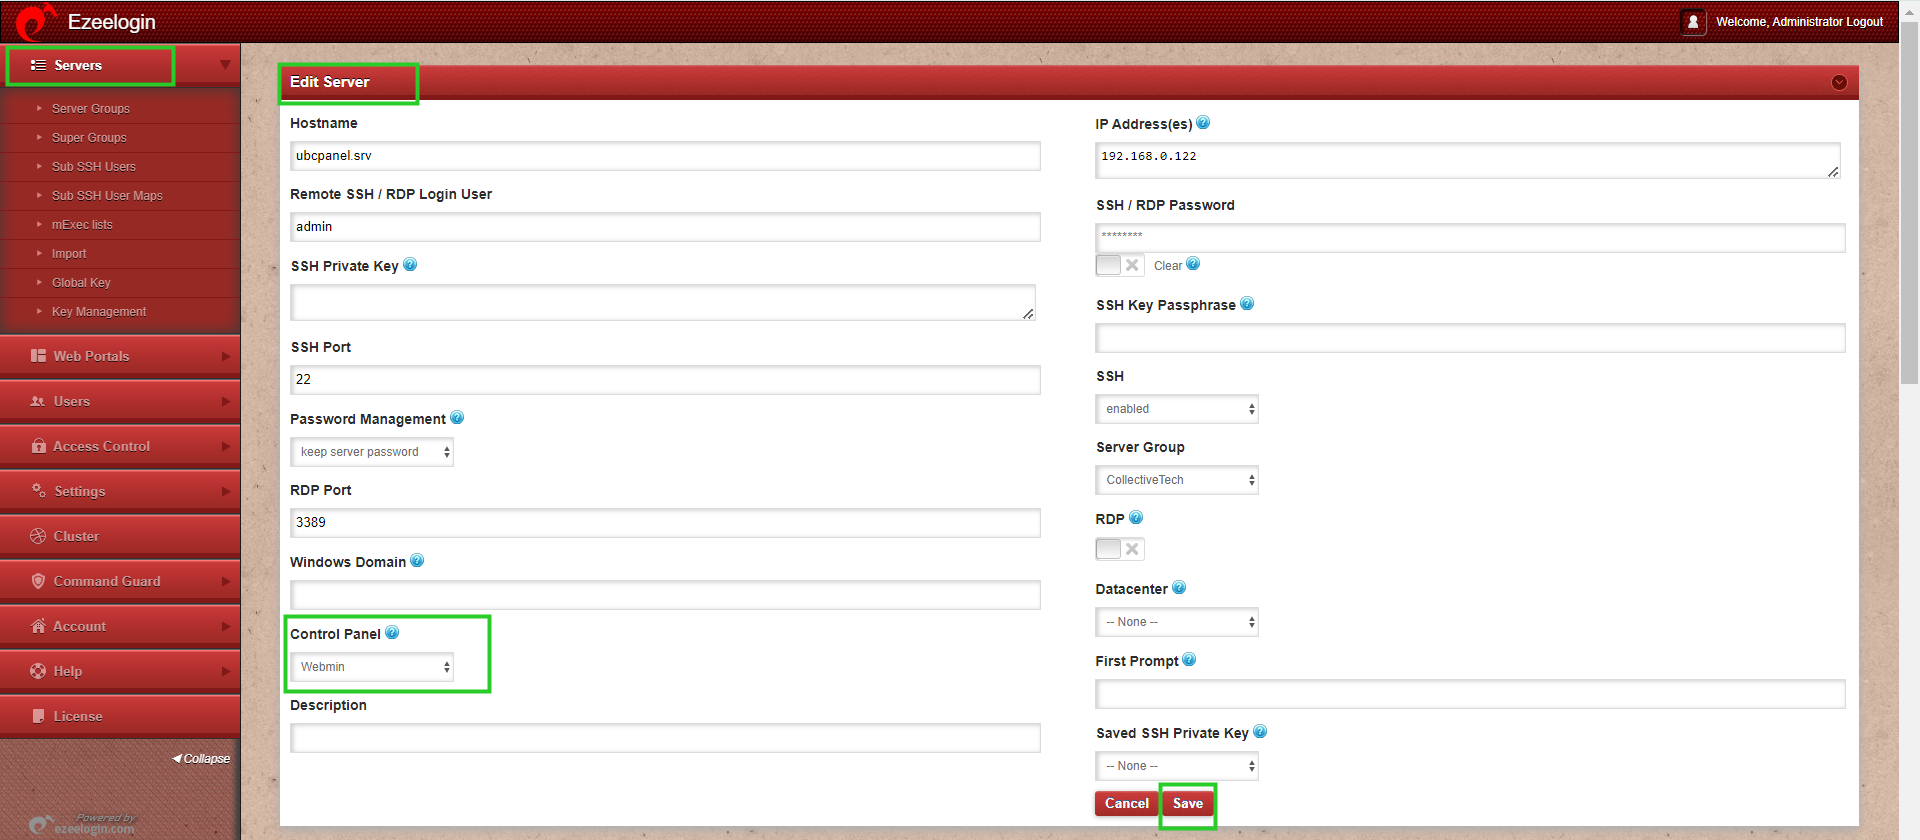
Make sure to select the control panel as Webmin from the drop-down menu.
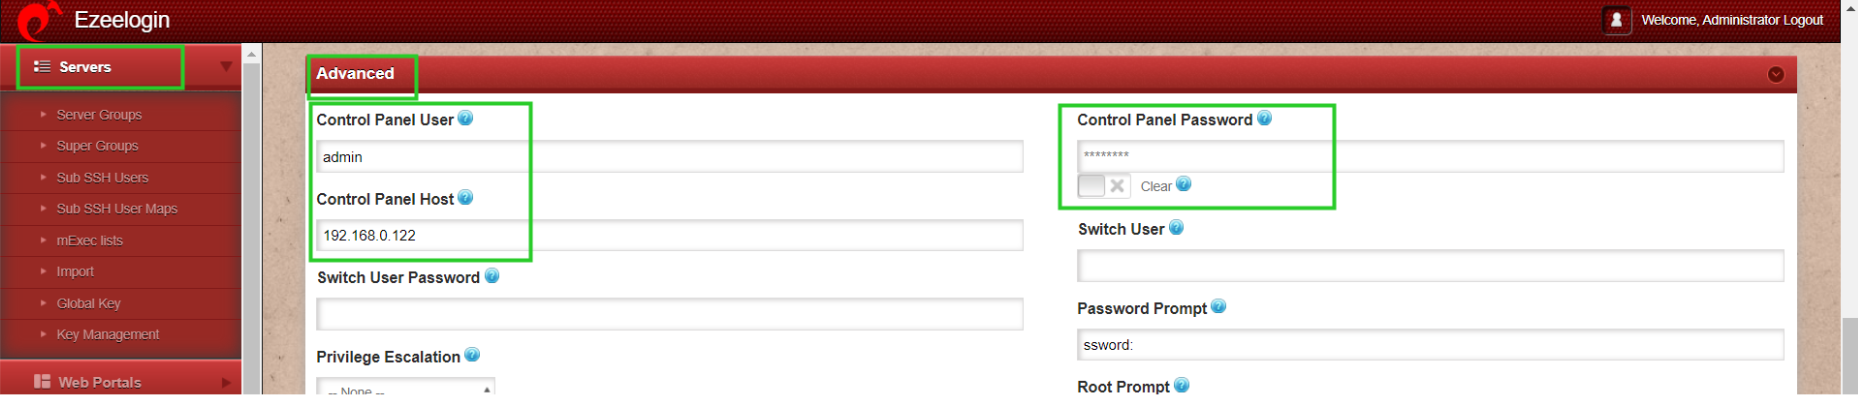
Step 4. Also ensure that you have provided Control Panel User, Control Panel Password, and Control Panel Host under the Advanced section of Server Edit. You can refer to the screenshot below as an example:
Step 5. Refer to this article to grant access to users to have access to ControlPanel.
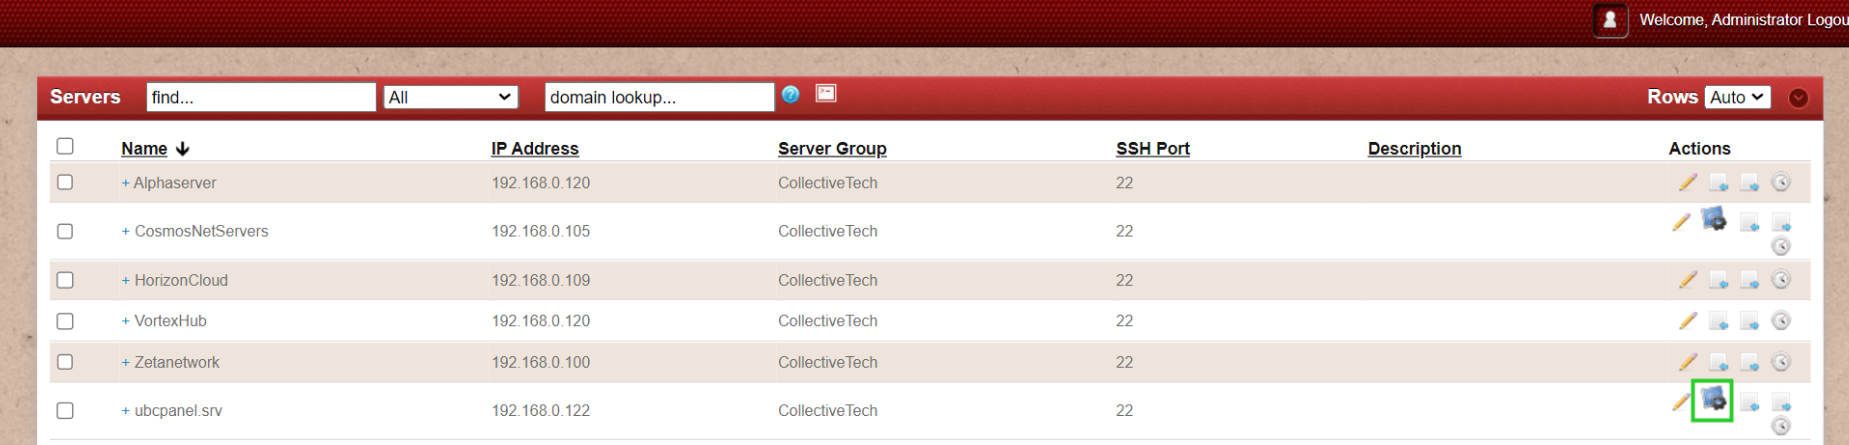
Click on the control panel icon to access Webmin that you have added.