Switching node states in Ezeelogin Cluster
Switch the node state from slave to master in the Ezeelogin cluster
Overview: This article describes how to switch a node from Slave to Master in Ezeelogin by verifying database synchronization, promoting the Slave node to Master, and refreshing the browser to update the node state.
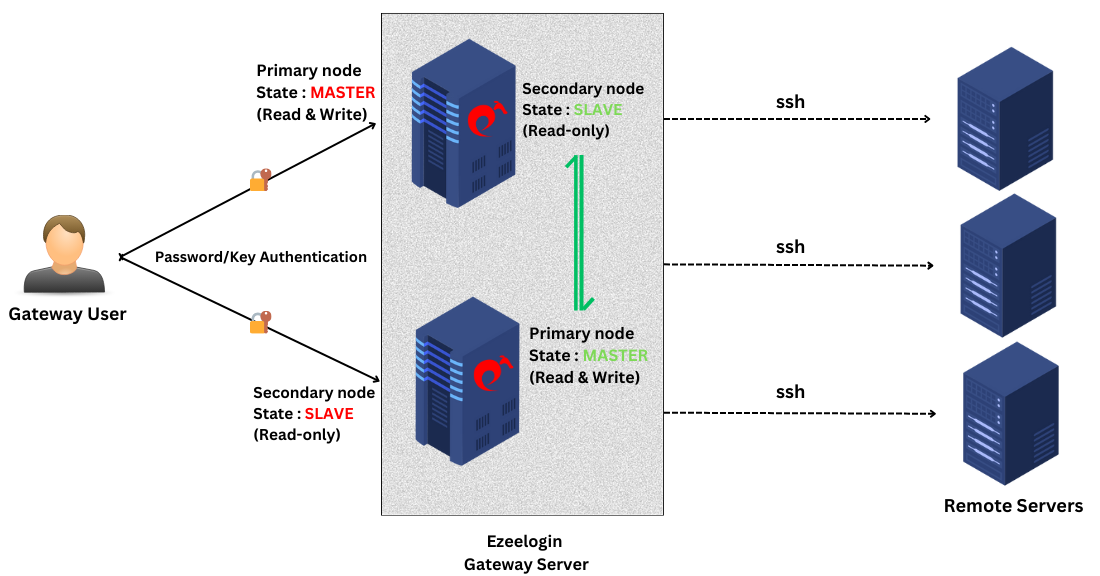
If the Master node state has changed to the slave state, you would like to revert it to how it was originally since the master node is back online.
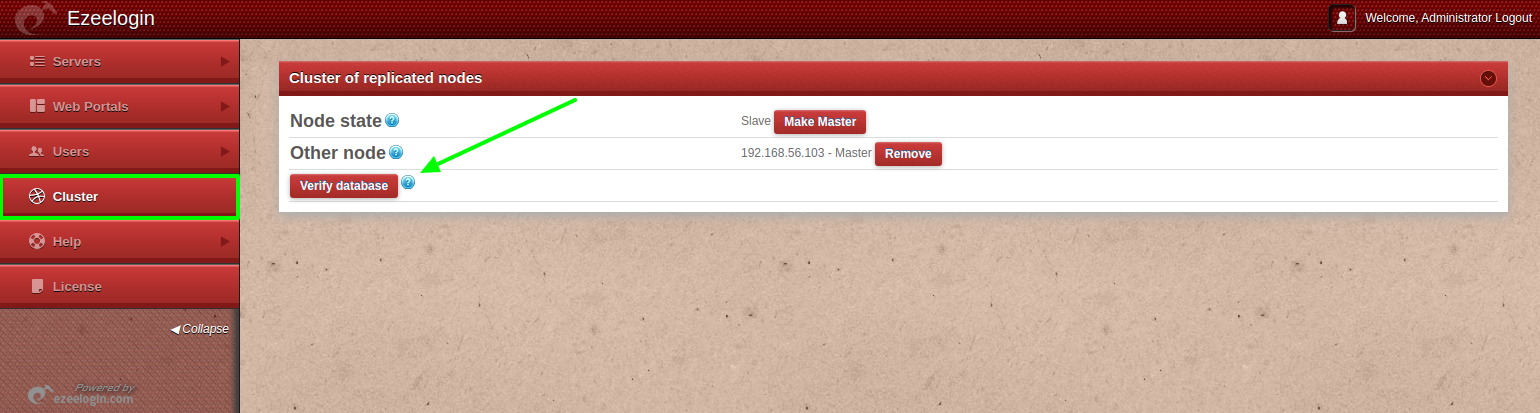
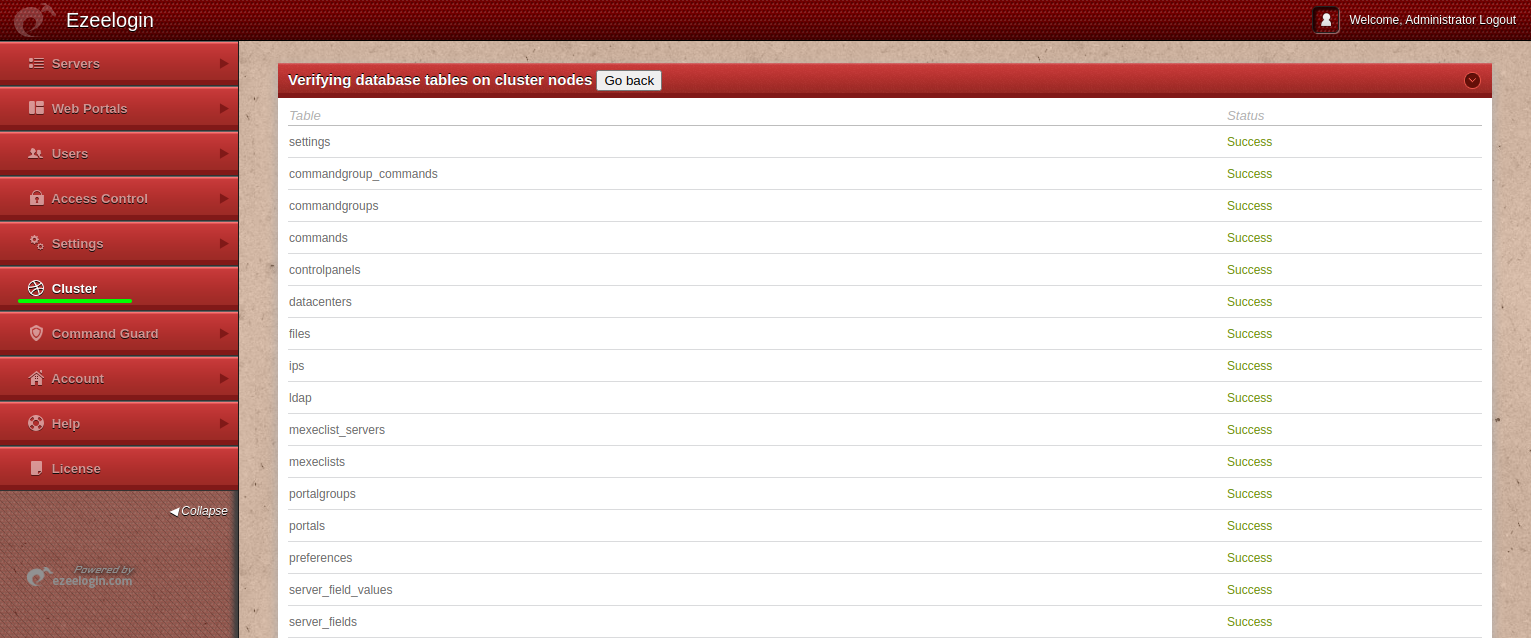
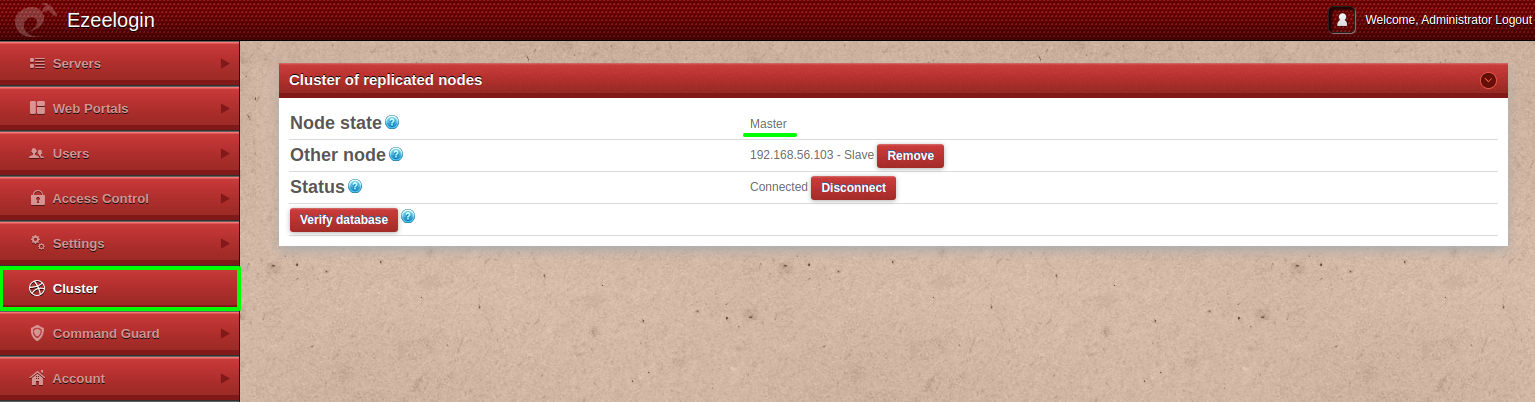
1. Login into the GUI of the current slave node -> click on Cluster -> Verify database to ensure that databases are in sync before switching node roles.
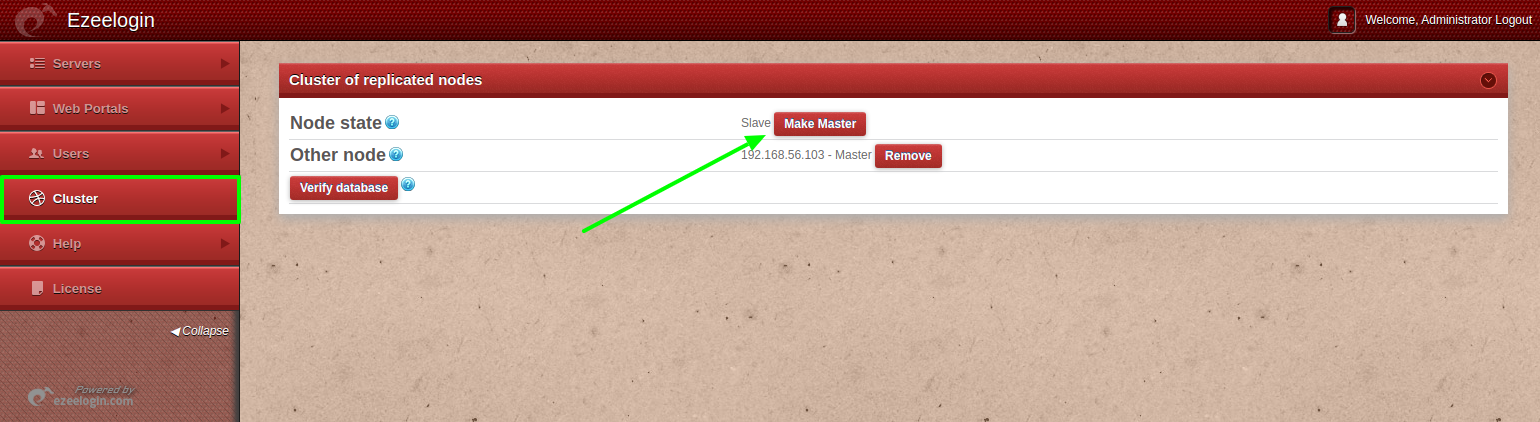
2. Once the databases are in sync (identical) after verifying the database, click on "Cluster" > "Make master" on the current slave node.
3. Refresh the browser tab to view the updated node state. Refer to the below screenshot.
FAQ:
1. Can we disable the slave server since we are currently using only the master node?
Certainly, the choice to disable the slave server is yours, but keep a note that data synchronization between the master and slave servers will not occur if the slave is disabled. It is recommended to keep both servers running and synchronized for real-time data updates, as changes made to the master server will automatically sync with the slave server.
Related Articles:
Explanation of cluster
Install Cluster/Secondary node
Verify the Database to sync tables in a database