Integrate Okta OpenID connect
How to integrate Okta OpenID connect with Ezeelogin
Overview: This article will helps to integrate Okta OpenID Connect with the Ezeelogin jump server.
OpenID connect is an authentication mechanism for web applications. It's based on web protocols and it cannot be used for user authentication over SSH.
.png)
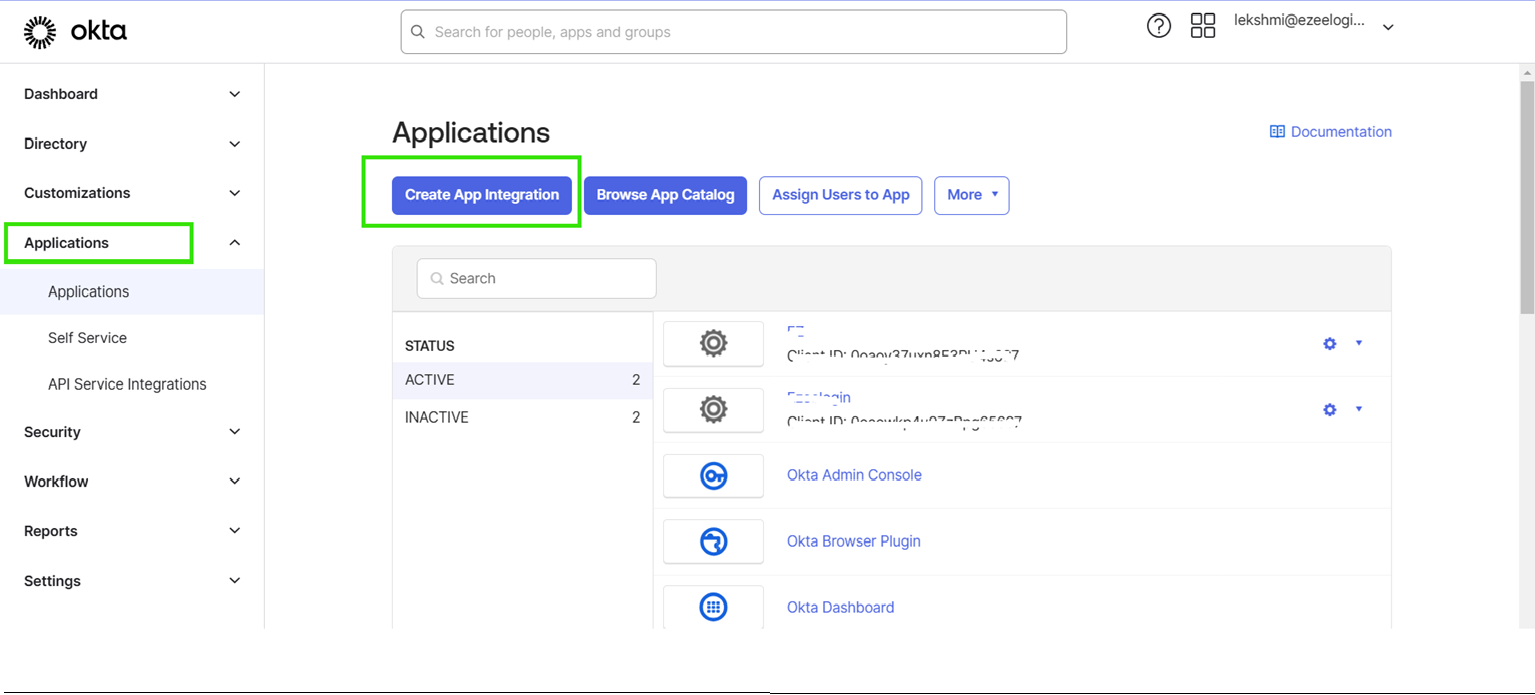
Step 1: Log into Okta and add the application under Applications -> Create App Integration.
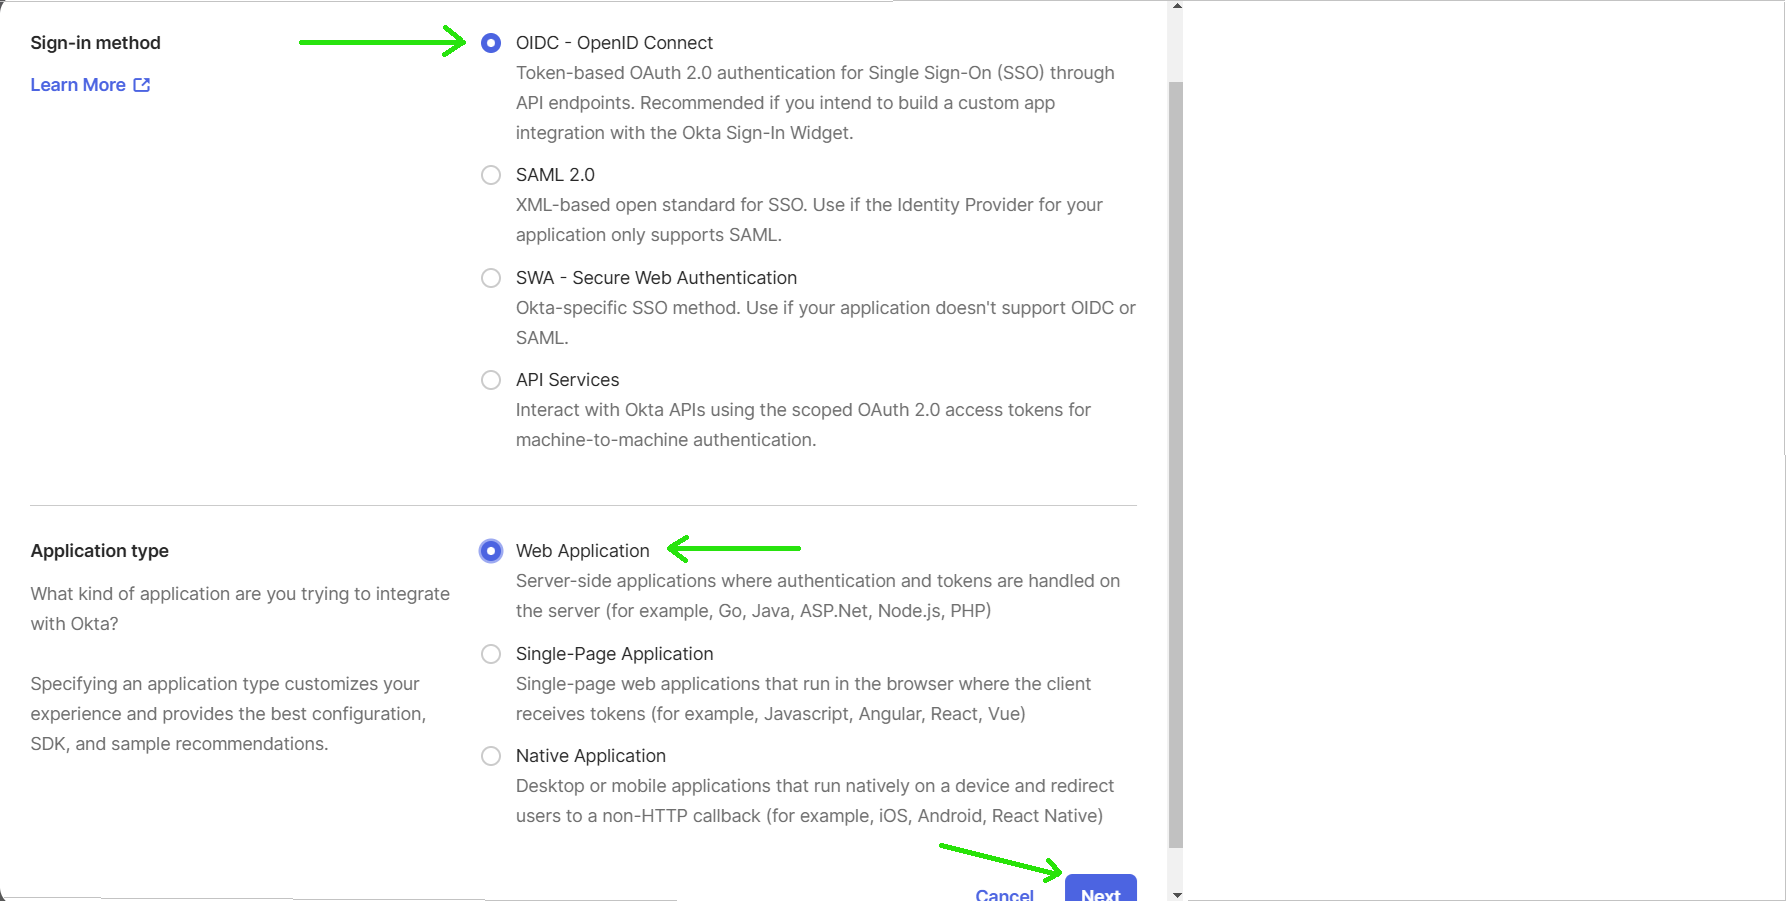
Step 2: Select the sign-in-method as OIDC -OpenID Connect, Choose Application type and click Next.
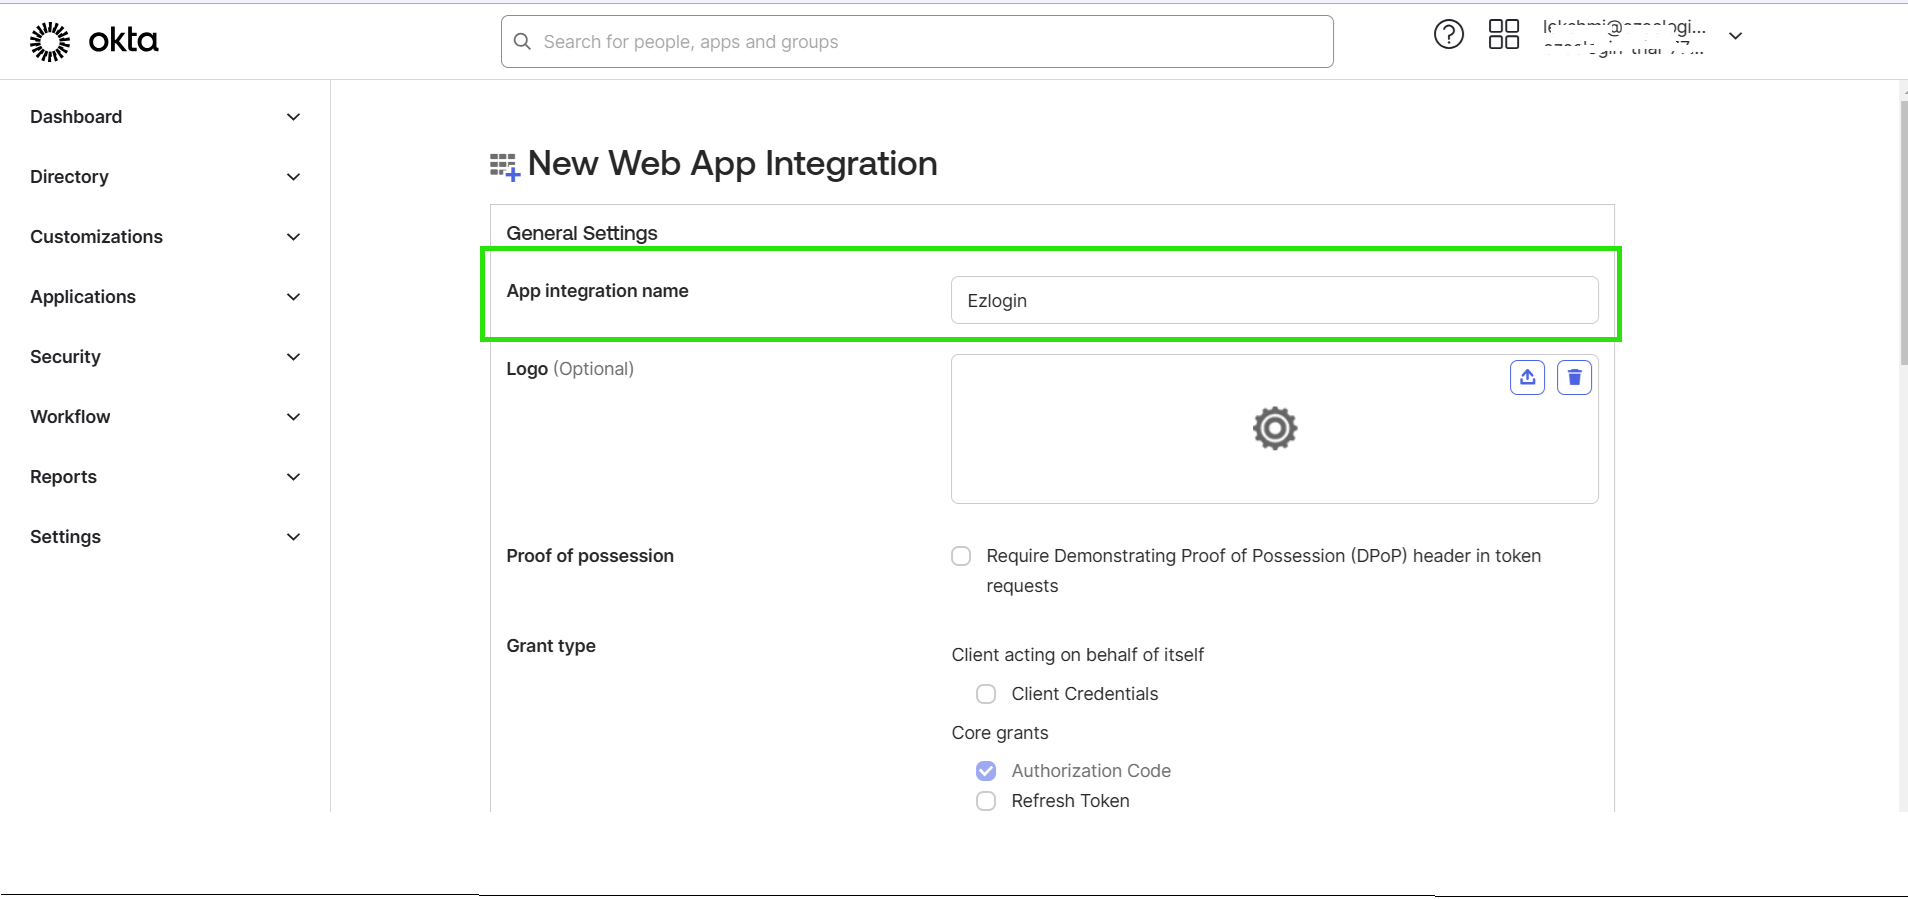
Step 3: Enter the app integration name.
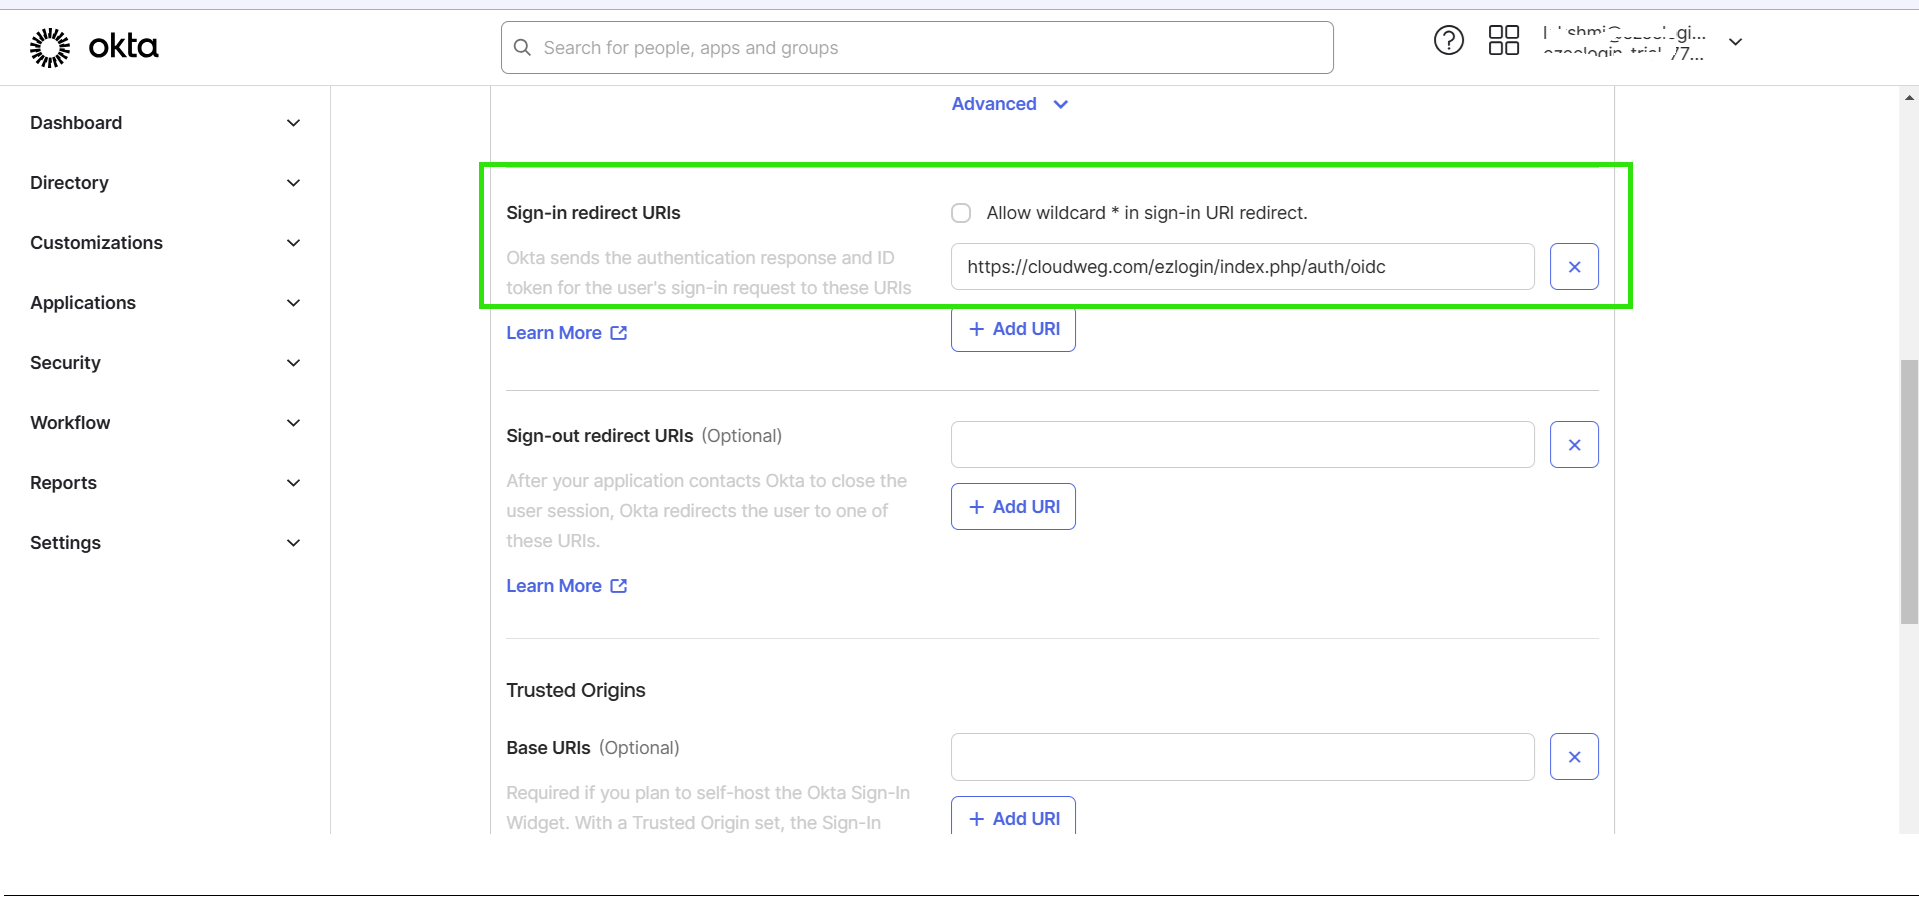
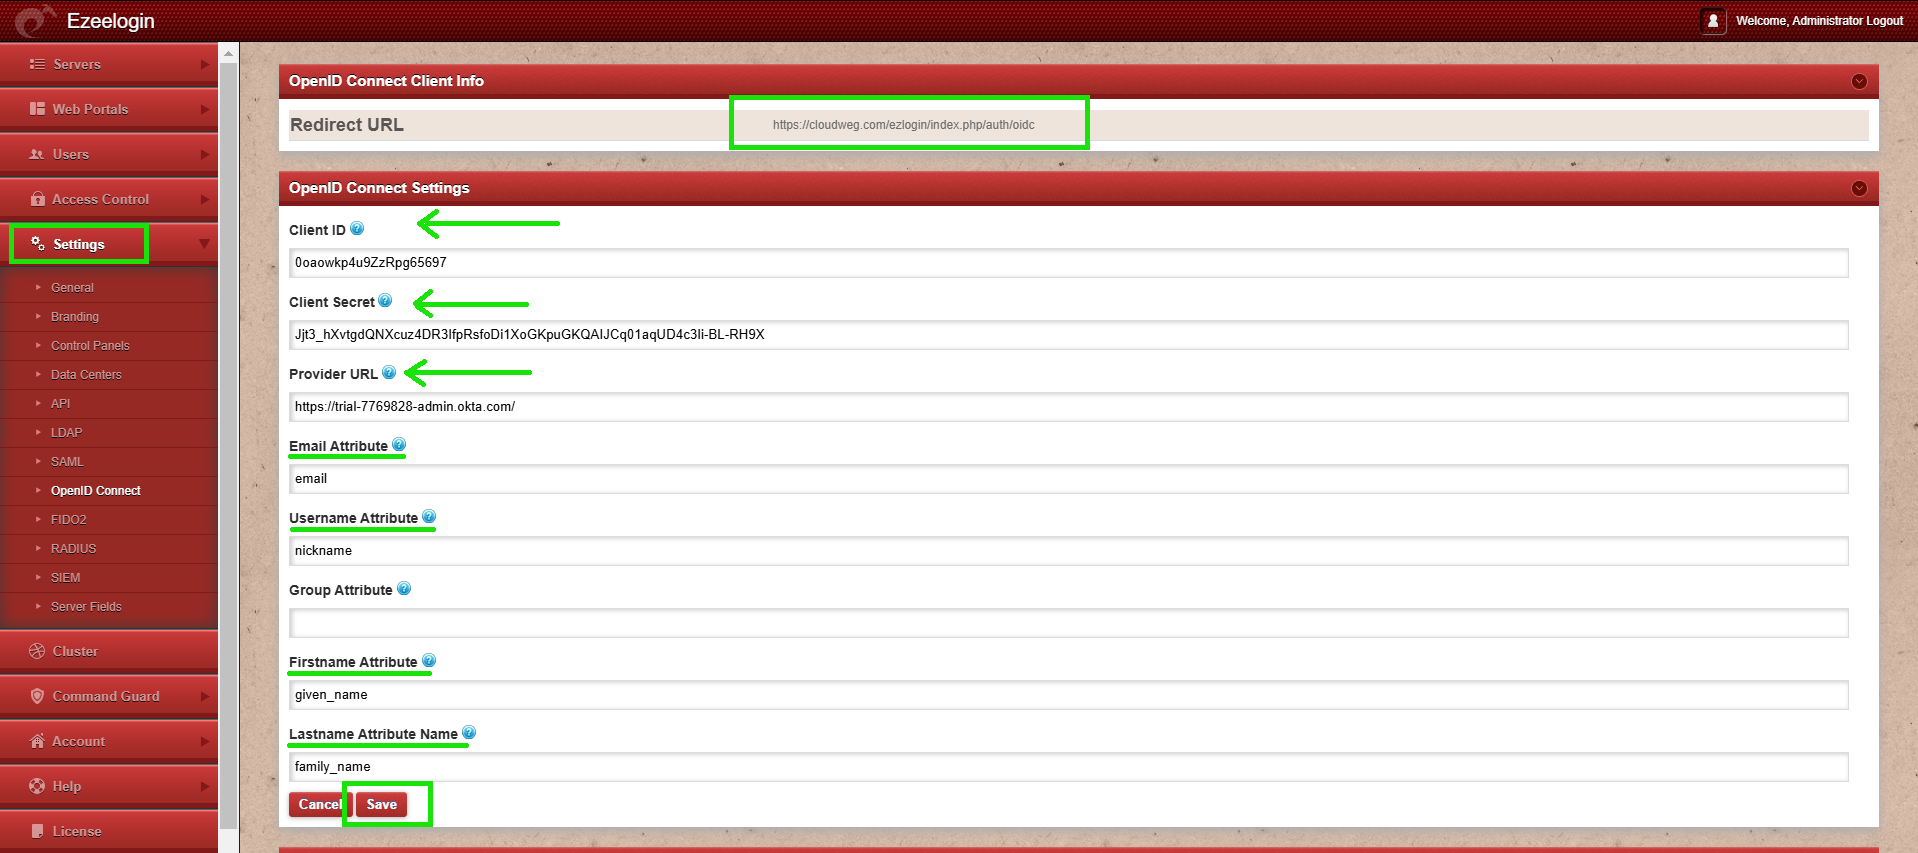
Step 4: Login to the Ezeelogin GUI, go to Settings -> OpenID Connect and copy the redirect URL(refer to the screenshot below). Then, paste the URL into the Sign-in Redirect URI field in okta portal and click save.
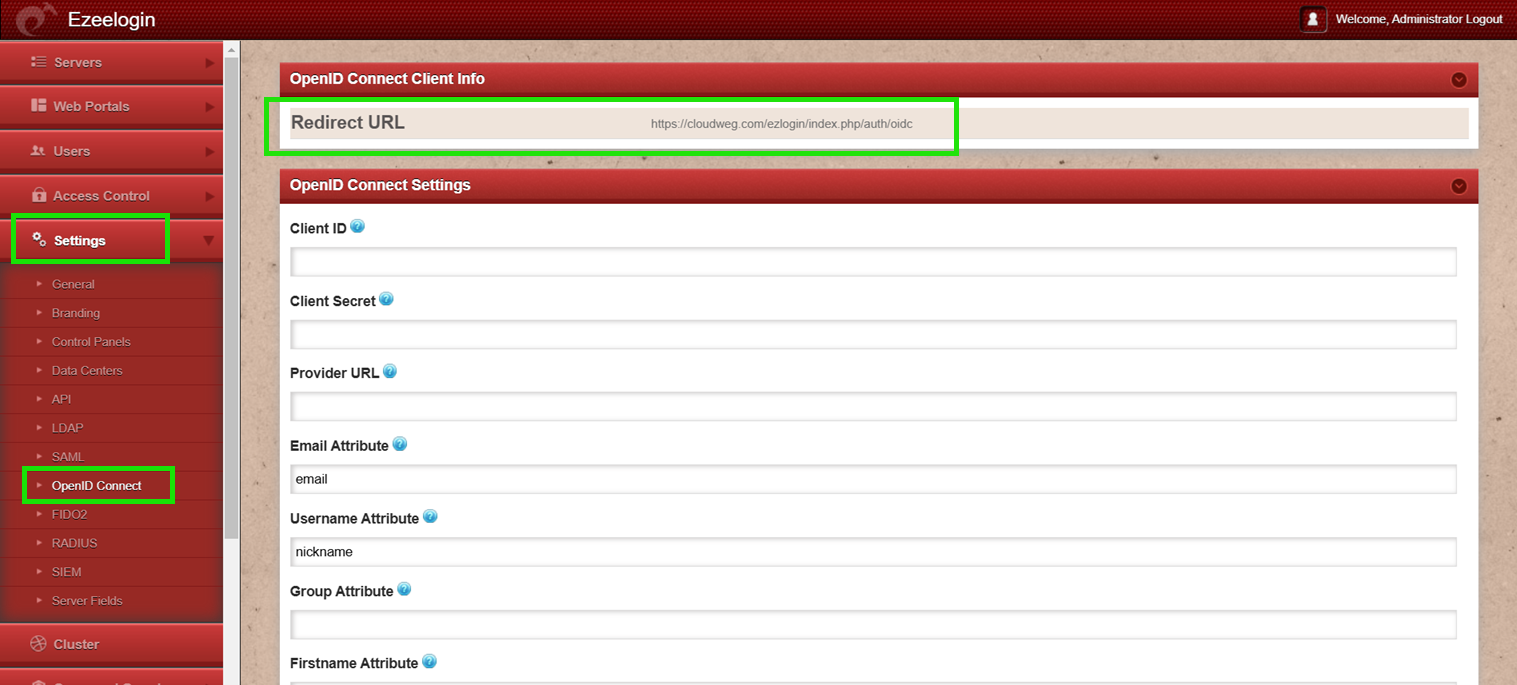
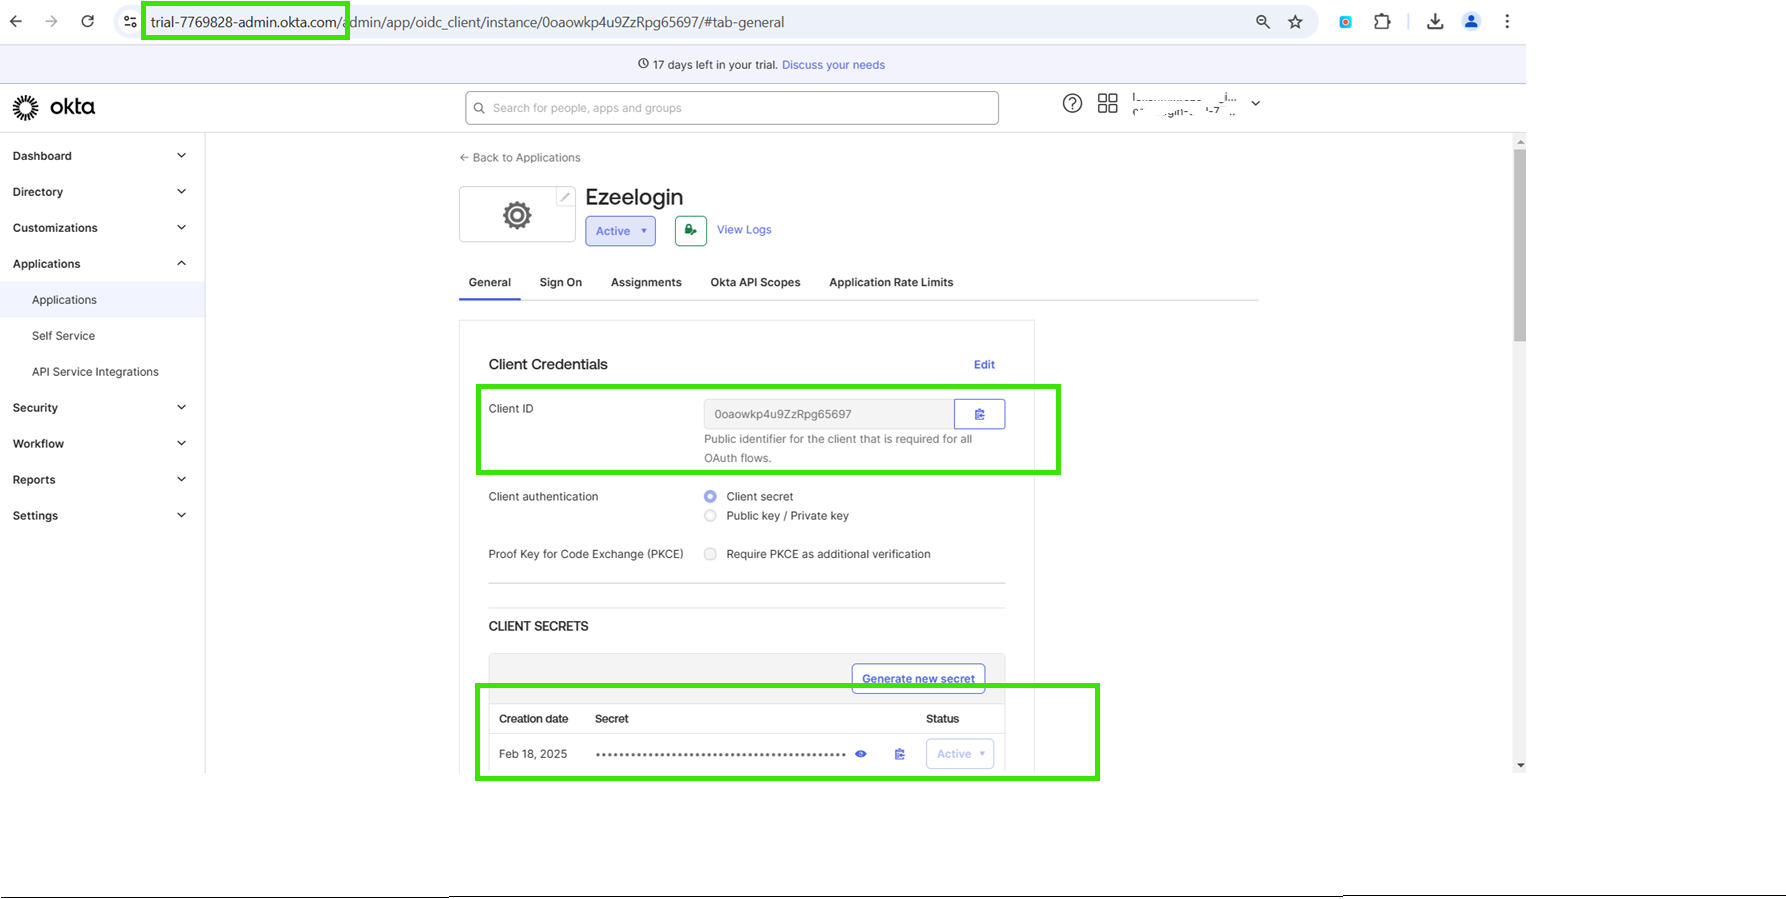
Step 5: Copy the Client ID, Client Secret and URL then paste them into the Ezeelogin GUI under Settings -> OpenID Connect (refer to the screenshot below) and click Save.
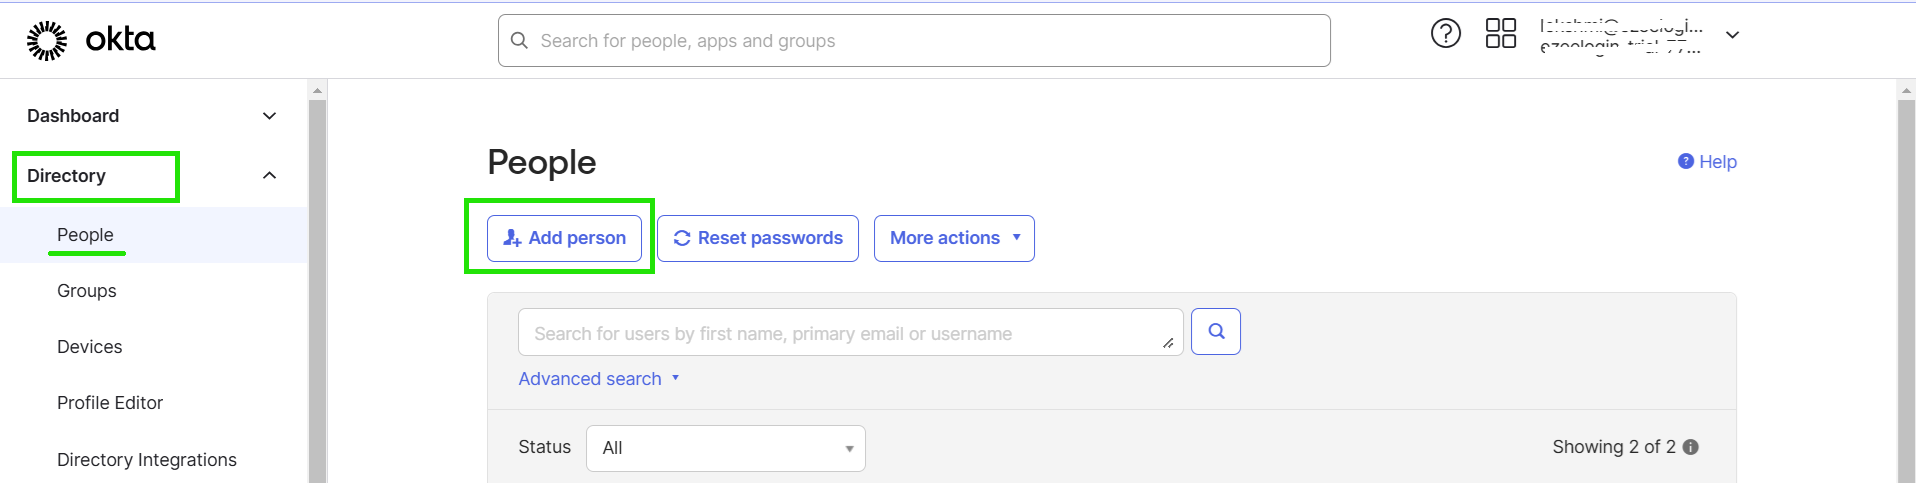
Step 6: To add users, navigate to Directory, then select People, and click on Add Person. This will open a form where you can enter the necessary user details and save them.
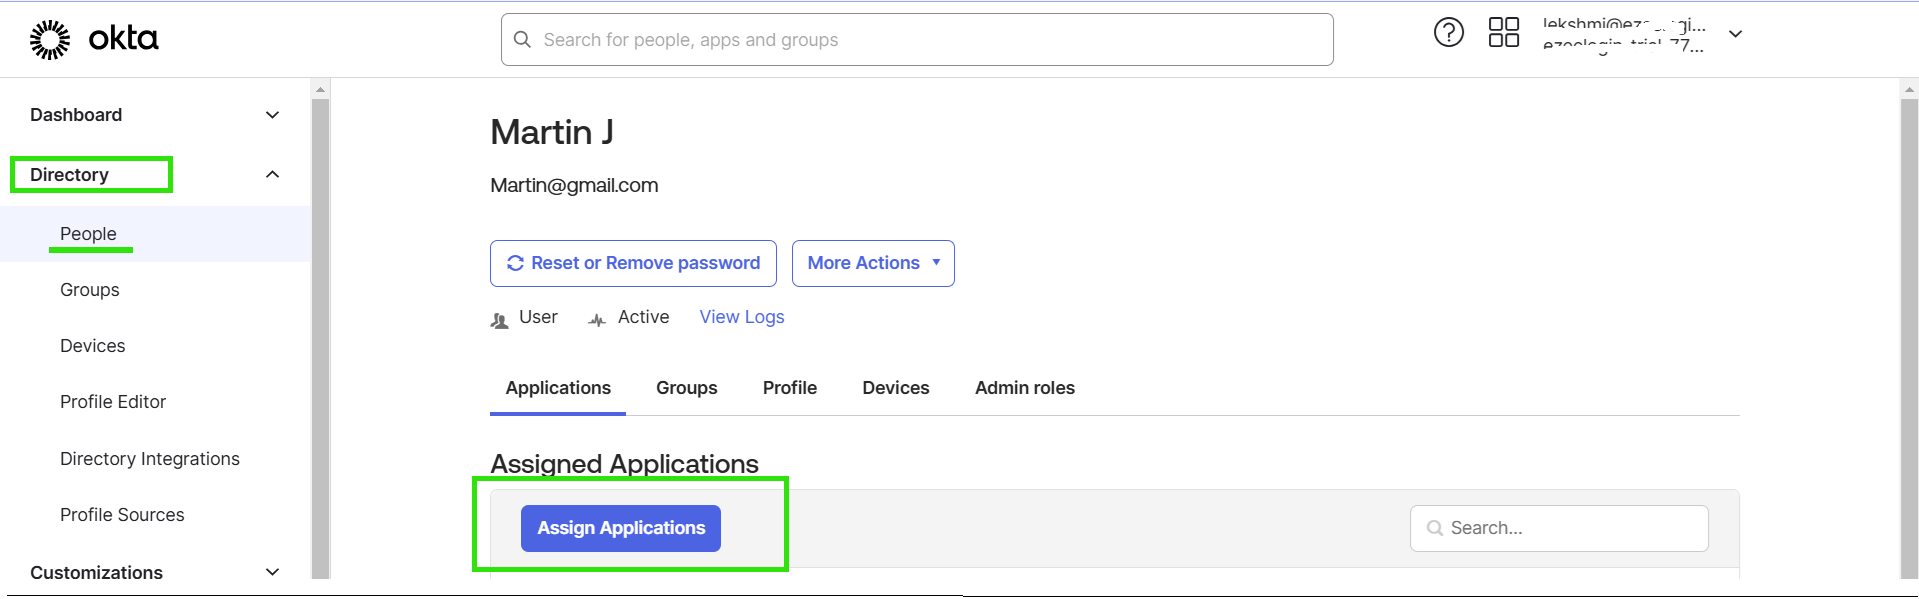
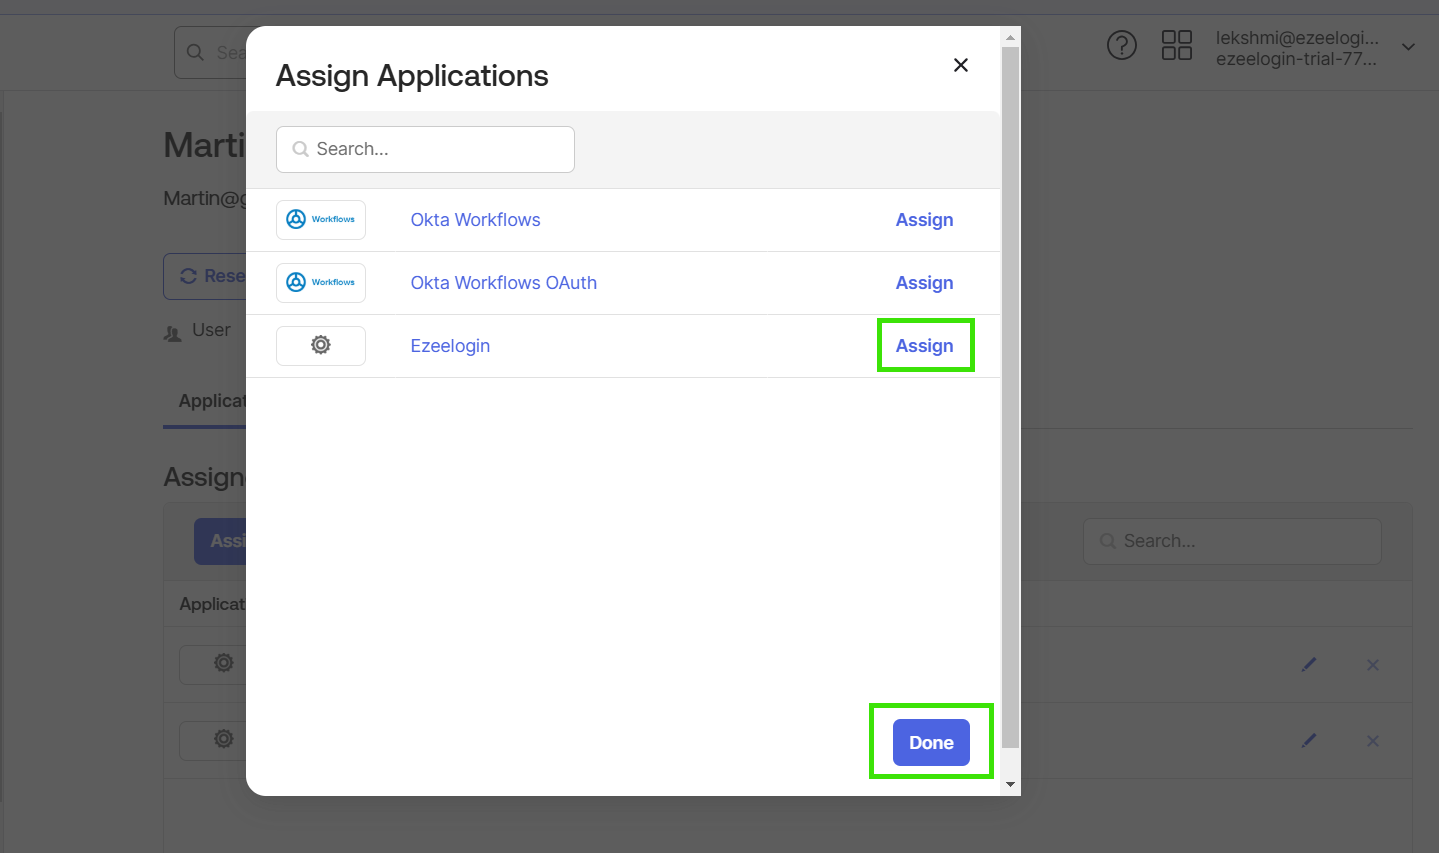
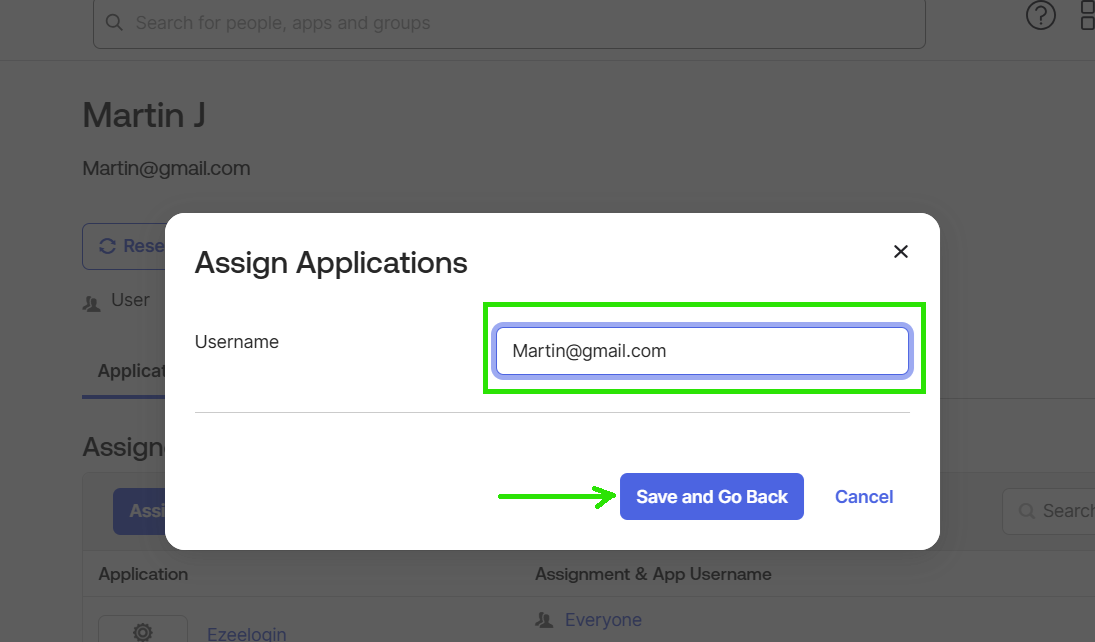
Step 7: After adding the user, navigate to the People tab and click Assign Application to assign the user to the application.
Step 8: After Login to Ezeelogin GUI and do the below steps
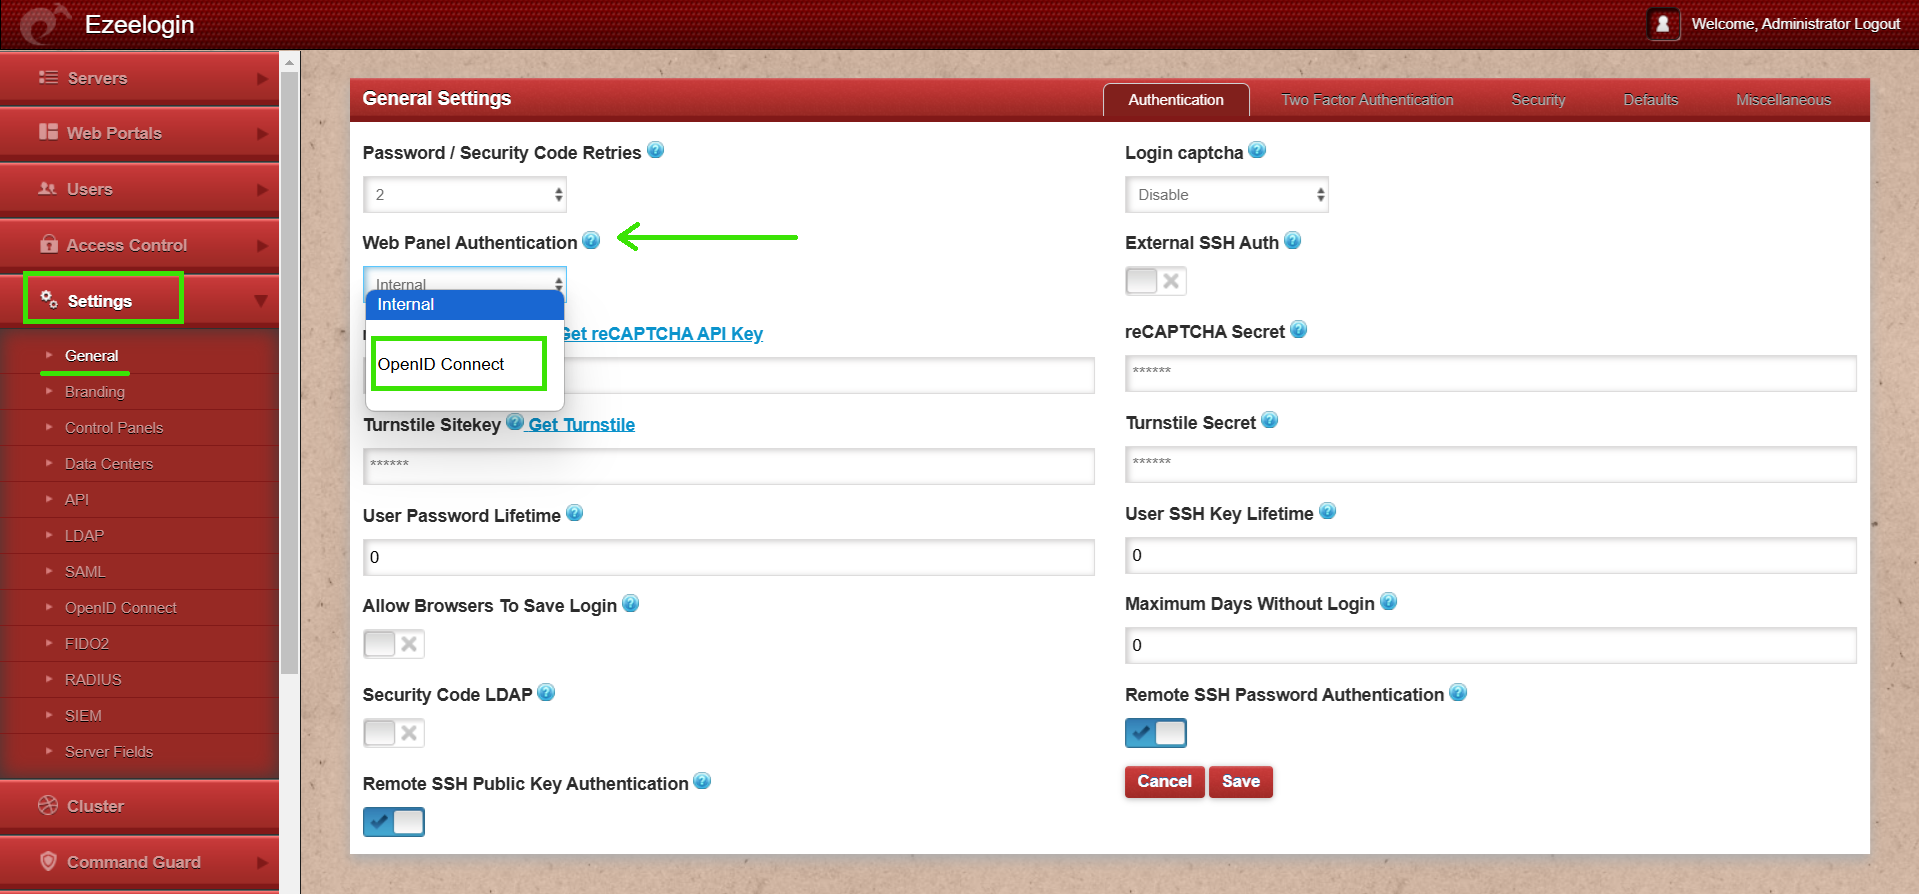
Step 8 (A): Go to Settings -> General -> Authentication -> Web Panel Authentication, then change Web Panel Authentication to OpenID Connect.
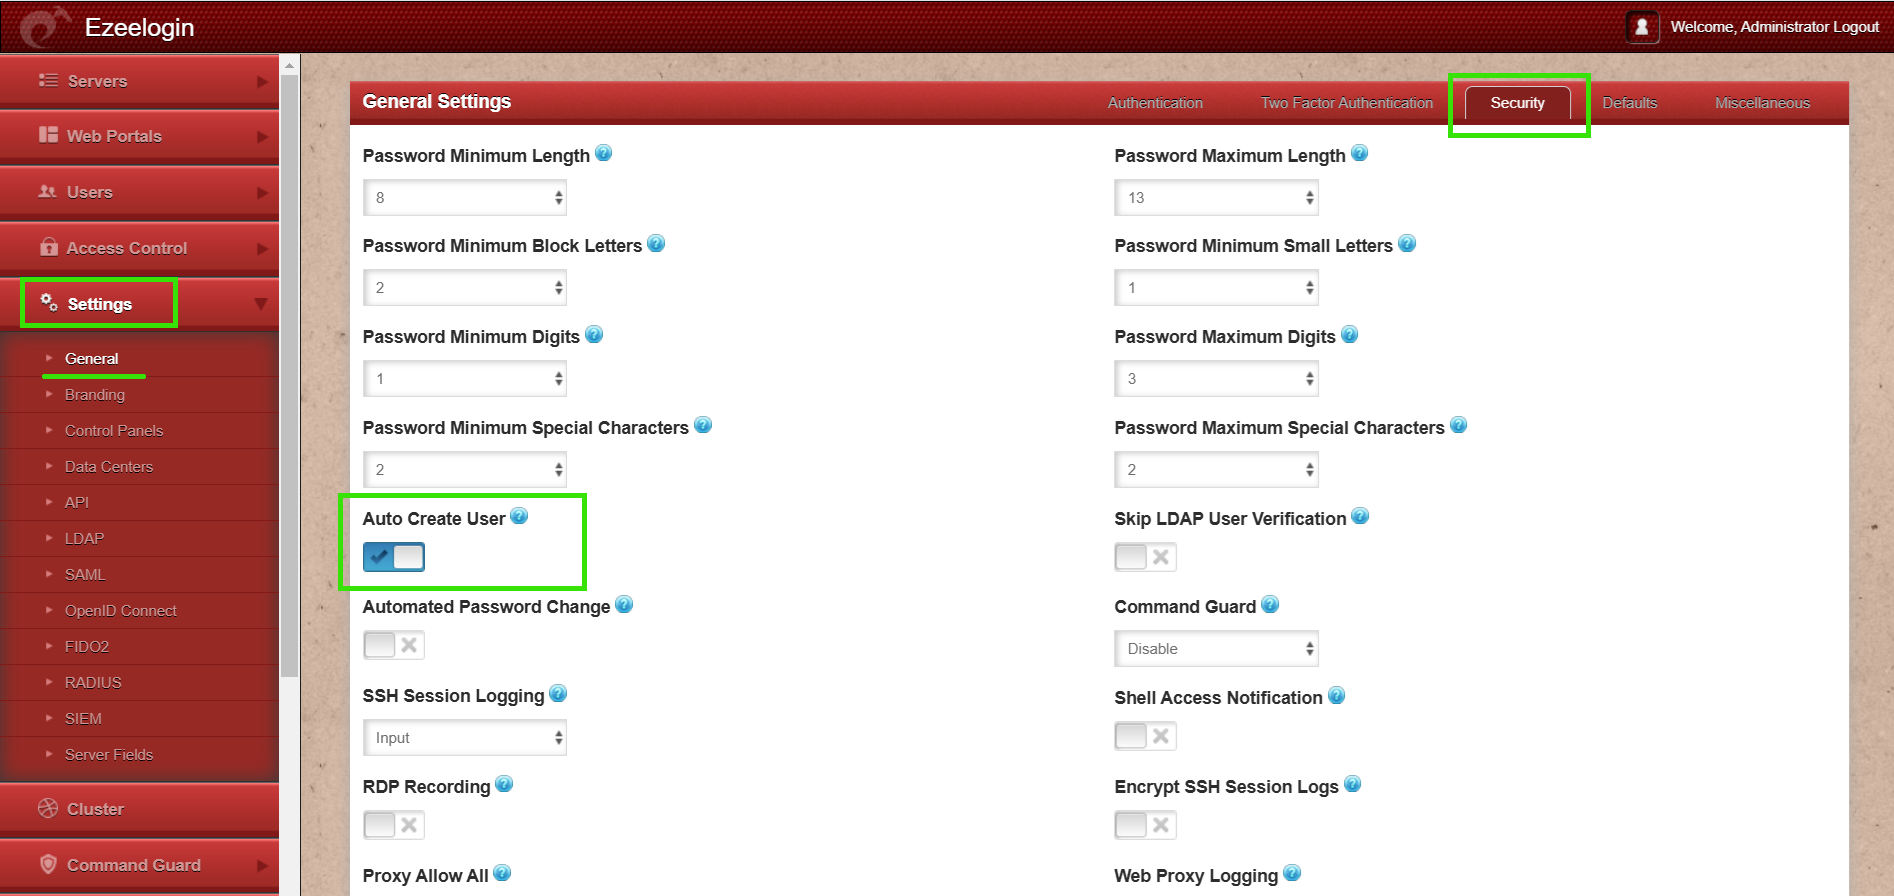
Step 8 (B): Enable Auto Create User in the Ezeelogin GUI by going to Settings -> General -> Security.
Step 9: Re-login to the Ezeelogin GUI with OpenID connect authentication

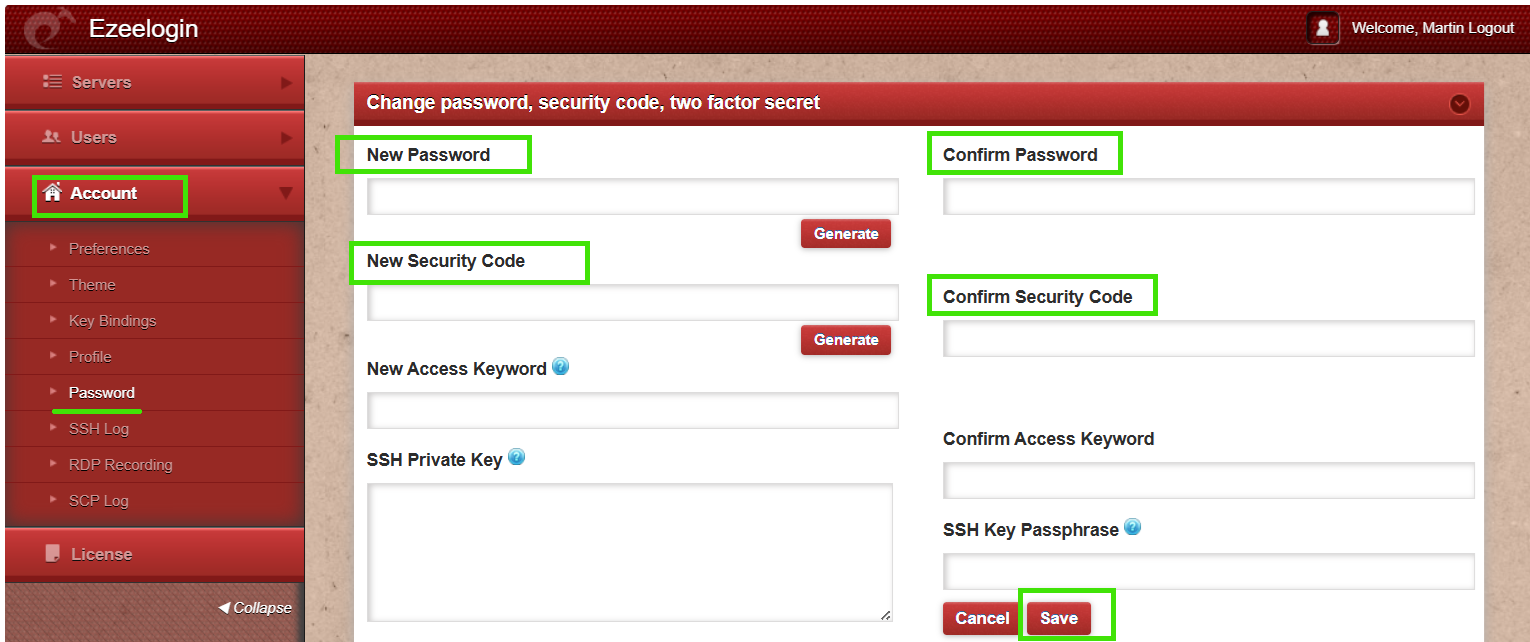
After logging in, set a new password and security code under Account -> Password.
Step 10: Also, try logging in to the Ezeelogin shell using WebSSH (refer the below screenshot) or any SSH client such as PuTTY or a terminal.

After setting the new password and security code, try logging in using the updated credentials.
Related Articles: