Integrate Jumpcloud OpenID Connect
How to integrate Jumpcloud OpenID connect with Ezeelogin jumpserver?
Overview: This article will help Ezeelogin super admin user to integrate Jumpcloud OpenID Connect with the Ezeelogin jump server.
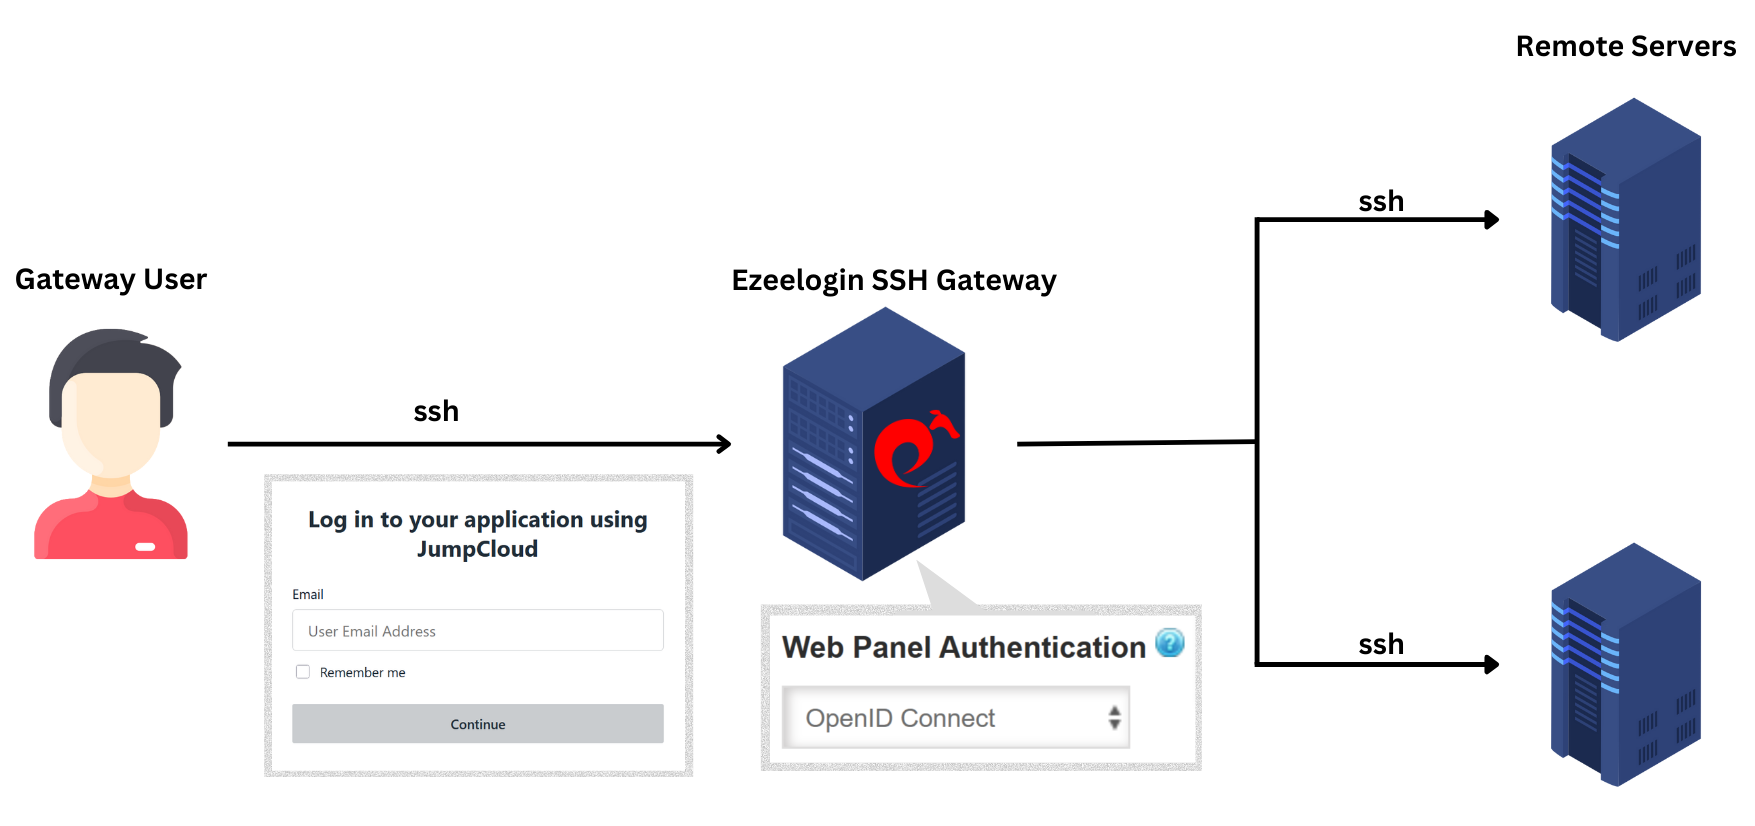
OpenID connect is an authentication mechanism for web applications. It’s based on web protocols and it cannot be used for user authentication over SSH.
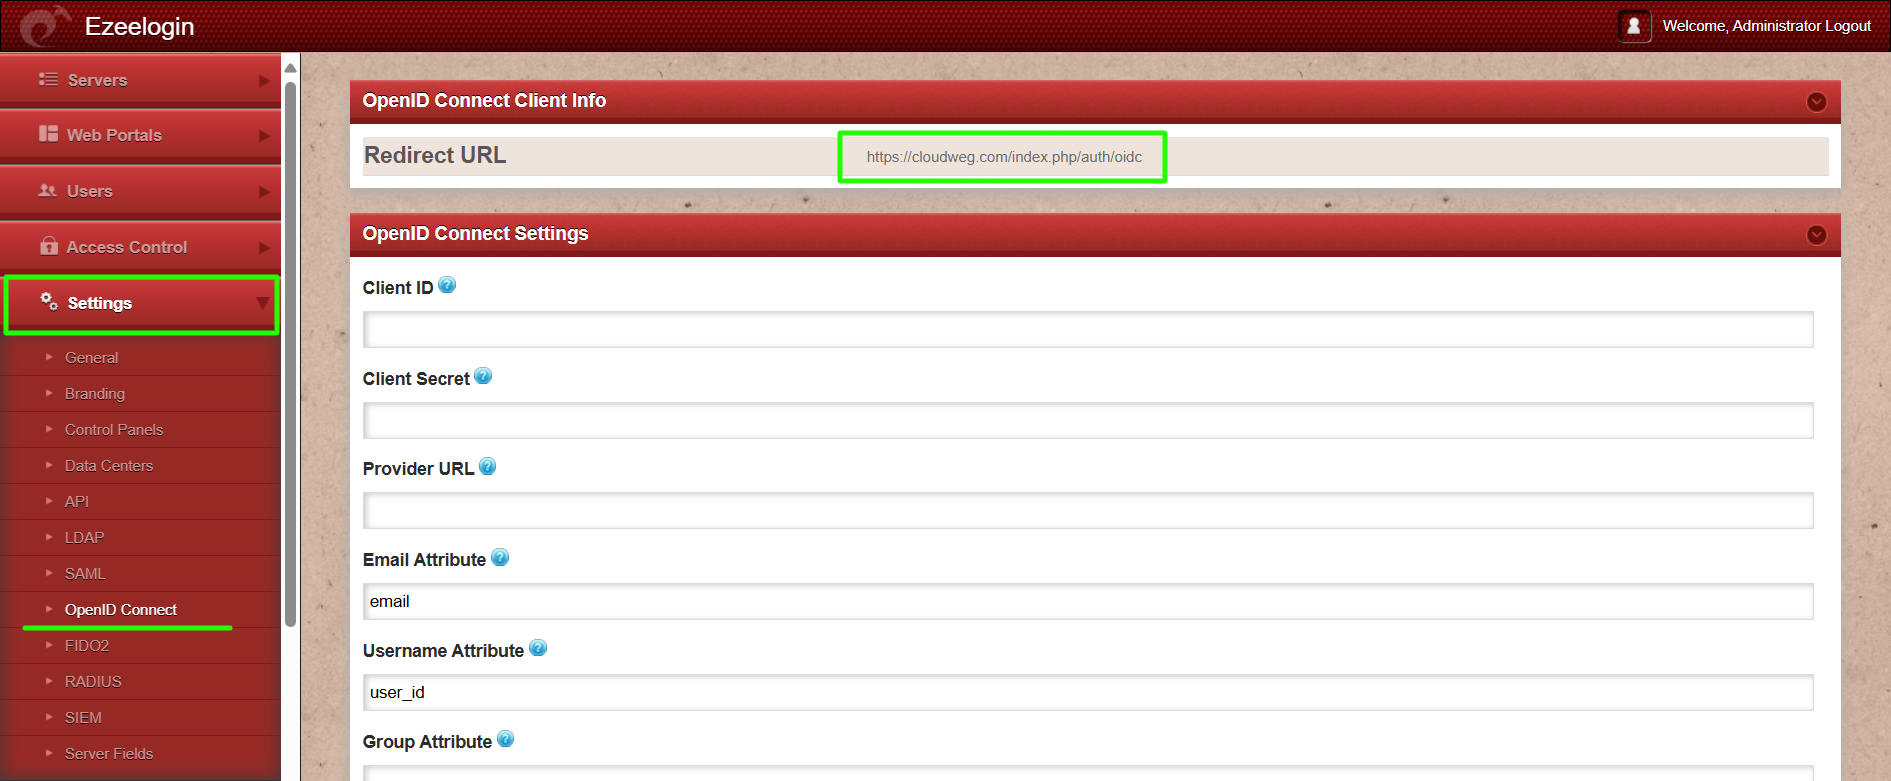
Step 1: Login to Ezeelogin GUI and click on Settings -> OpenID Connect and copy ’redirect URL’.
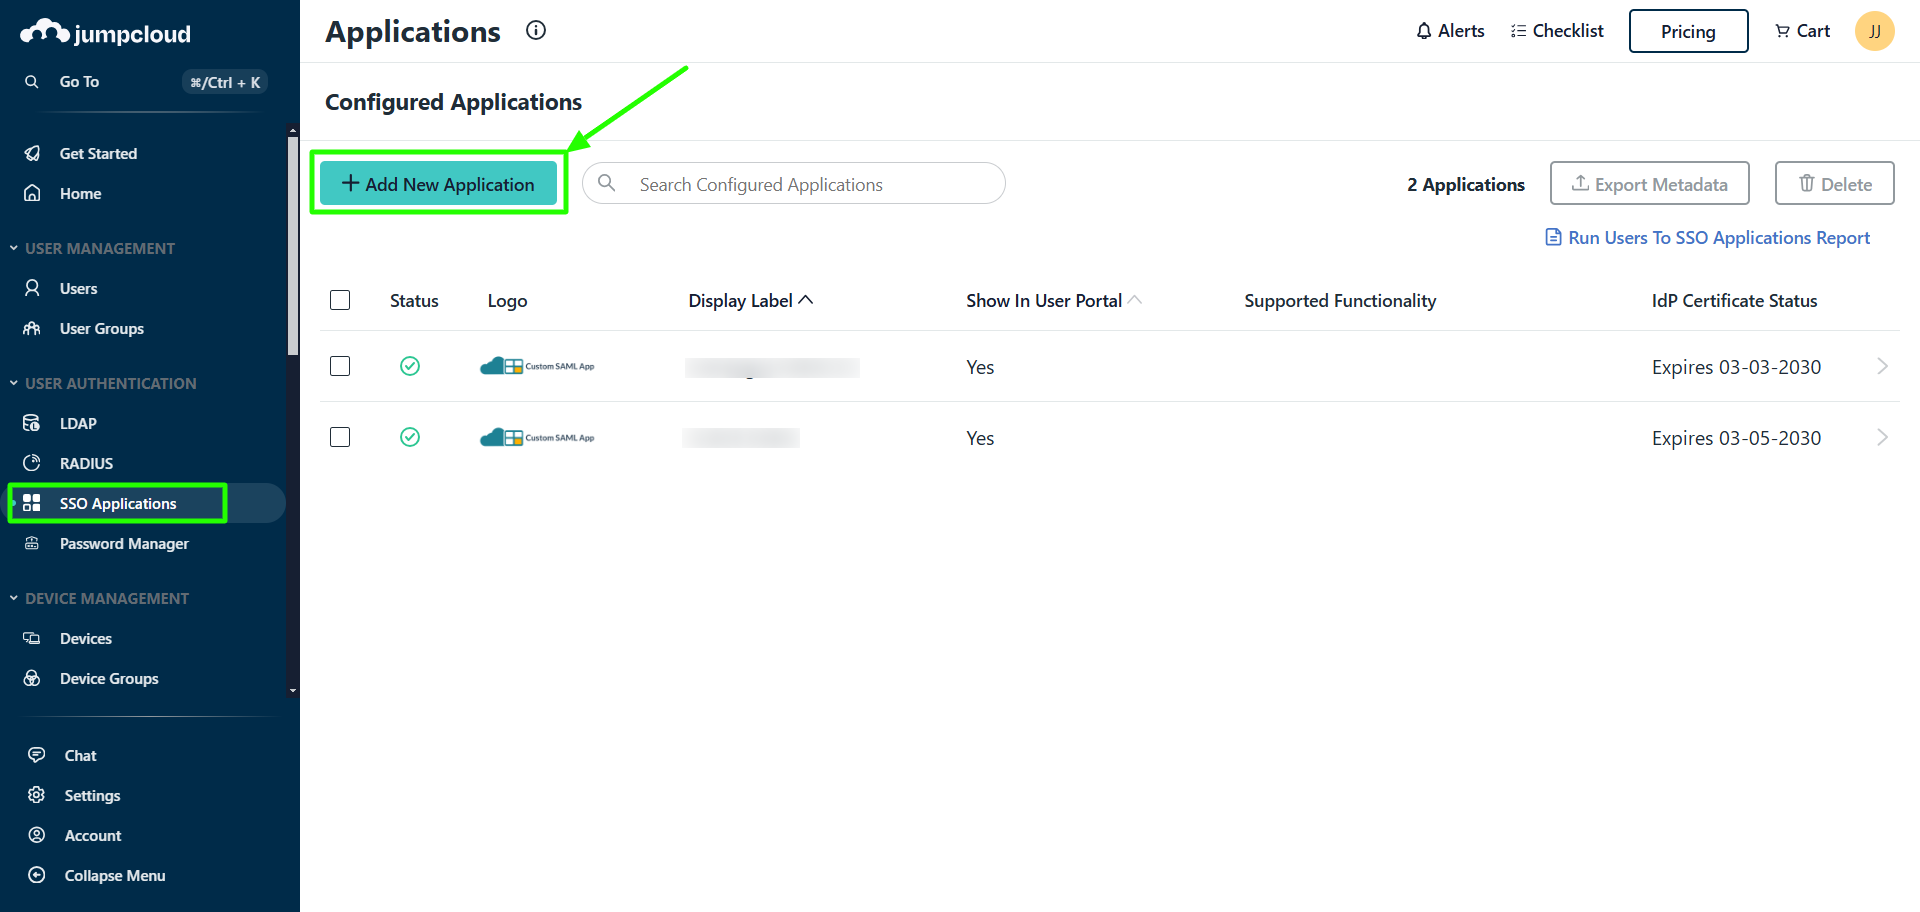
Step 2: Login to Jumpcloud and add the Application.
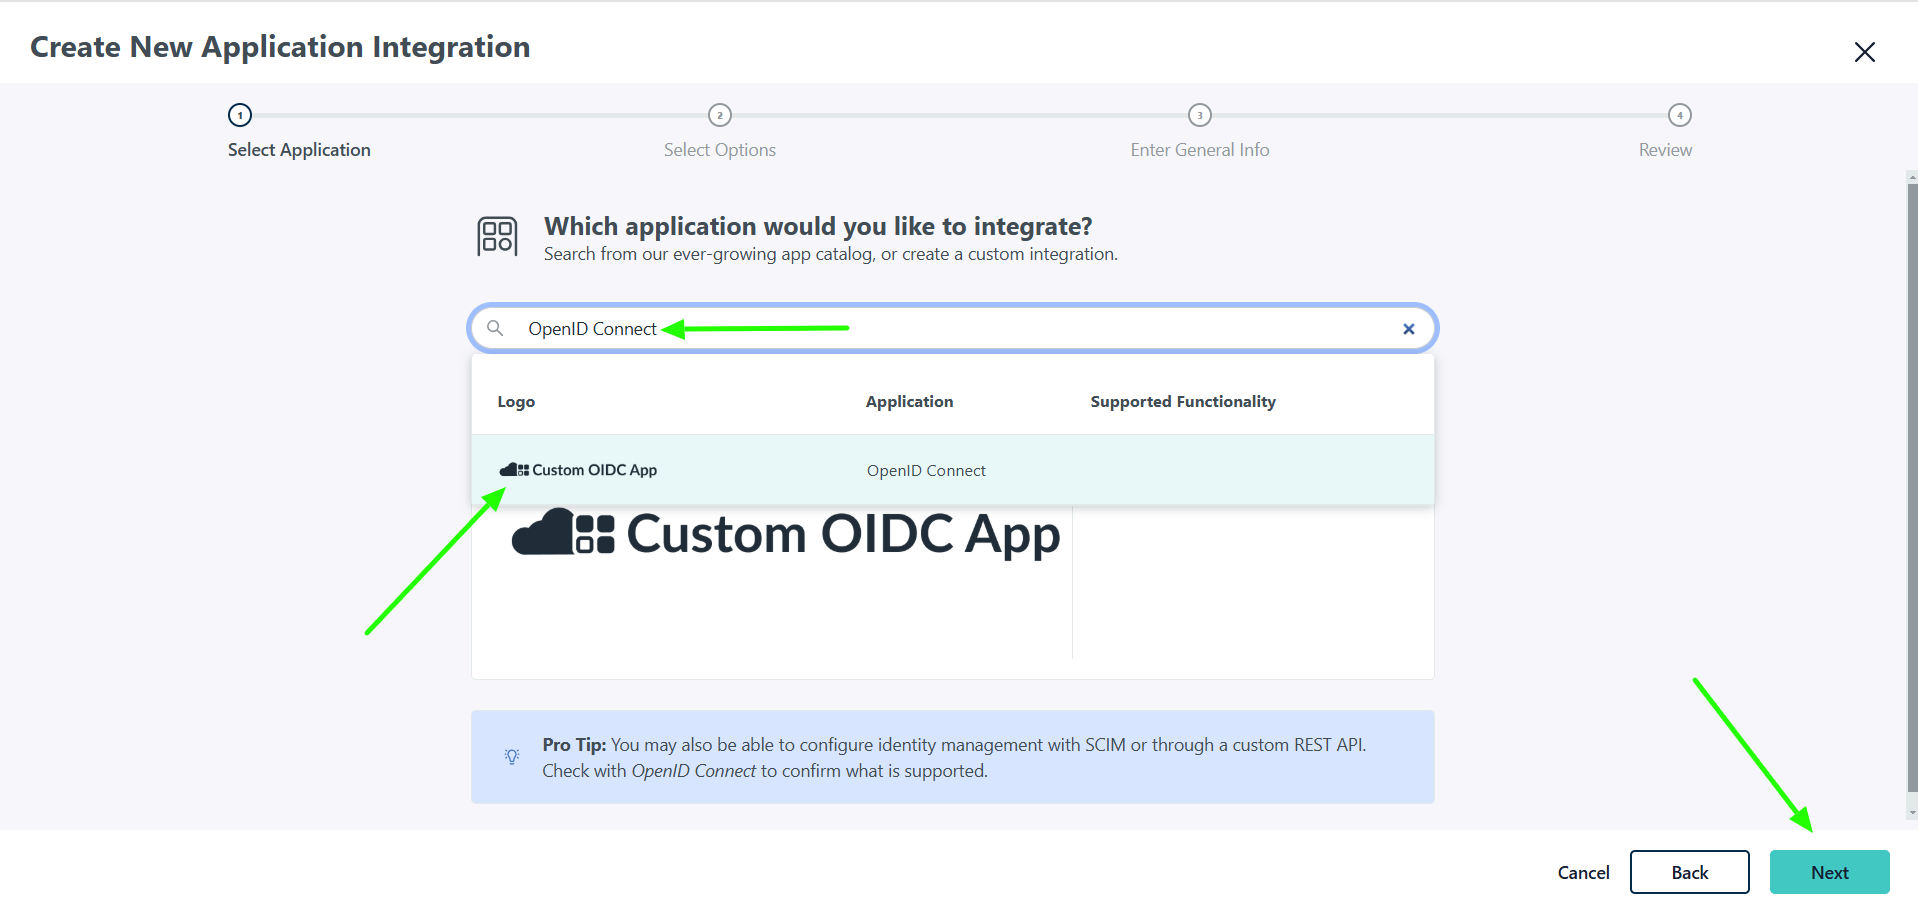
Step 2: Search for OpenID and select "Custom OIDC App" and click on "Next"
Step 3: Change the Display Label and click on Next
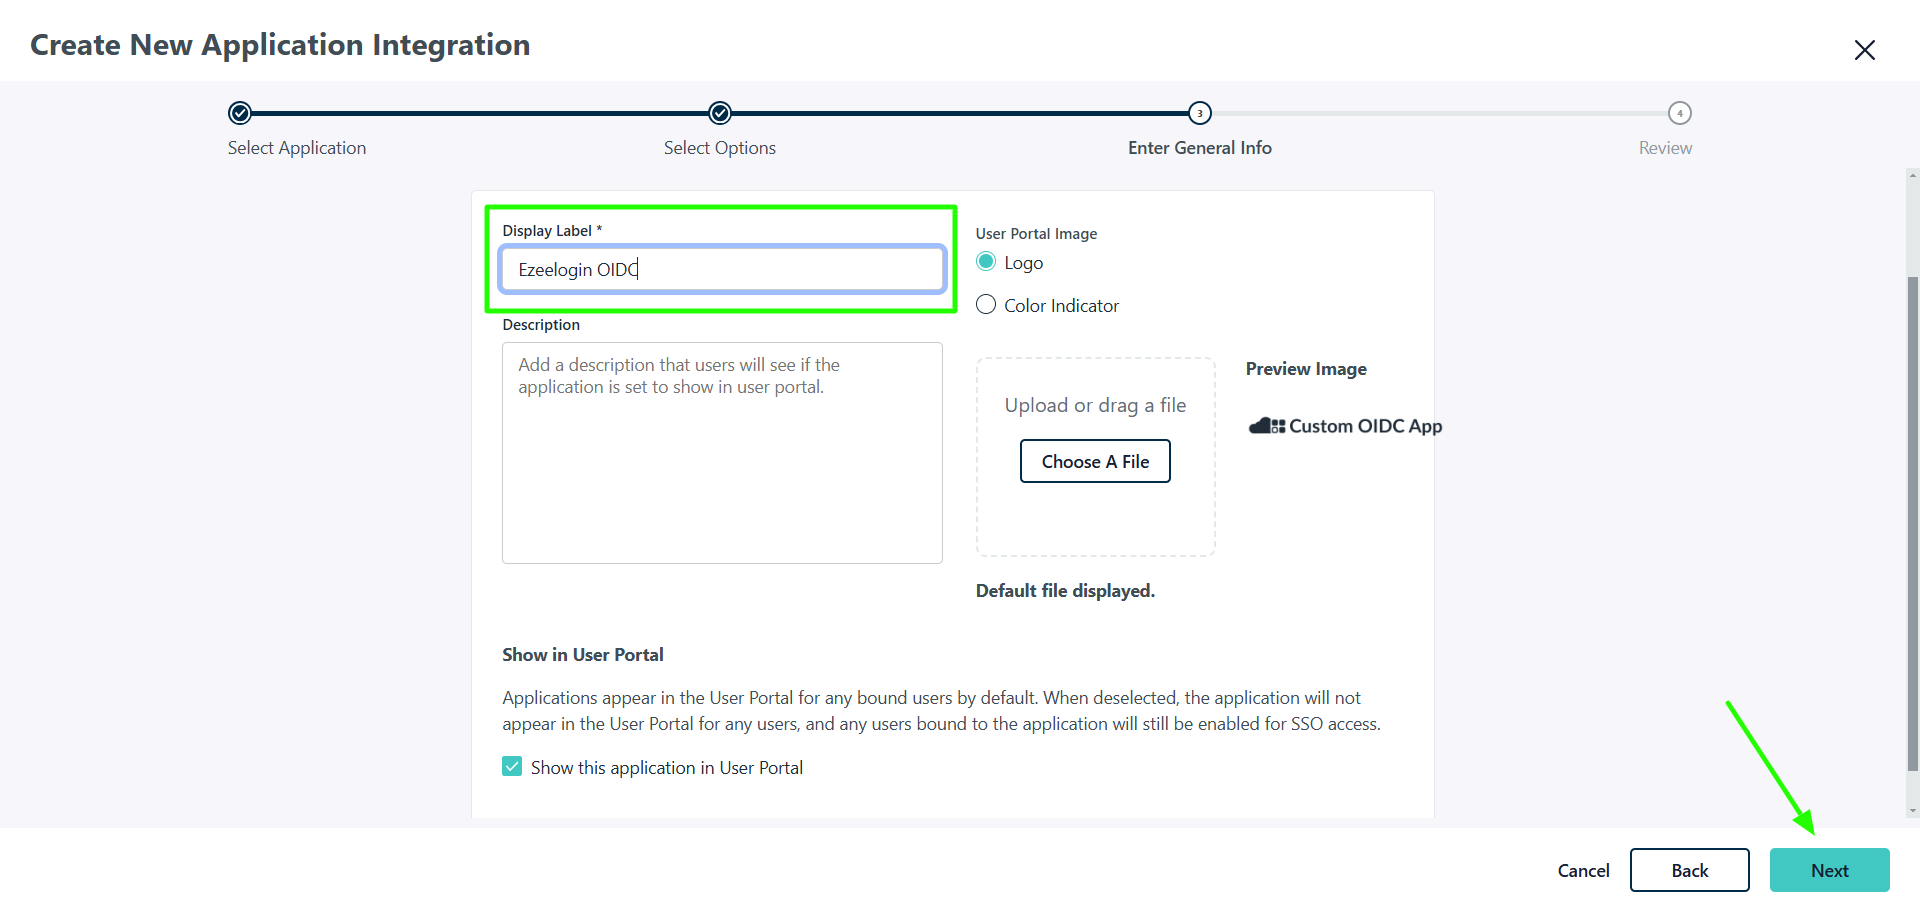
Step 4: On the next page click on "Configure Application"
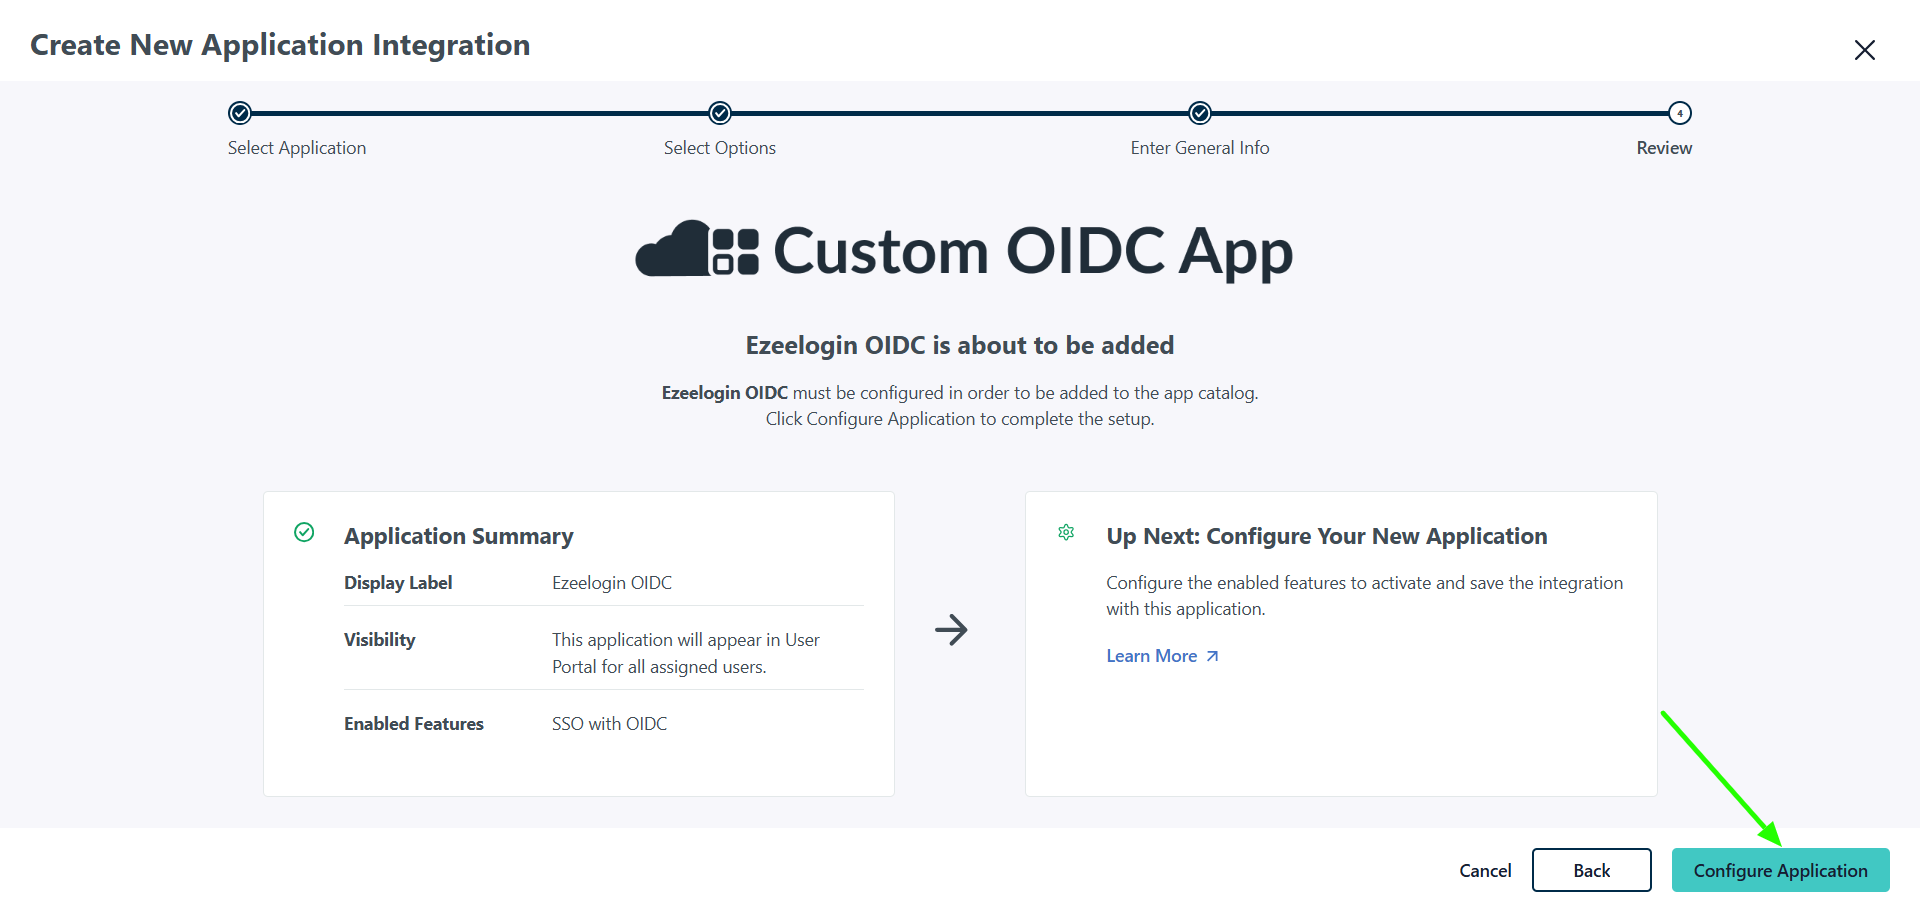
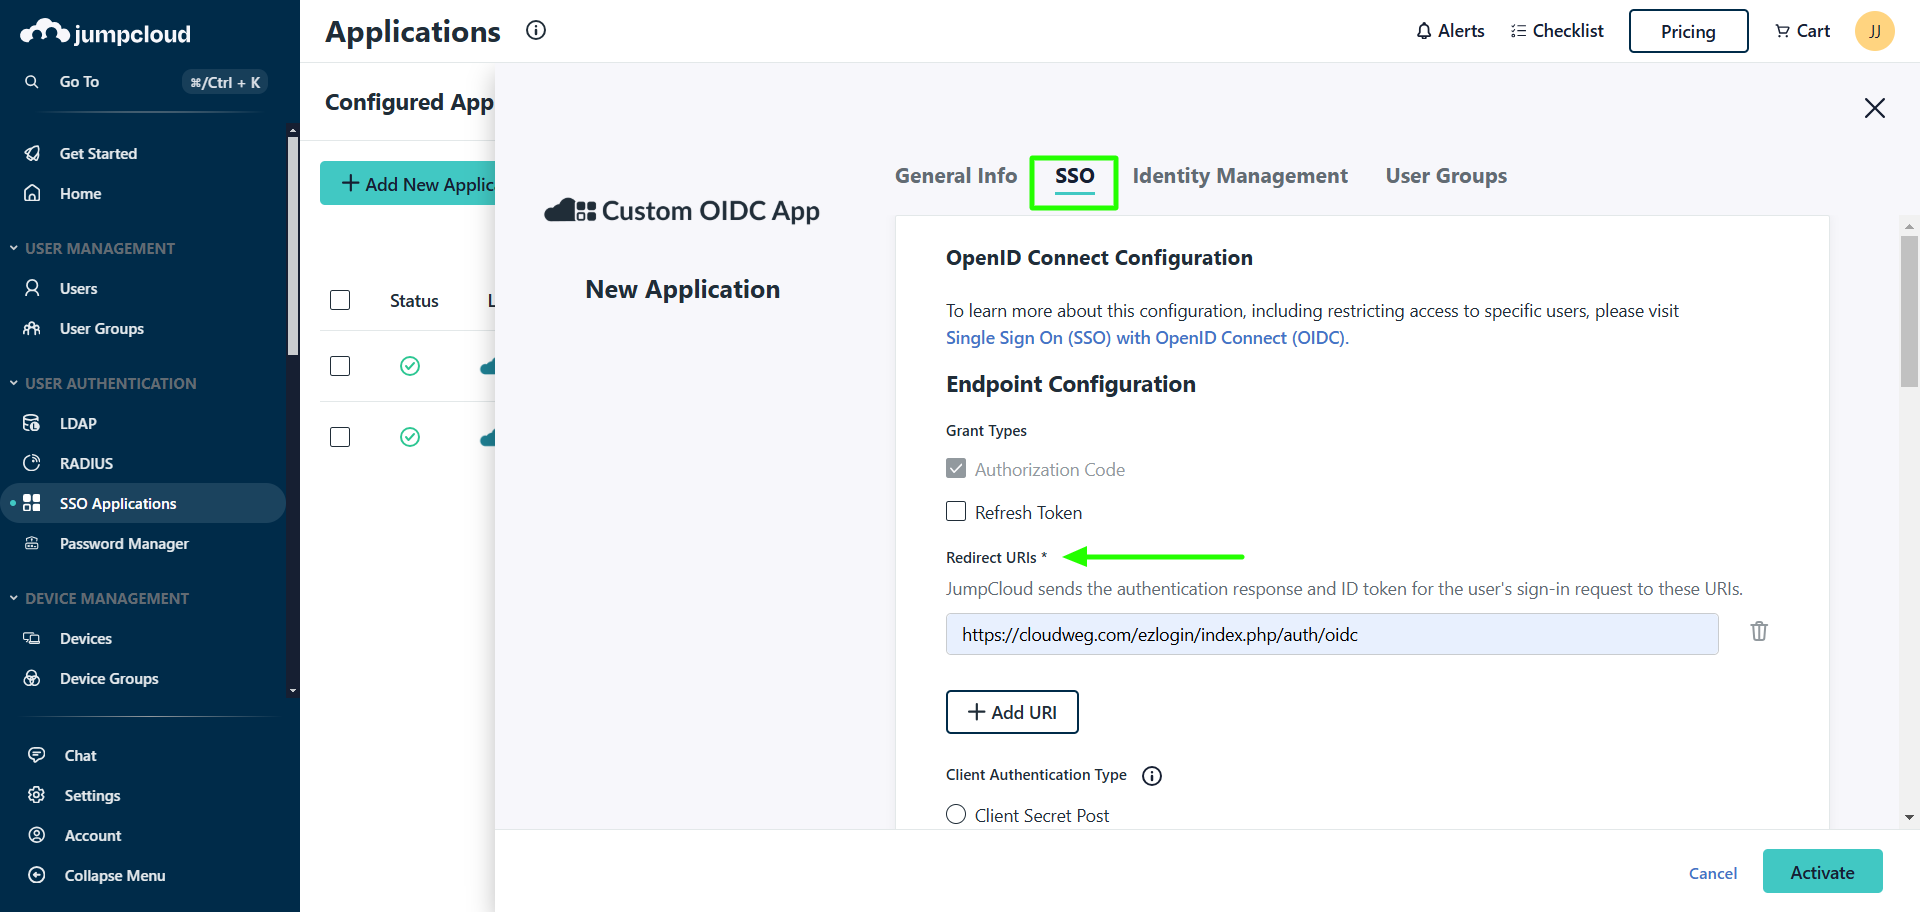
Step 5: Under the Redirect URL, paste the OIDC URL obtained from Ezeelogin in Step 1.
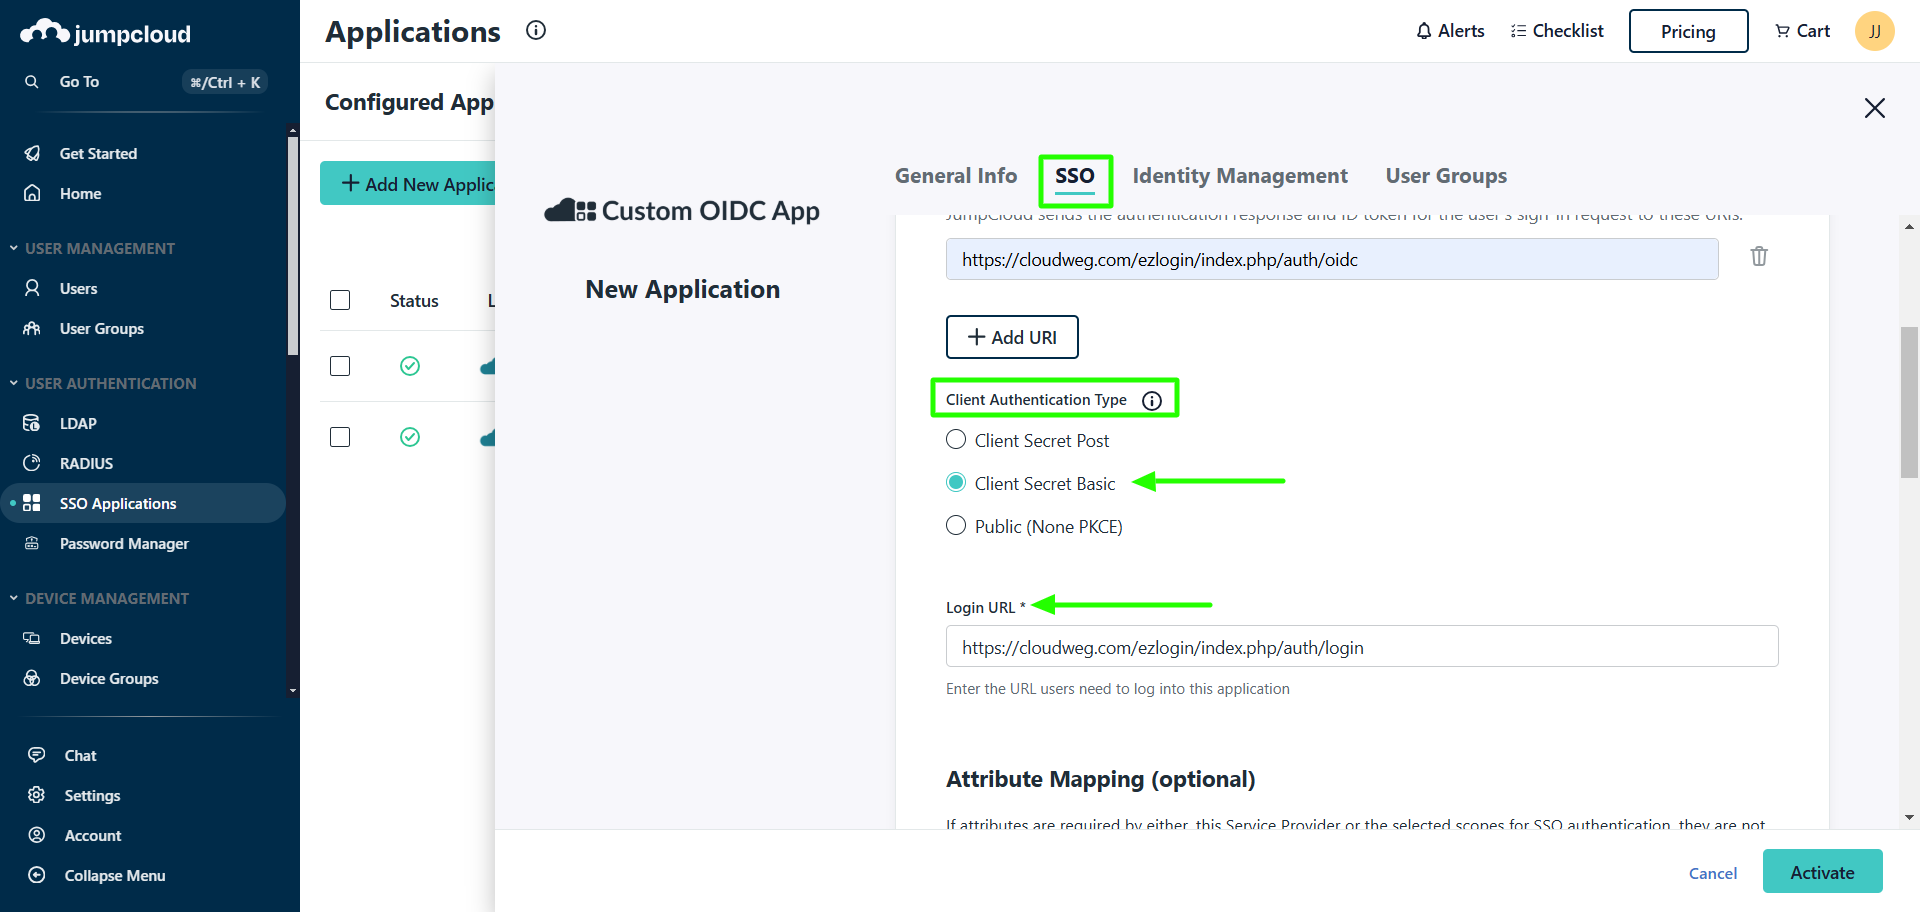
Step 6: Select "Client Authentication Type" as "Client Secret Basic". Also provide the login URL. For the Login URL, modify the OIDC URL by replacing the last part "OIDC" with "login".
(Example : change https://cloudweg.com/ezlogin/index.php/auth/oidc to https://cloudweg.com/ezlogin/index.php/auth/login)
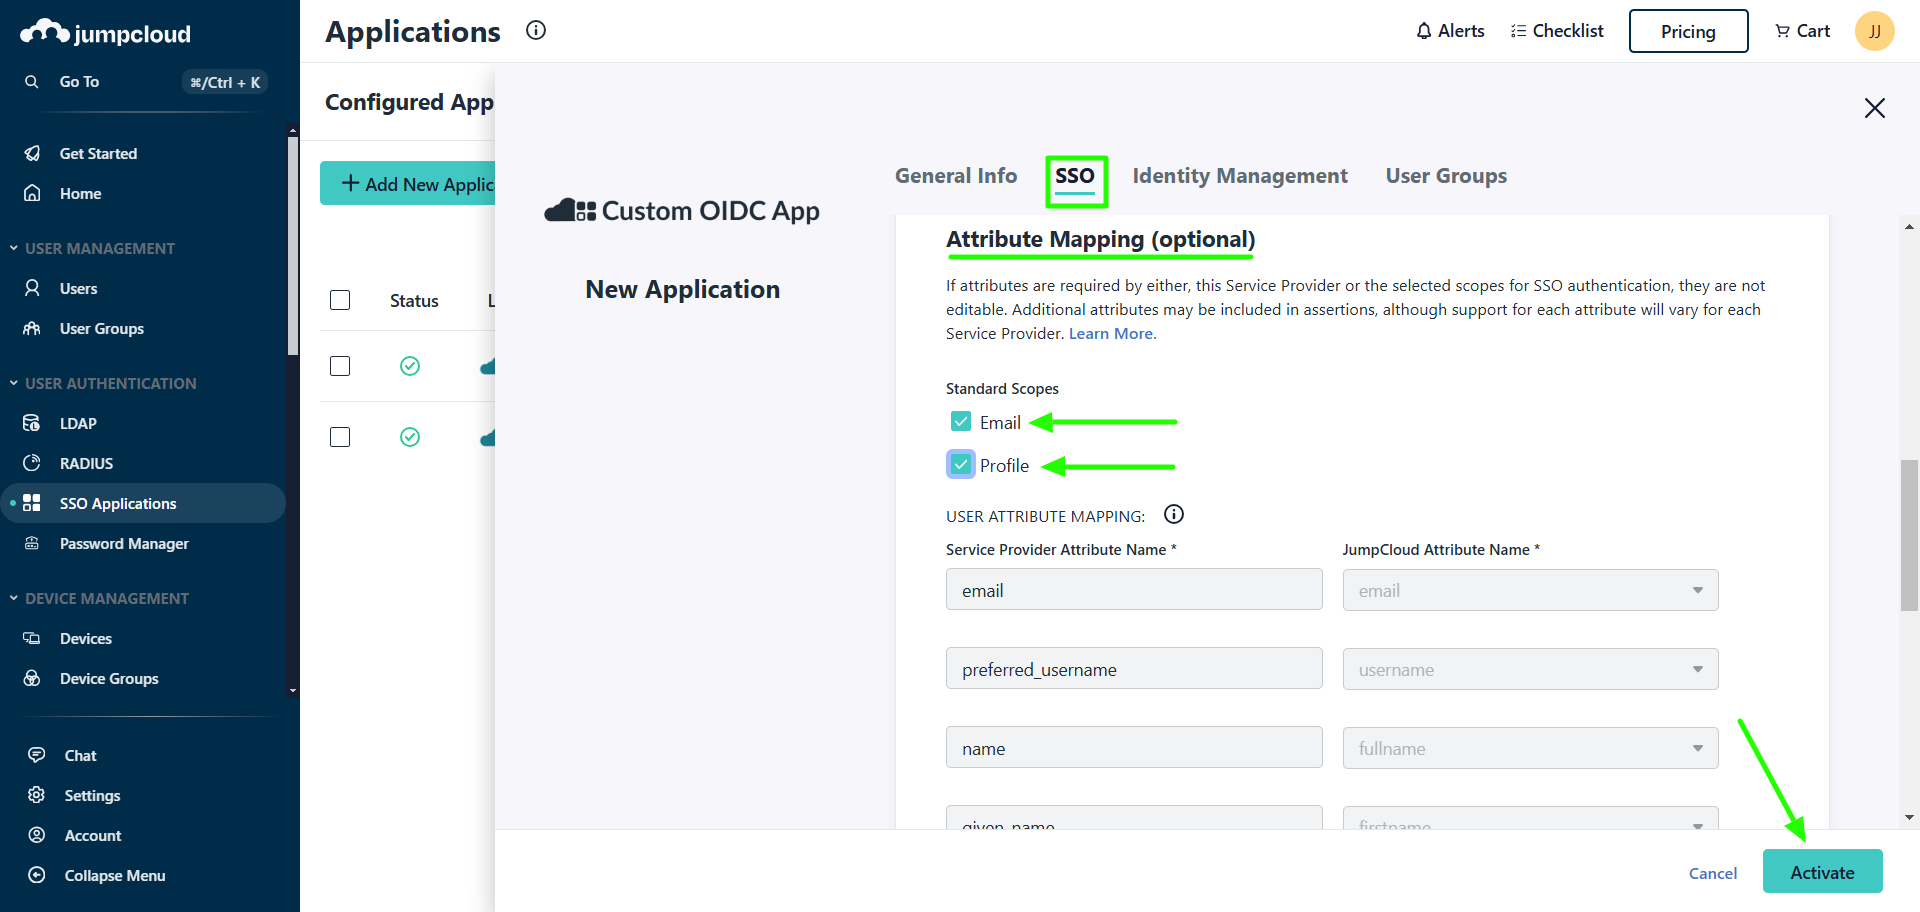
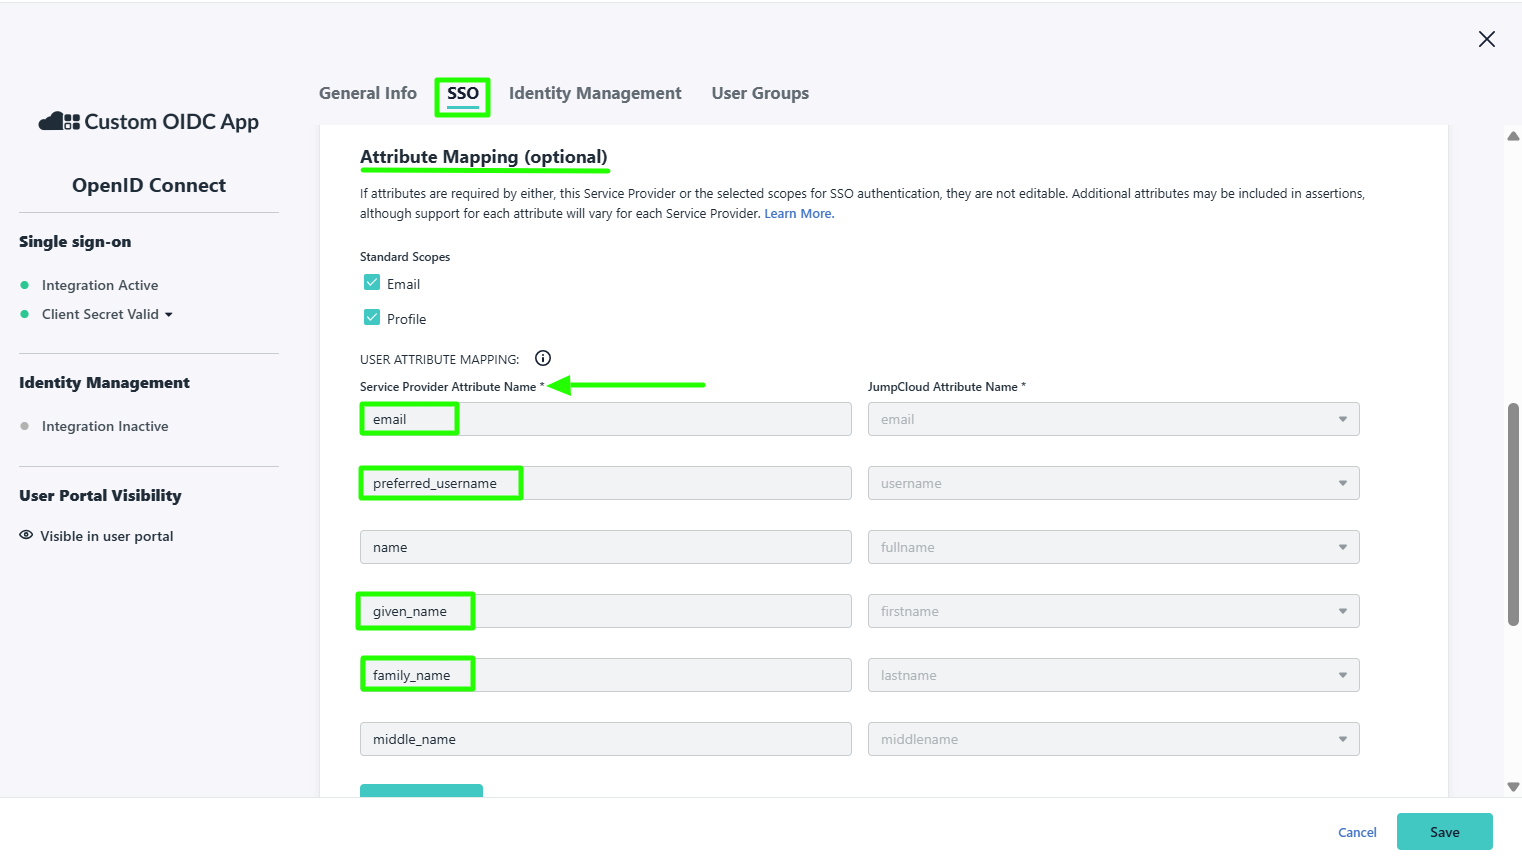
Step 7: Under "Attribute Mapping" enable "Email" and "Profile". After providing all the above details click on "Activate".
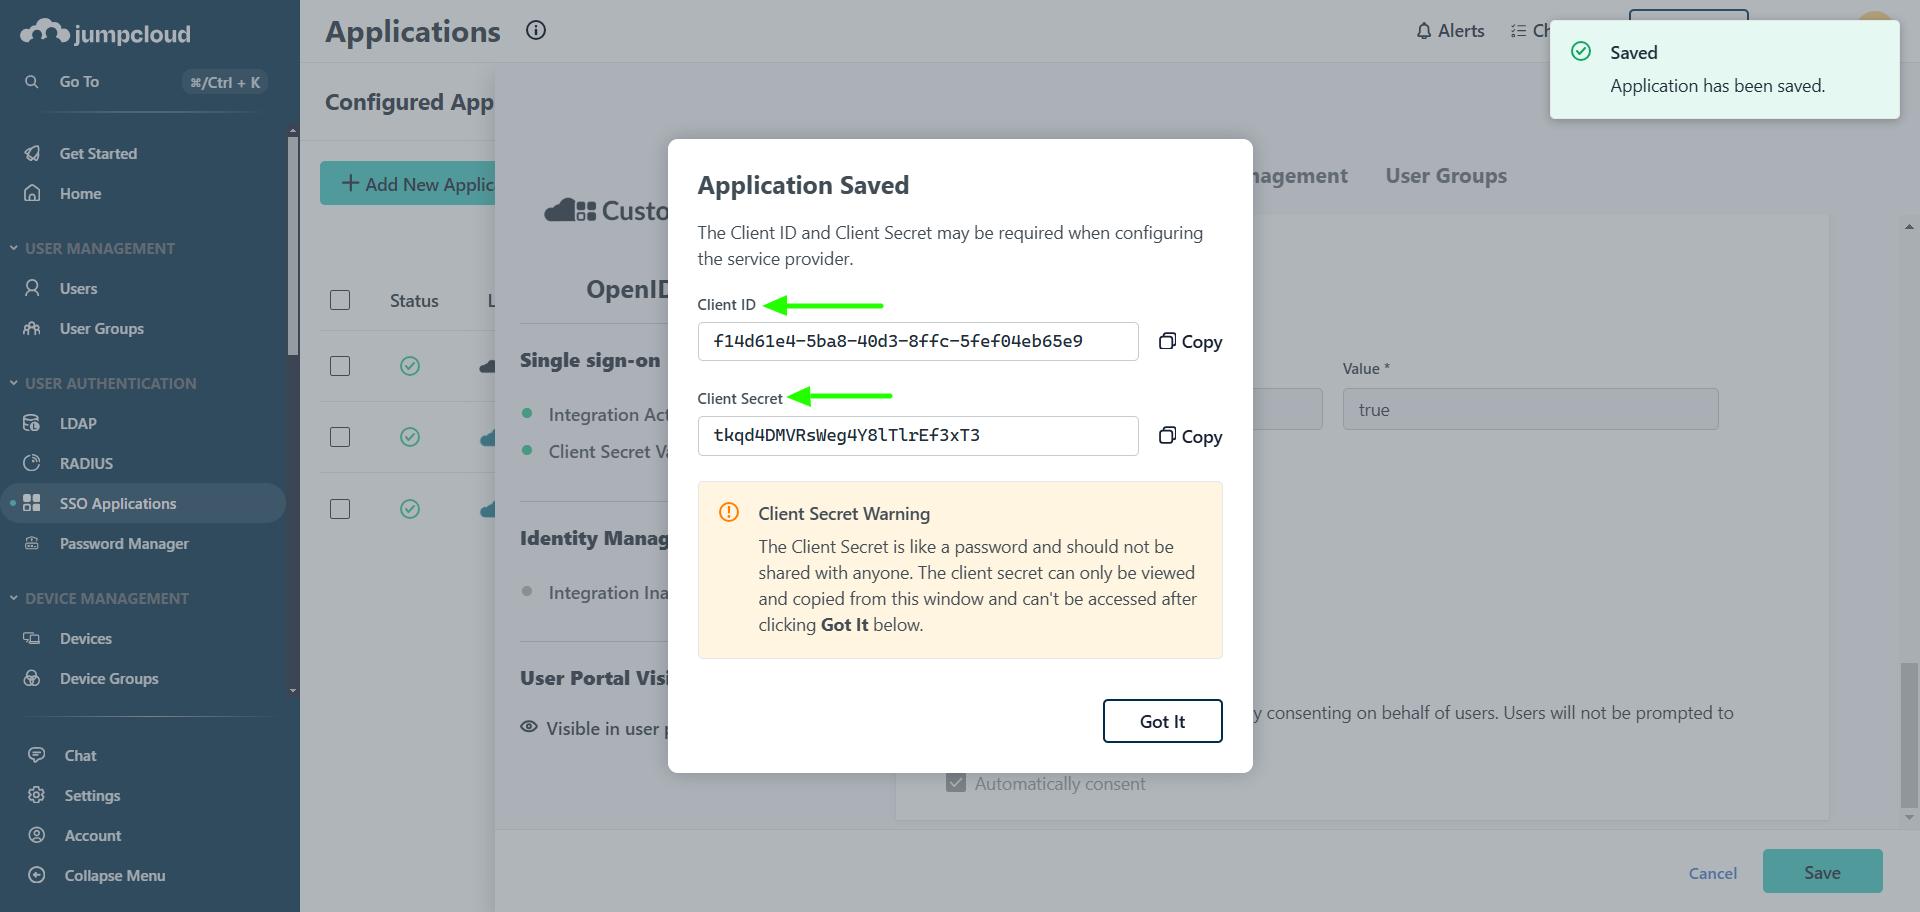
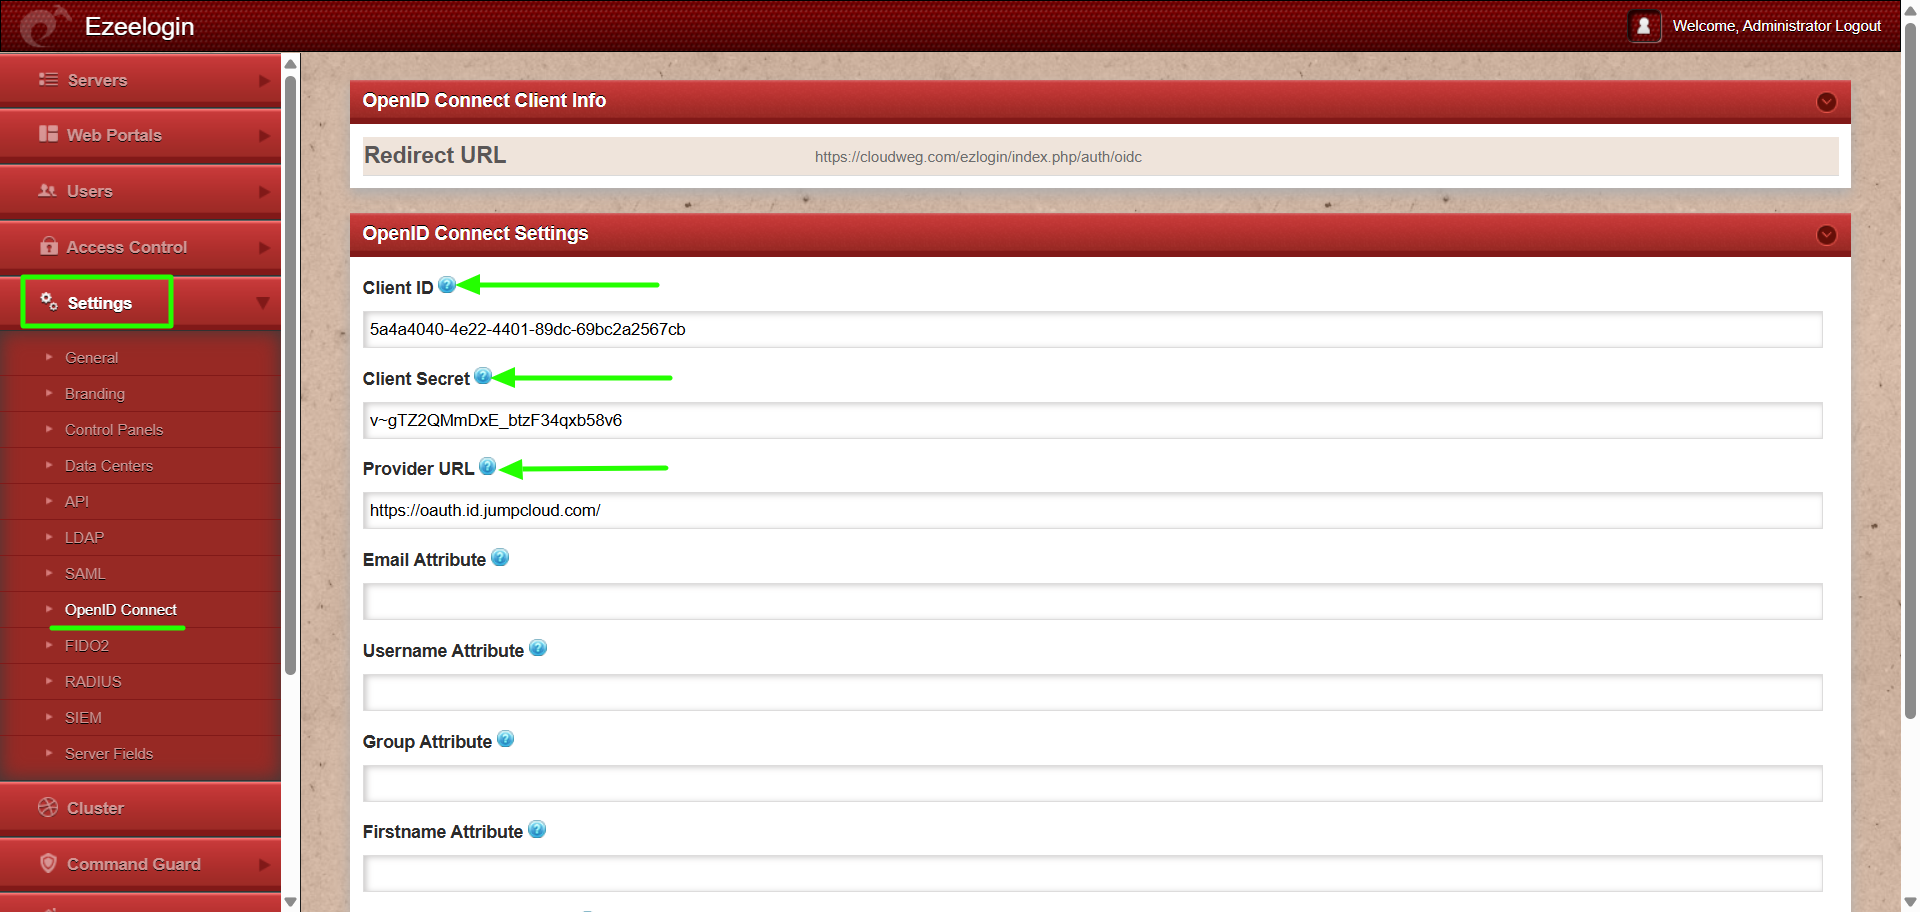
Step 8: From the next page, copy the Client ID and Client Secret, then paste them into the web GUI OpenID Connect settings. Additionally, enter the Provider URL as https://oauth.id.jumpcloud.com/ in the web GUI.
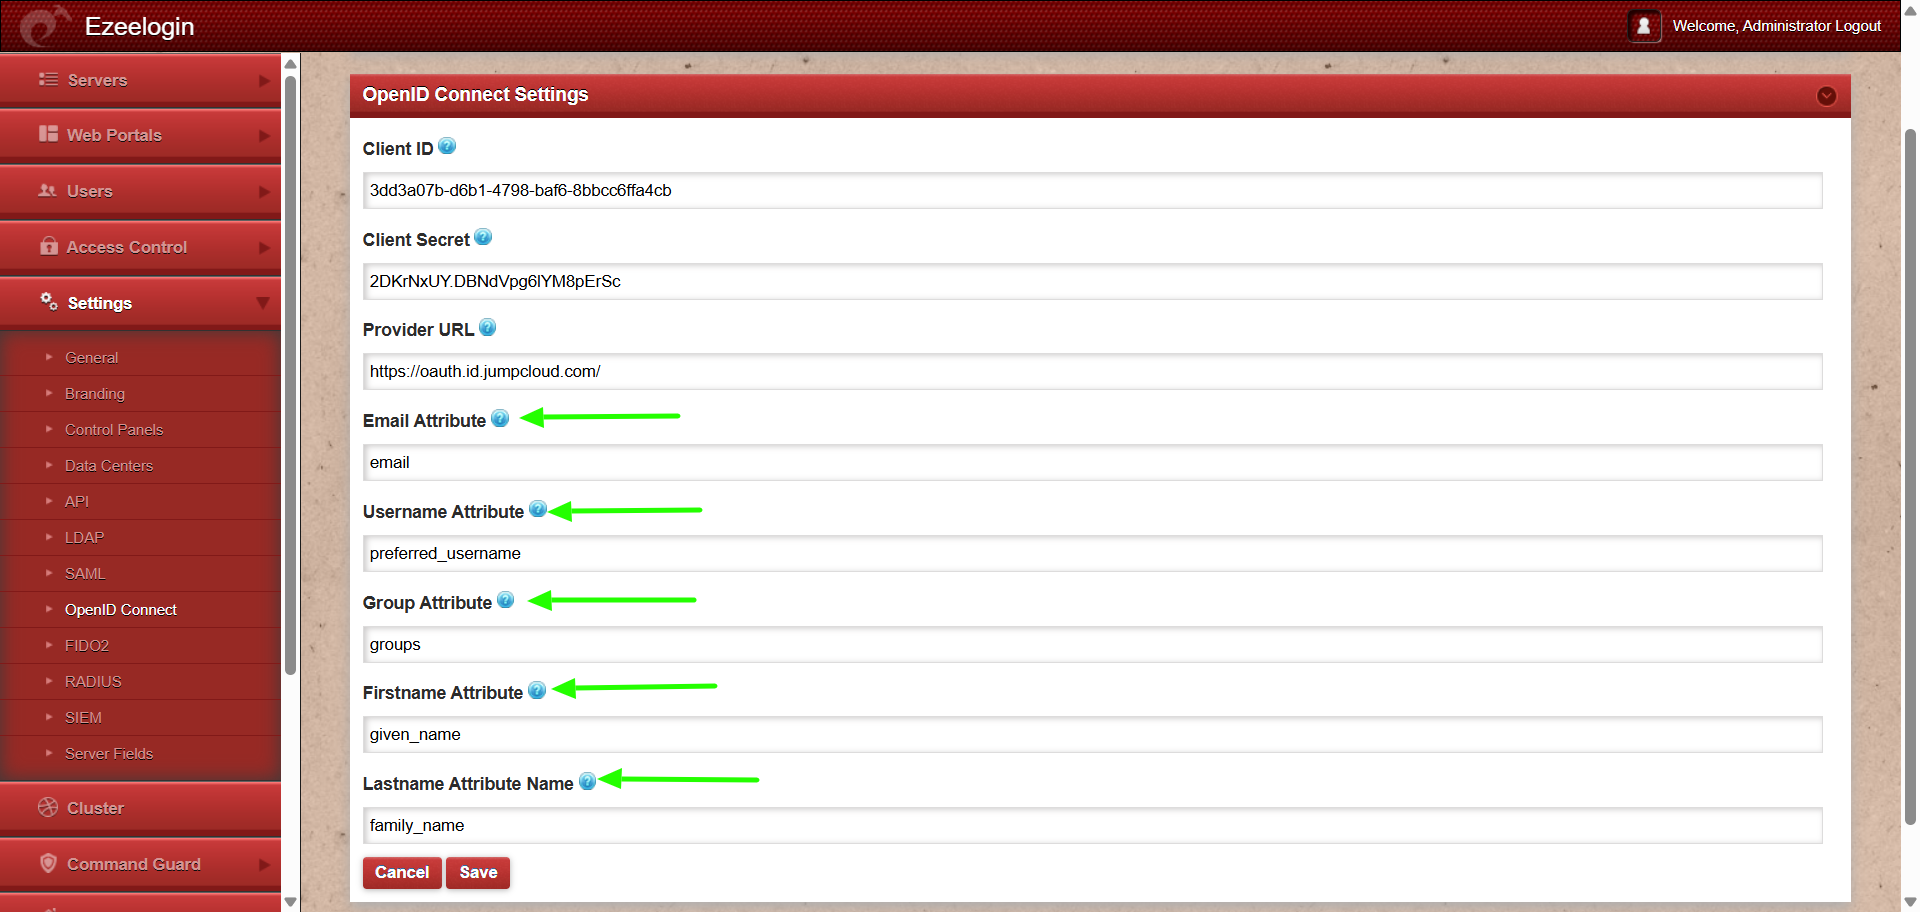
Step 9: Provide the attribute names in the web GUI which can be found under "Service Provider Attribute Name" section of JumpCloud. After providing all the attributes click on "Save"
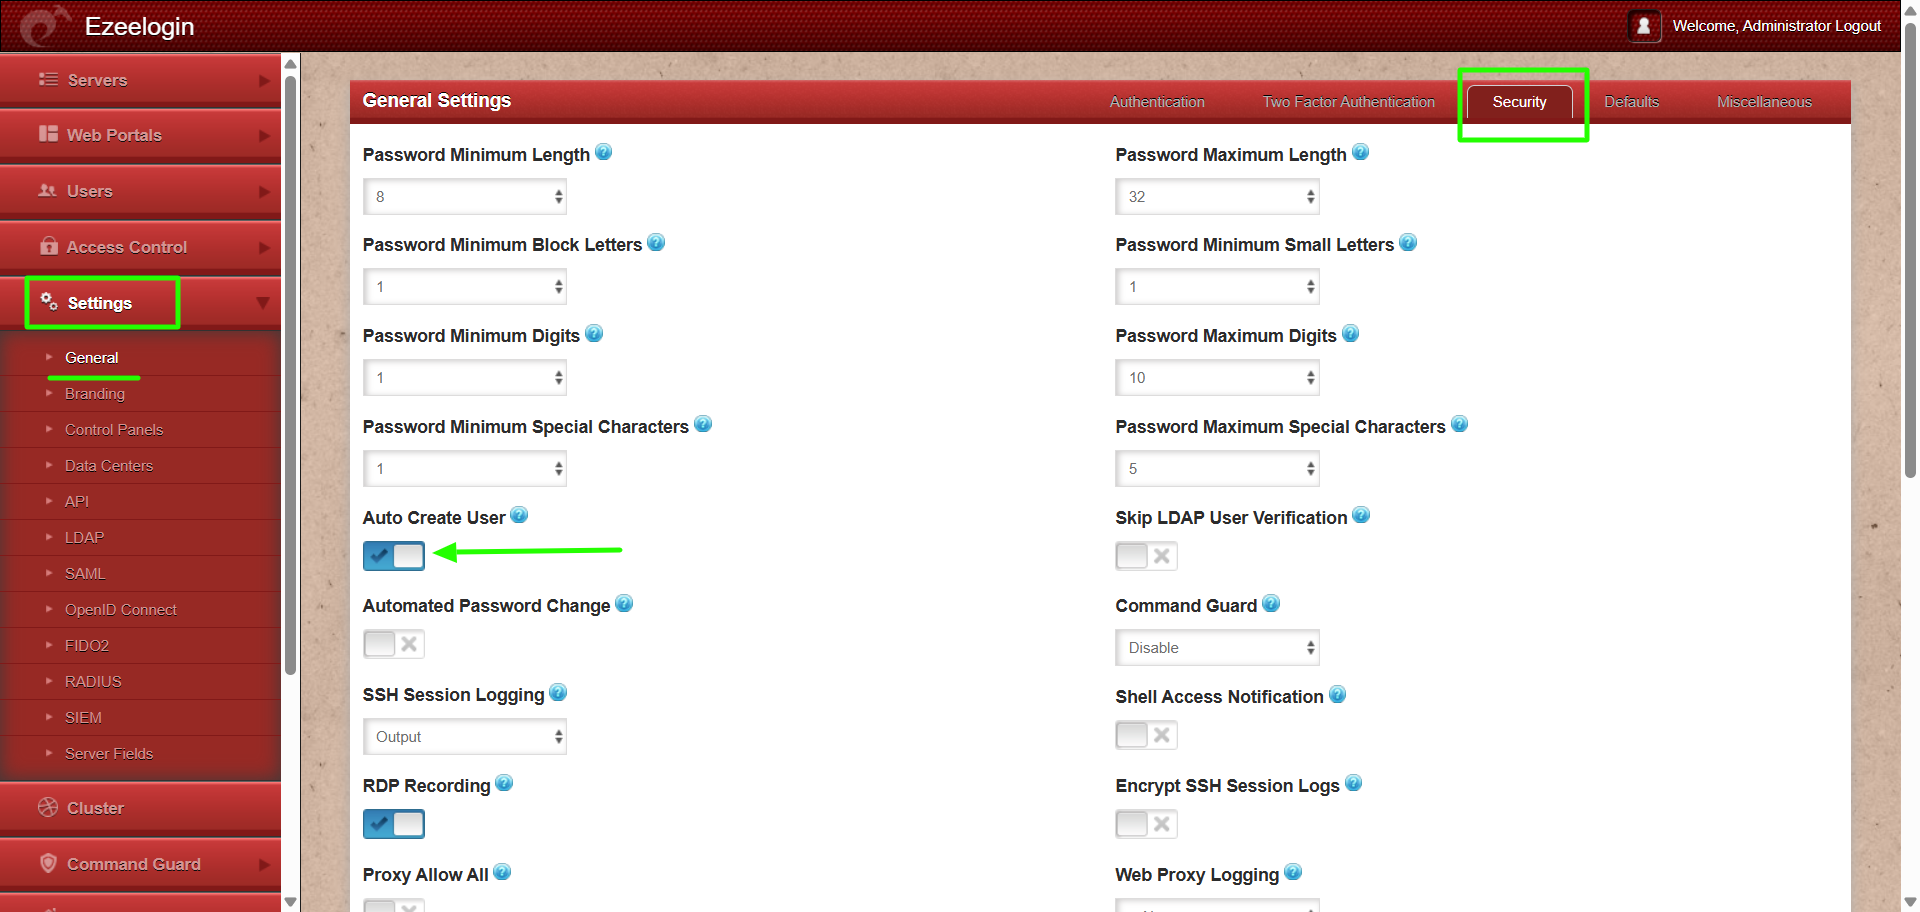
 Step 10: Enable Auto Create User from Ezeelogin GUI -> Settings -> General -> Security -> Enable Auto Create User, so the user will automatically created after successful authentication from Jumpcloud.
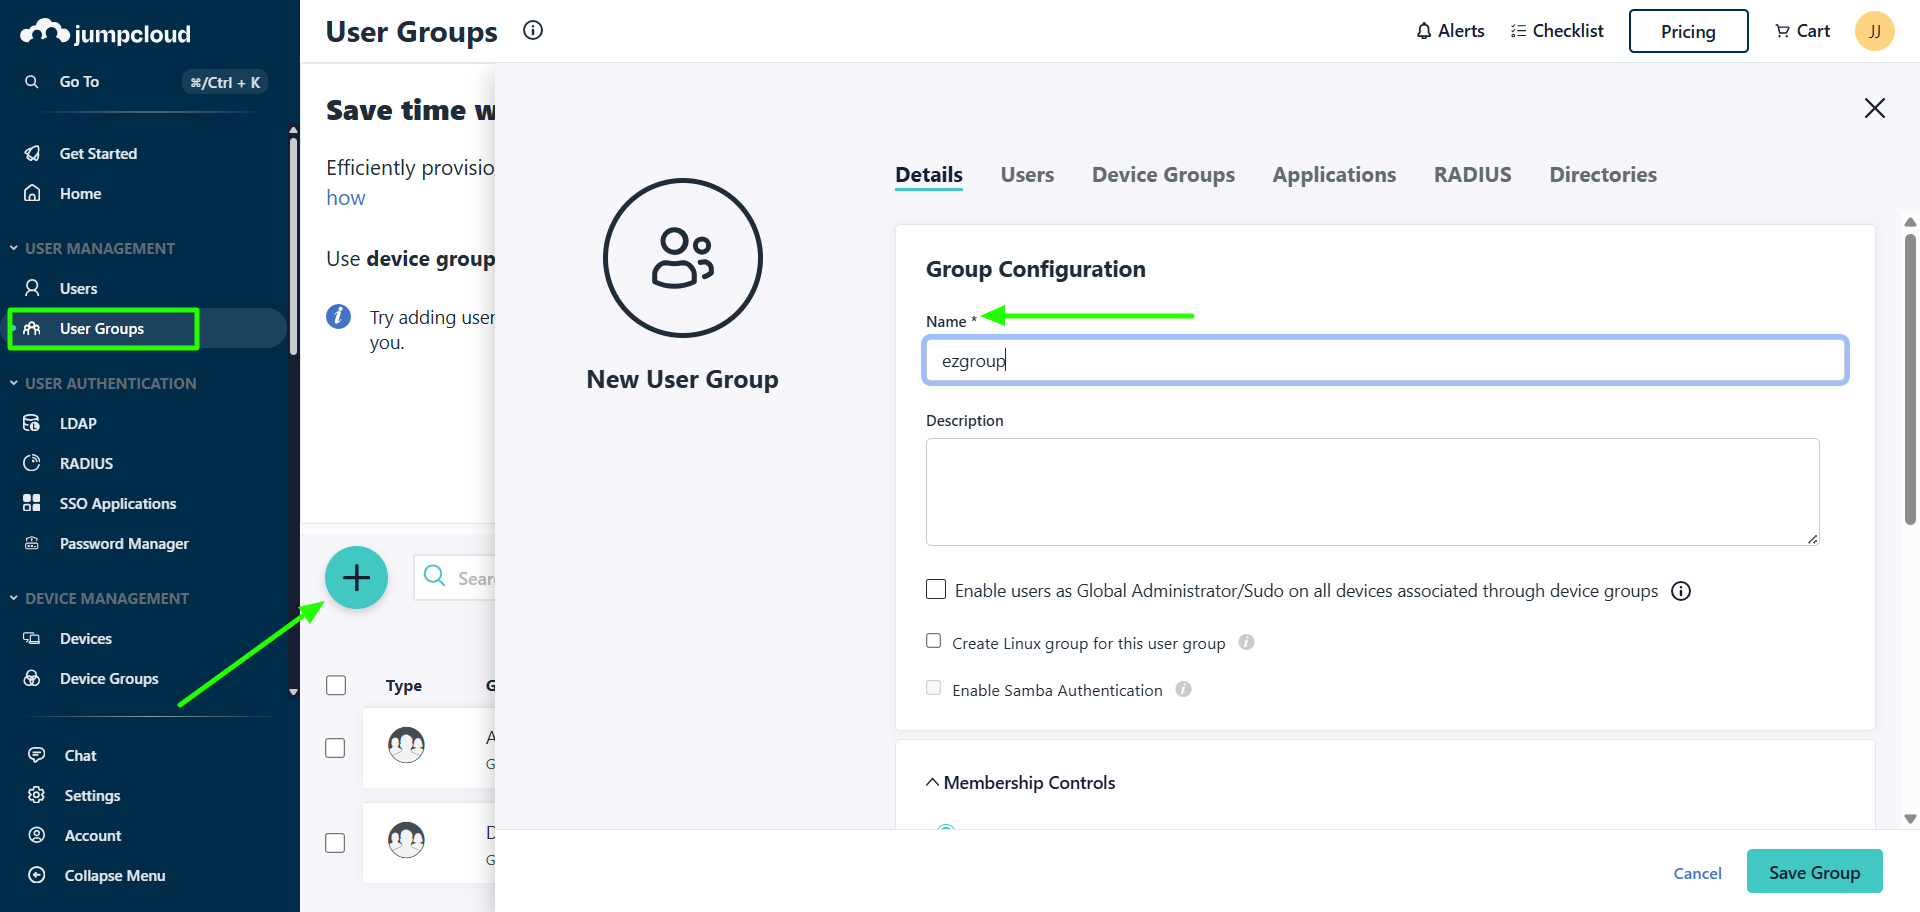
Step 11: Create usergroup in Jumpcloud
Step 11(A): Select the user group tab from the left panel, add the user group name.
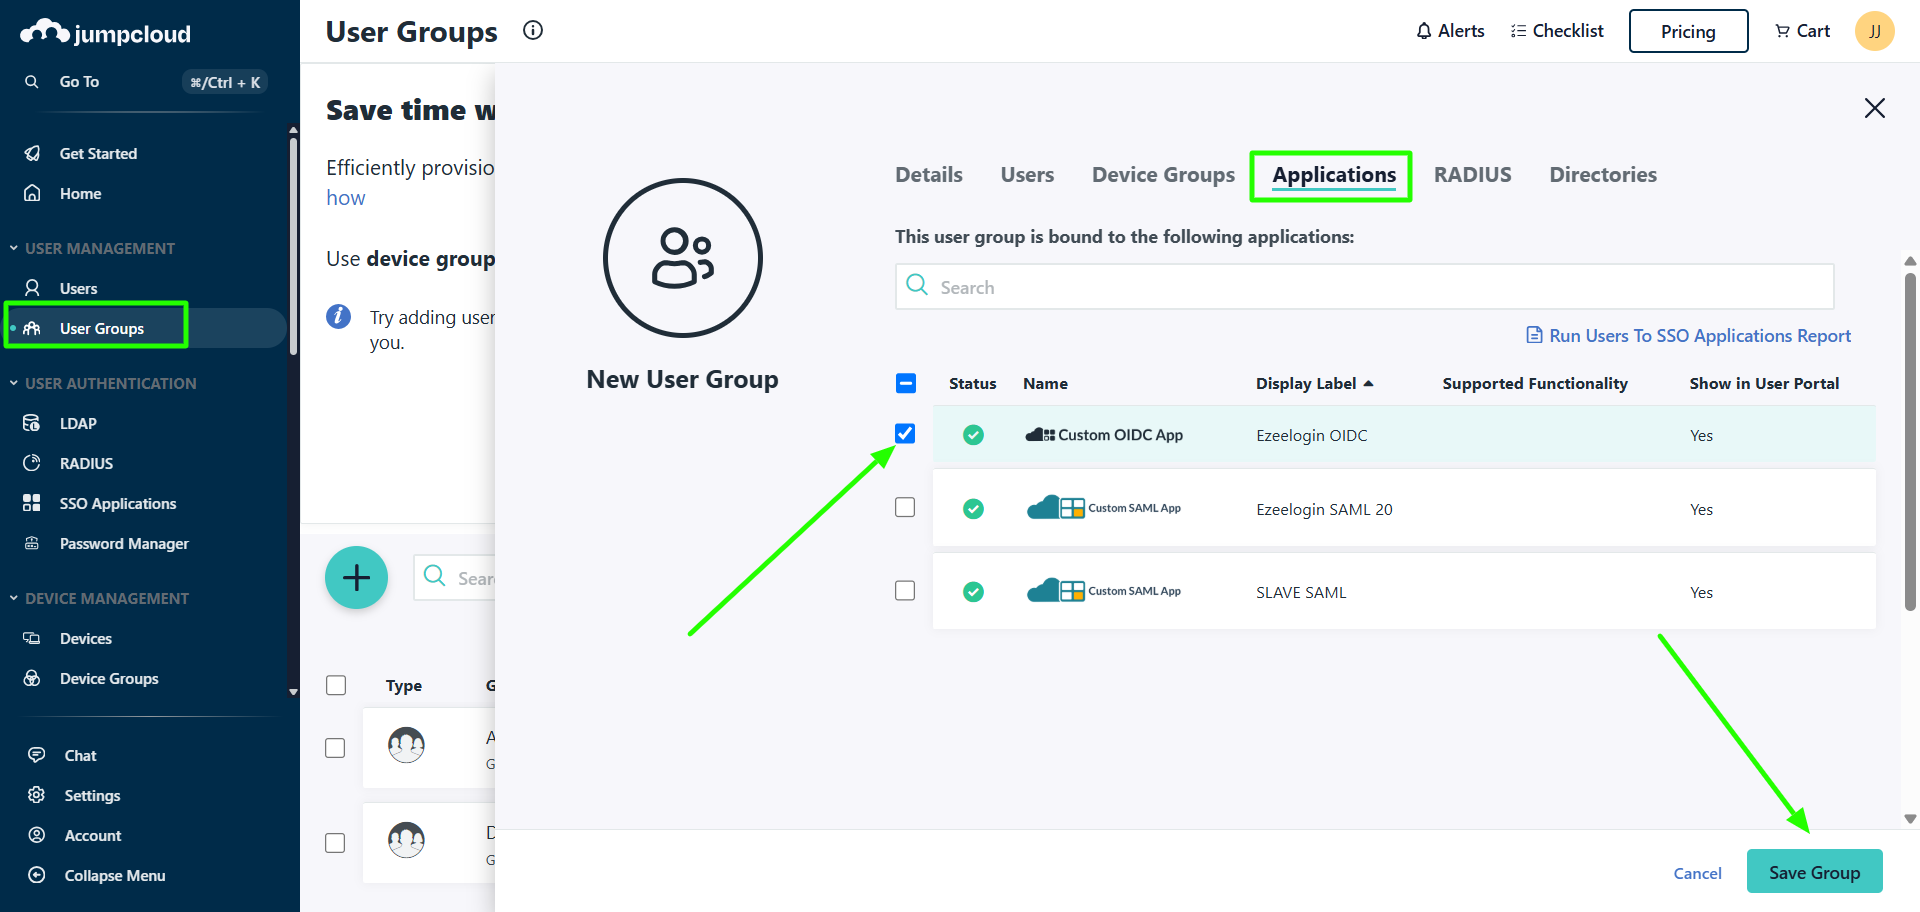
Step 11(B): Assign the usergroup to the OIDC application and save it.
Step 12: Create users in Jumpcloud
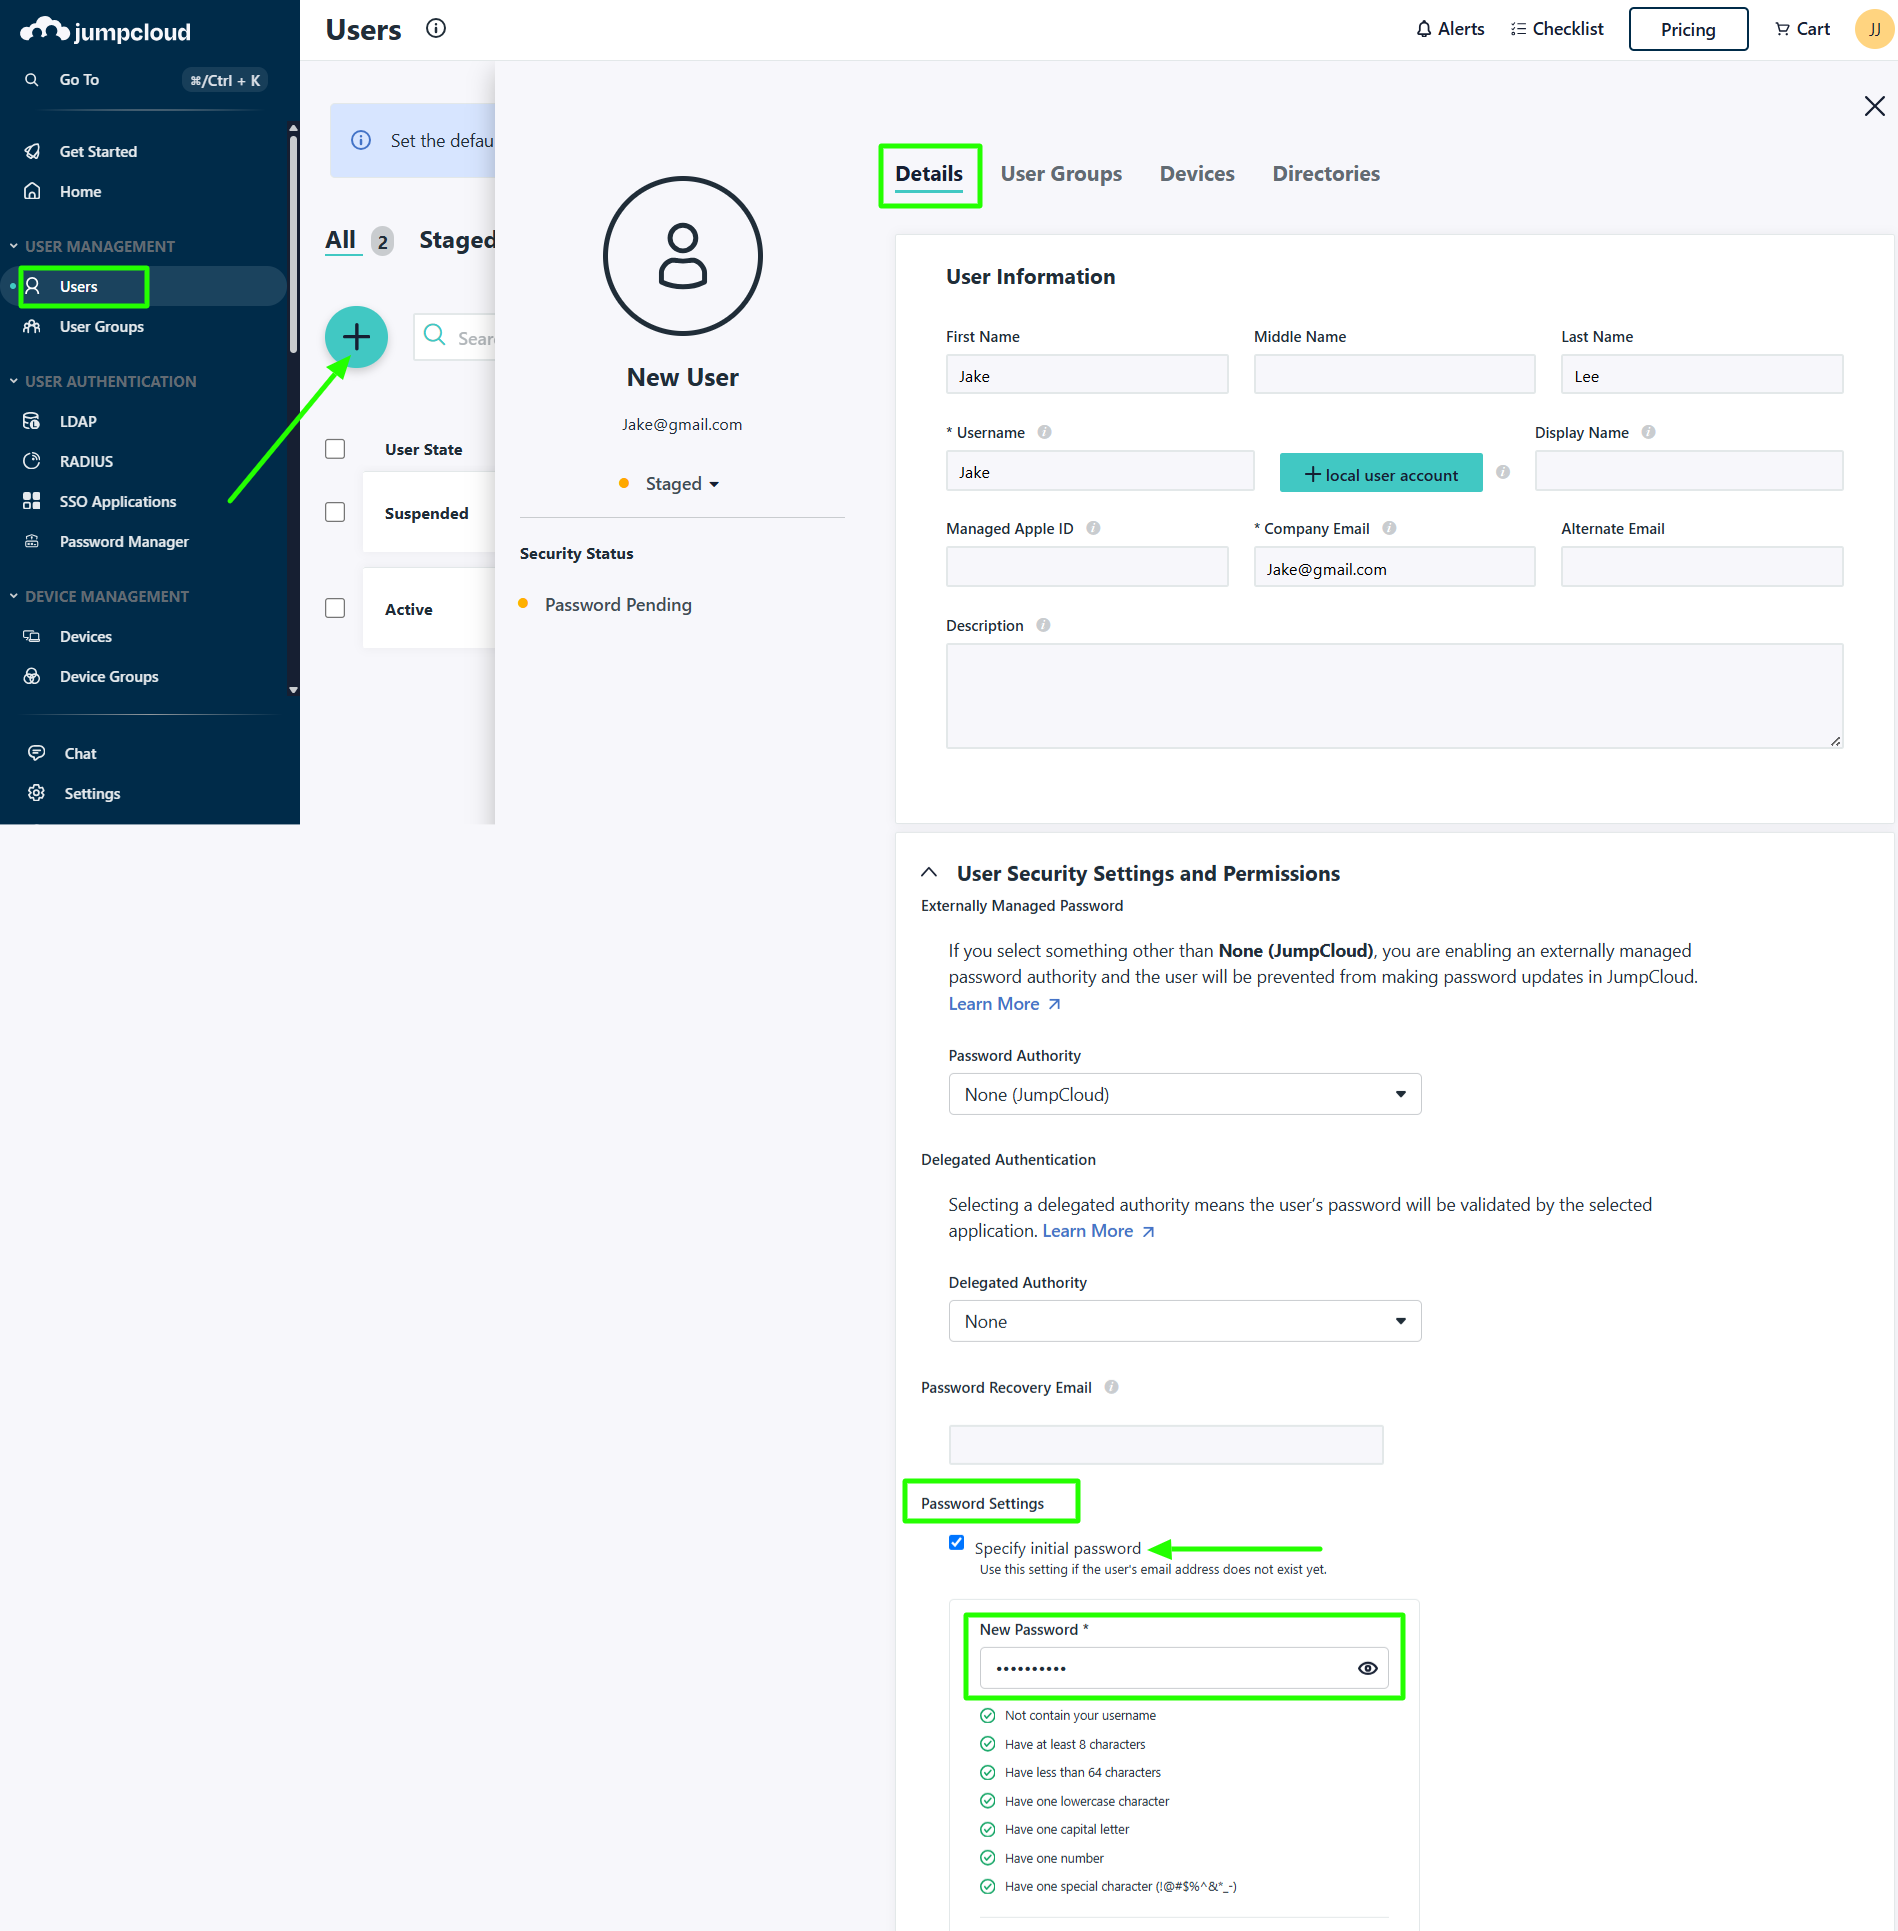
Step 12(A): To add users, navigate to Users tab, and click on + icon. This will open a form where you can enter the necessary user details and set a password for the user.
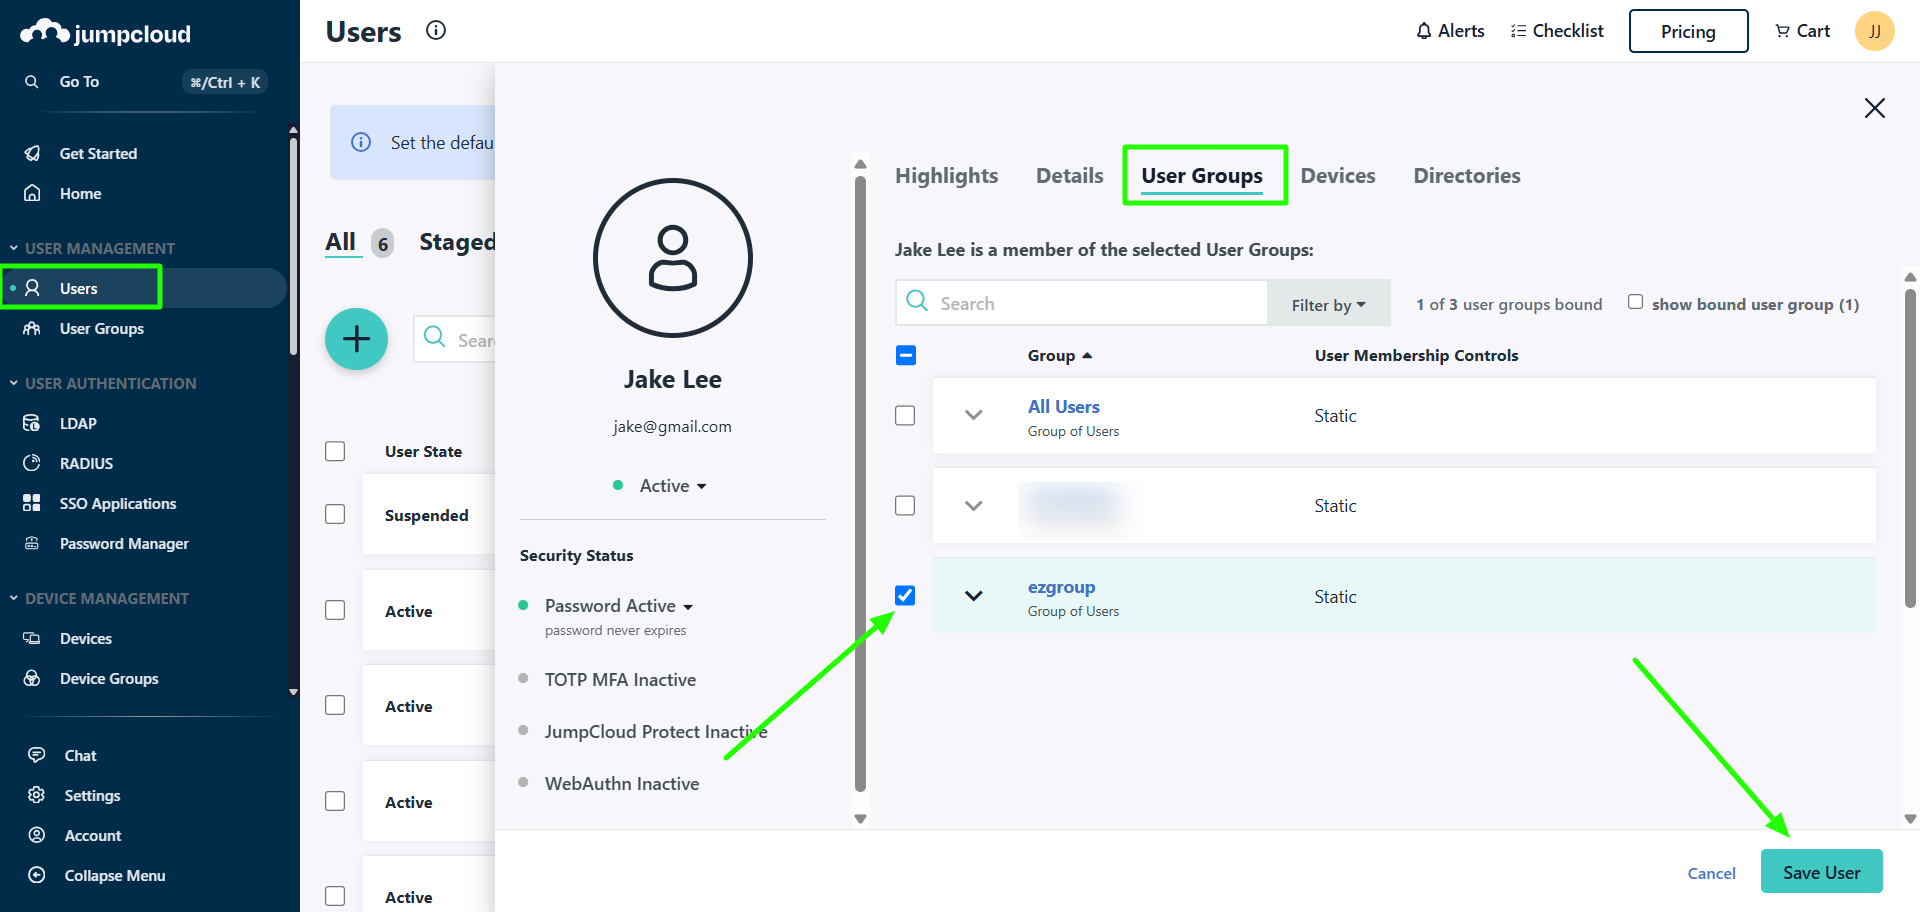
Step 12(B): Assign usergroup for the new user and save it
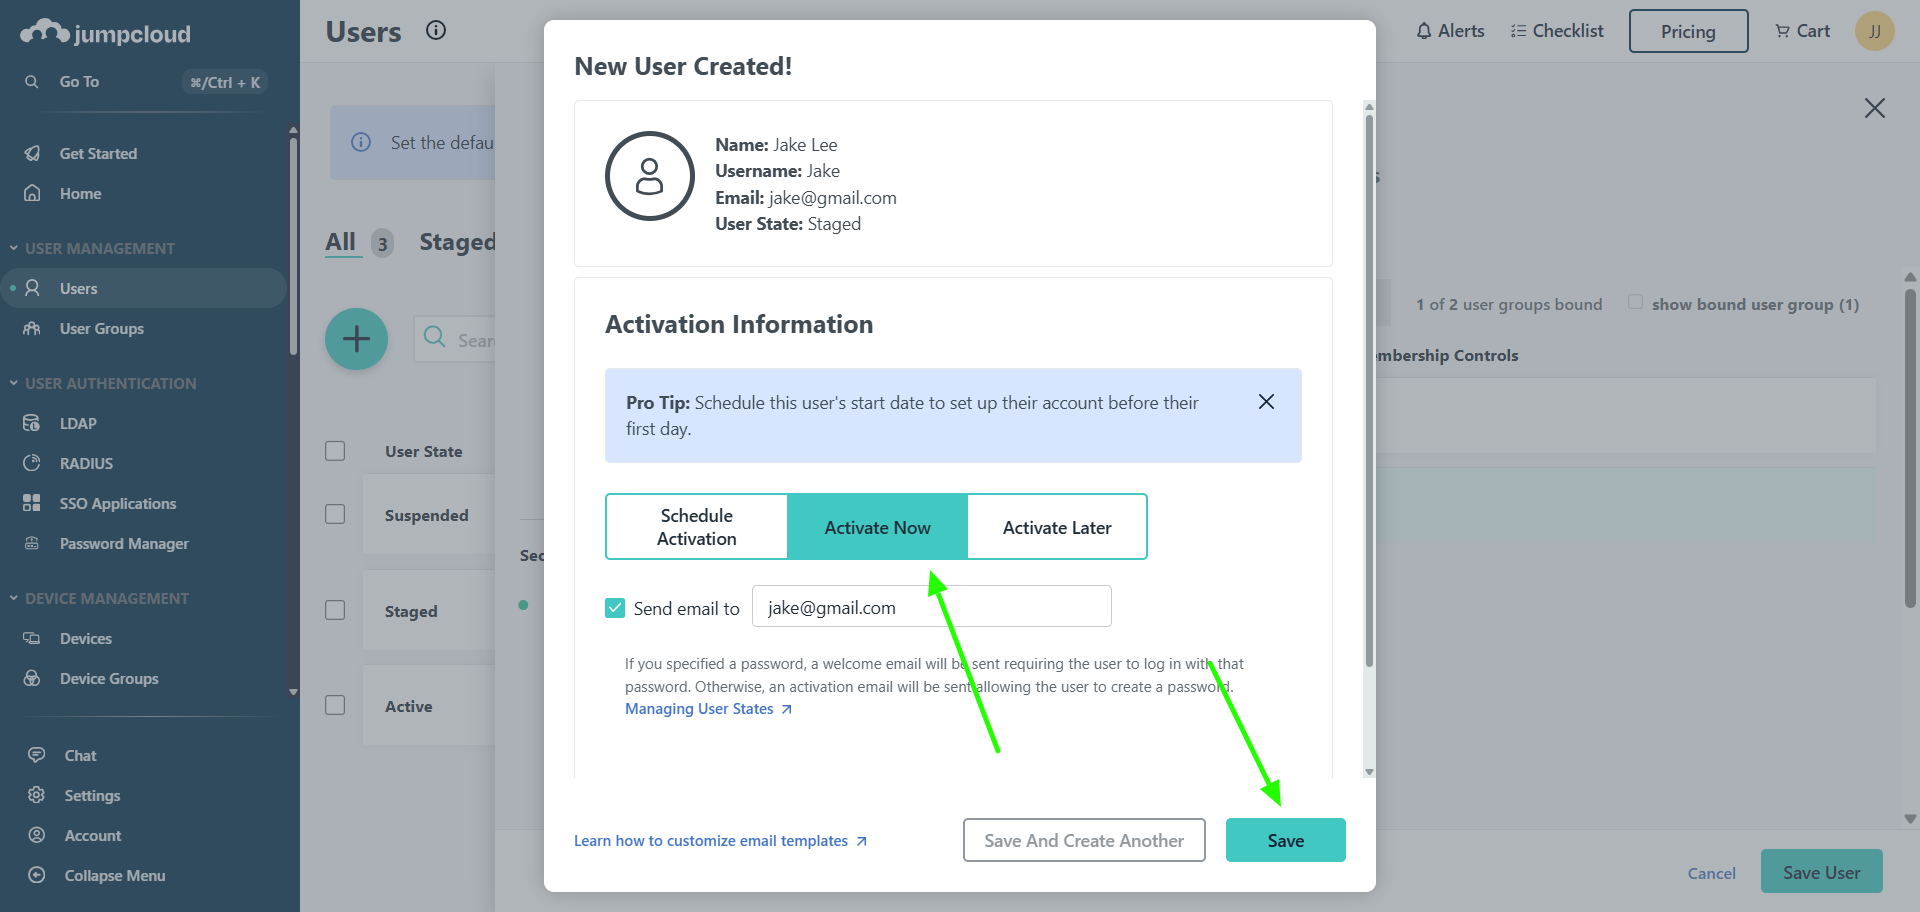
Step 12(C): Next activate the new user and click on save.
Step 13: Set Web Panel Authentication to OpenID Connect under Settings -> General -> Authentication -> OpenID Connect.

Step 14: Login into the Ezeelogin GUI and you will see the Jumpcloud login Page where you will need to enter the Jumpcloud user login credentials to be authenticated into the Ezeelogin.

Step 15: Finally, you will be logged into the web GUI using OpenID Connect Authentication. The user will be created automatically in Ezeelogin after successful authentication from Jumpcloud.

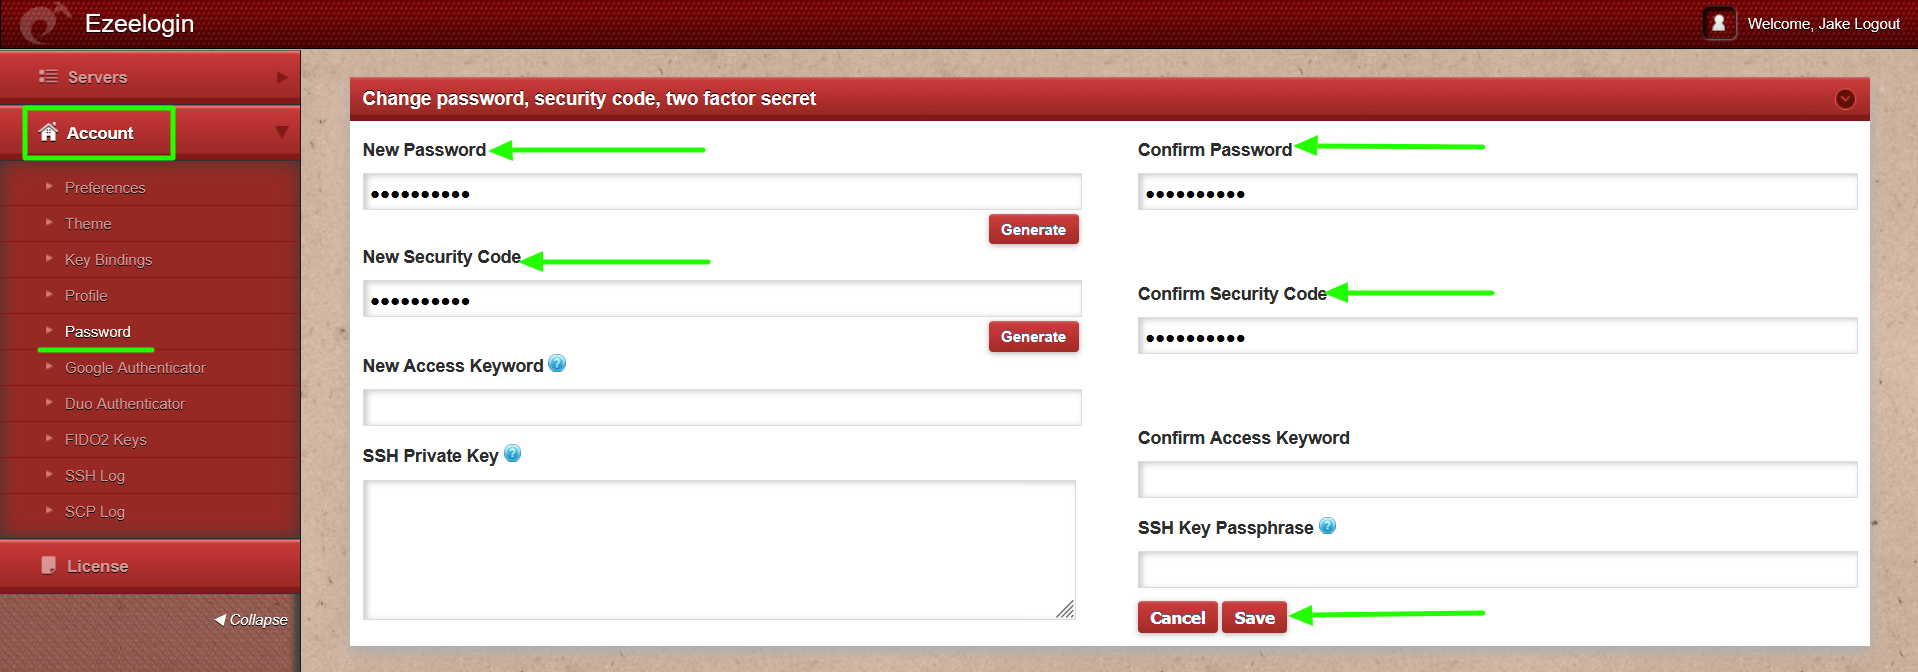
Step 16: After logging into the GUI, you need to reset the password and security code of the user under Account -> Password in order to SSH to the ezsh shell.
Step 17:You can log in to Ezeelogin shell via Webssh shell or using any SSH client such as Putty or terminal etc.
Step 17(A): Click on the 'Open Web SSH Console' icon to SSH via the browser.

Step 17(B): After resetting the password and security code you can SSH to the ezsh shell (using Terminal or Putty) with the OpenID connect username.

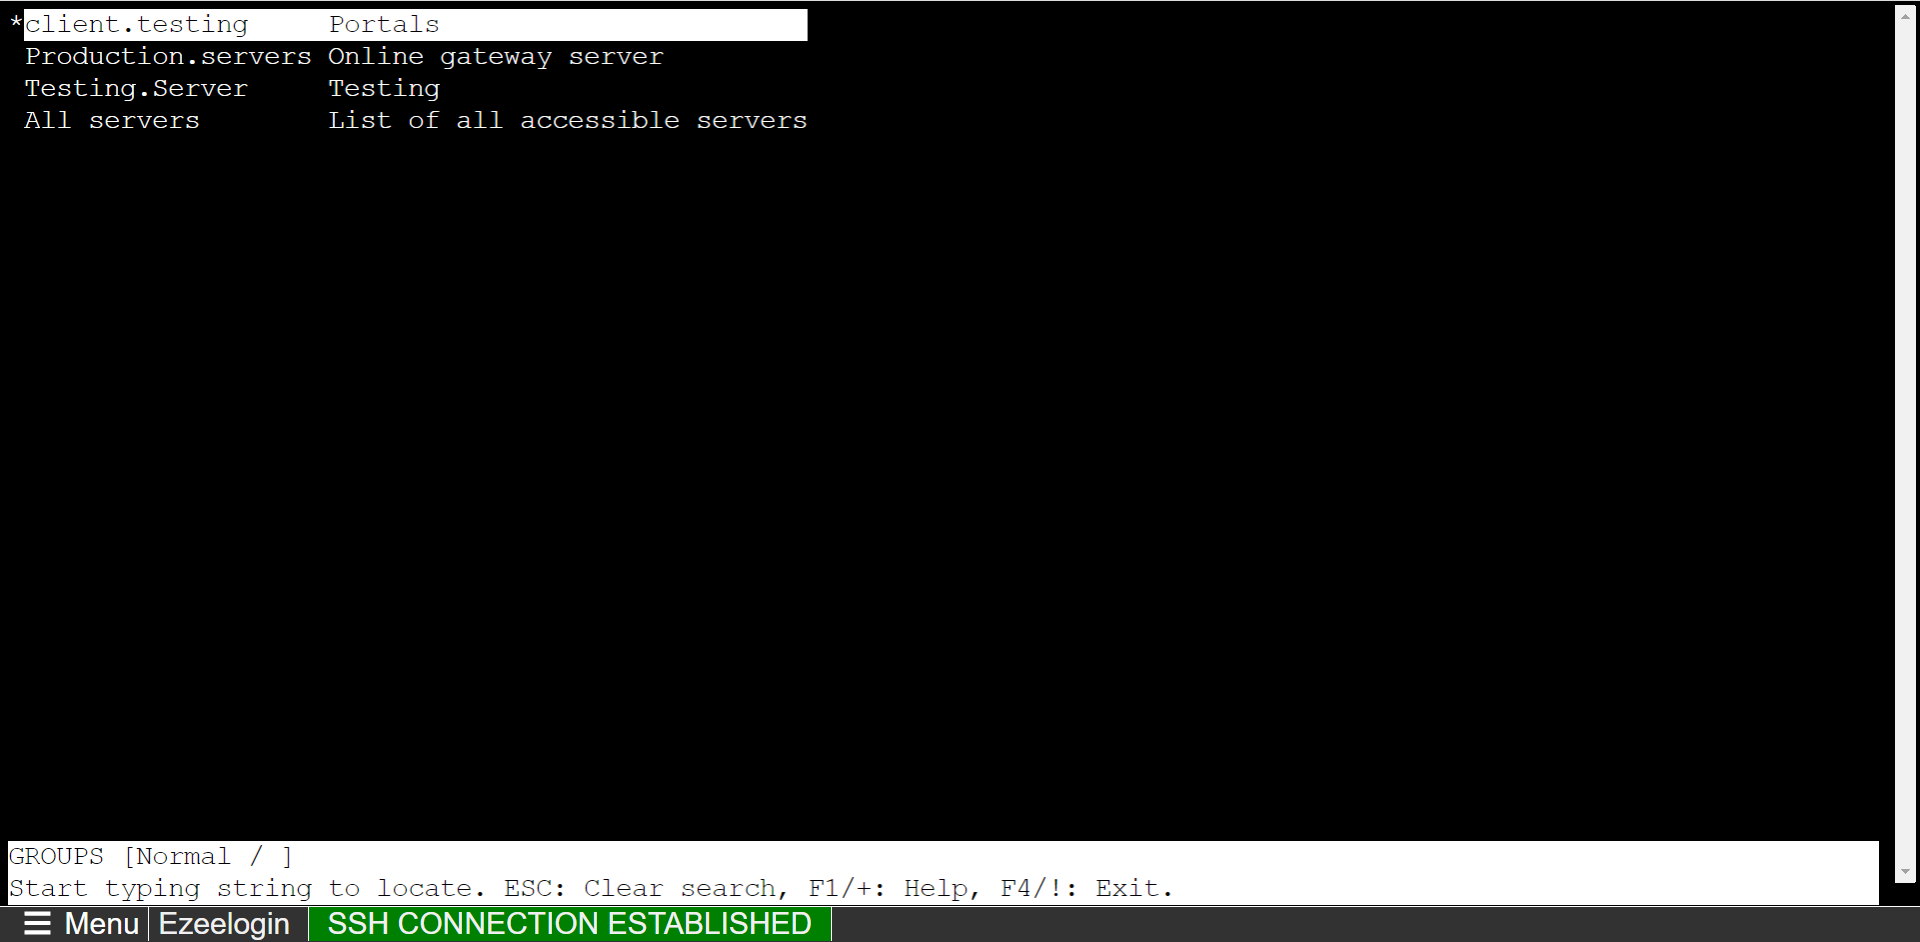
Step 18: After logging into ezsh, the server list will be visible. The user can navigate using the Up and Down arrow keys and login to a server by pressing the Enter key.
How to map Jumpcloud users to the same user group in Ezeelogin?
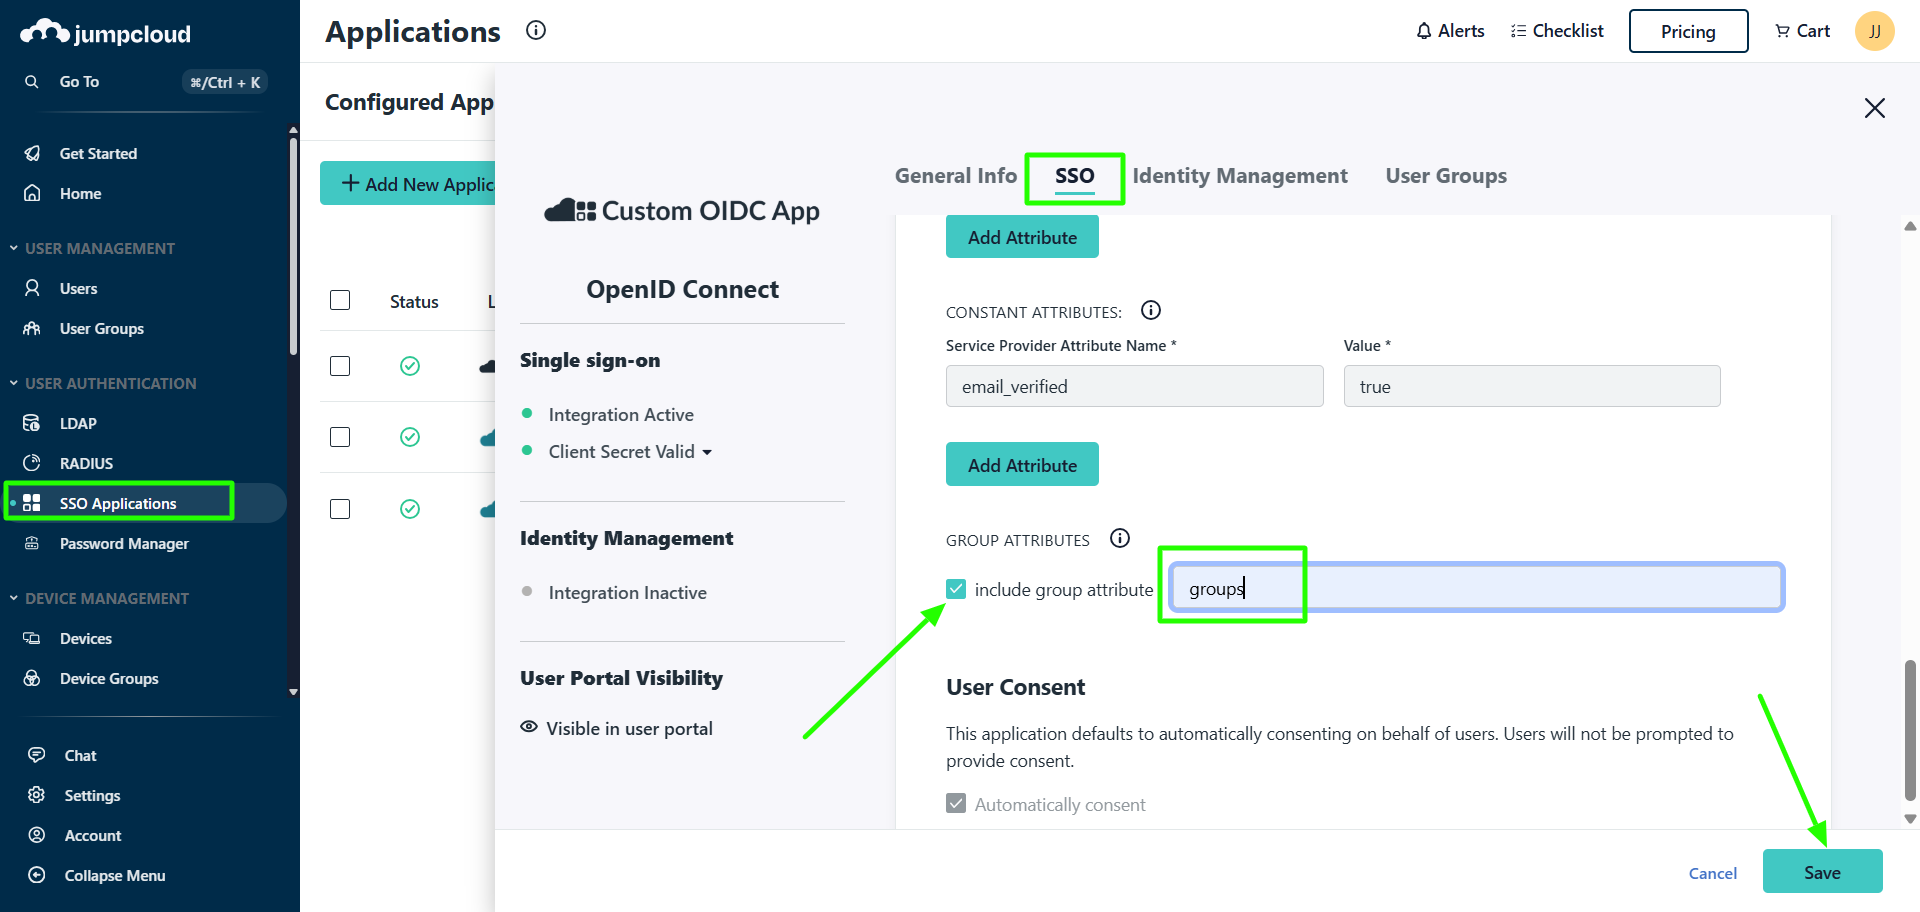
Step 1: Edit your custom OIDC app, navigate to SSO, enable "Include Group Attribute," enter "groups" in the field, and save the changes.
Step 2: Create the user group and users, then assign the user group for the users as specified in Steps 11 and 12.
Step 3: Create a user group in the web GUI with the same name as in Jumpcloud with priority set as mentioned below.

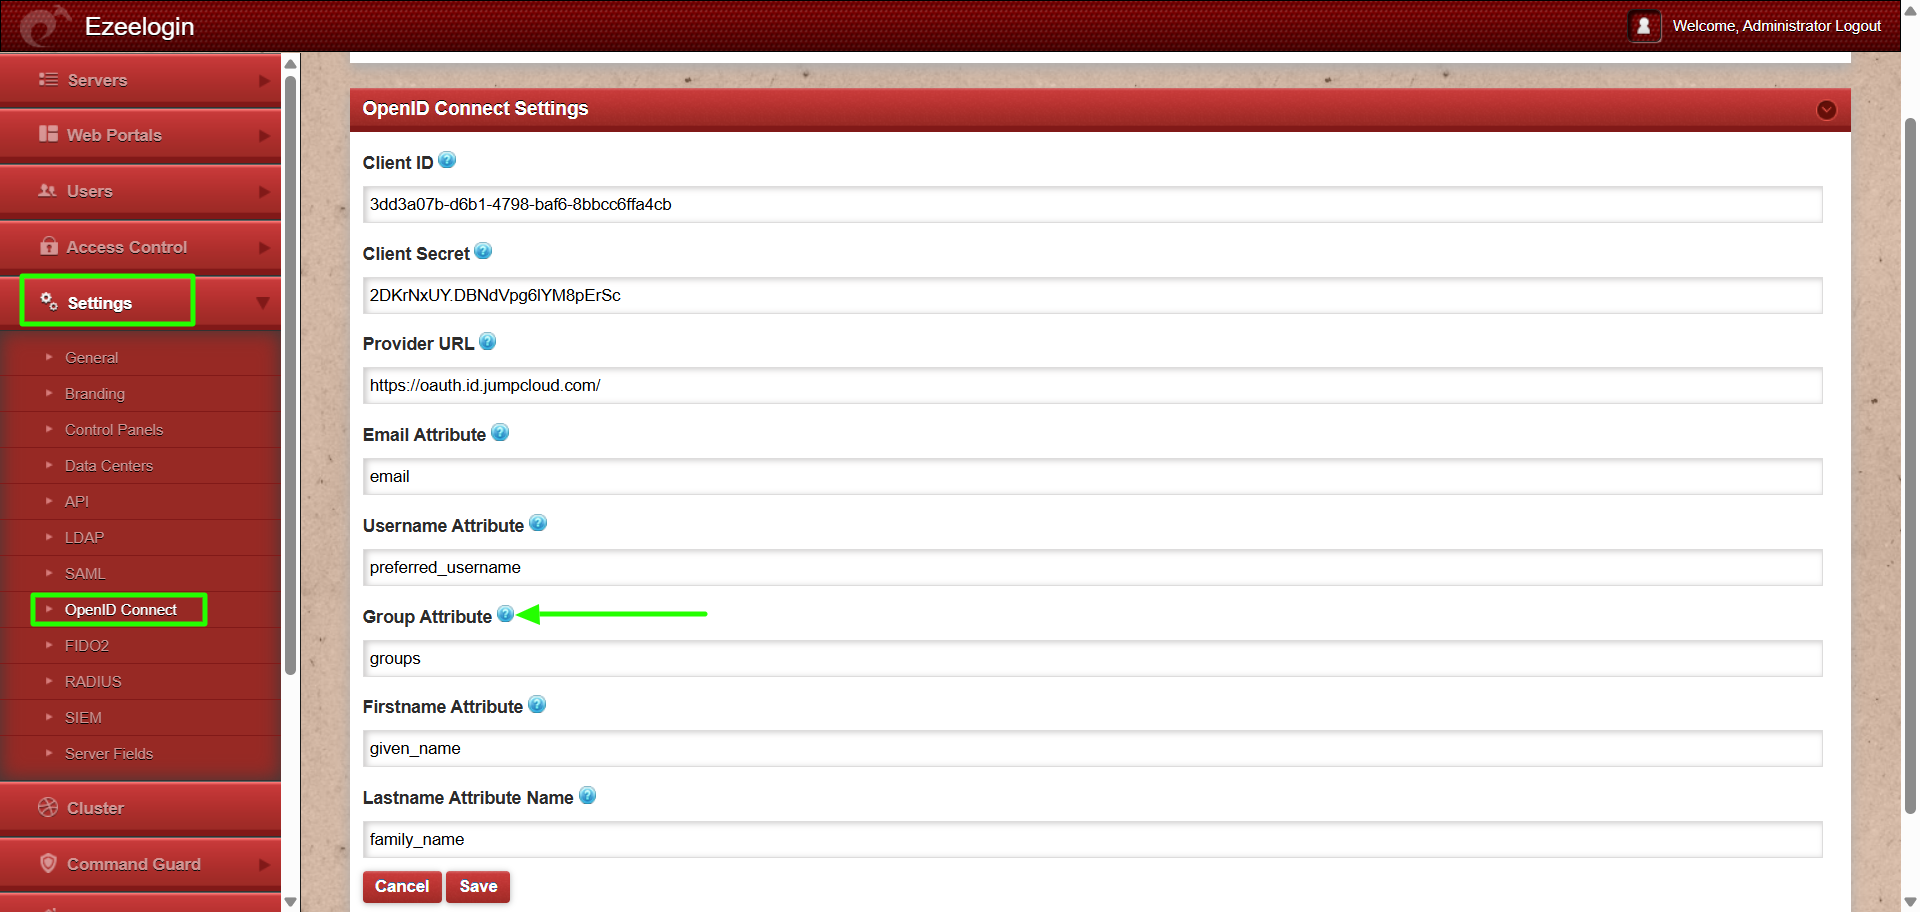
Step 4: In the web GUI. Navigate to Settings > OpenID Connect > Add the group attribute name and save it.
Step 5: Log in to the web GUI using JumpCloud user credentials, and the user will be assigned to the same group in Ezeelogin as in JumpCloud.


How to add additional scope from Jumpcloud OpenID connect to Ezeelogin jumpserver?
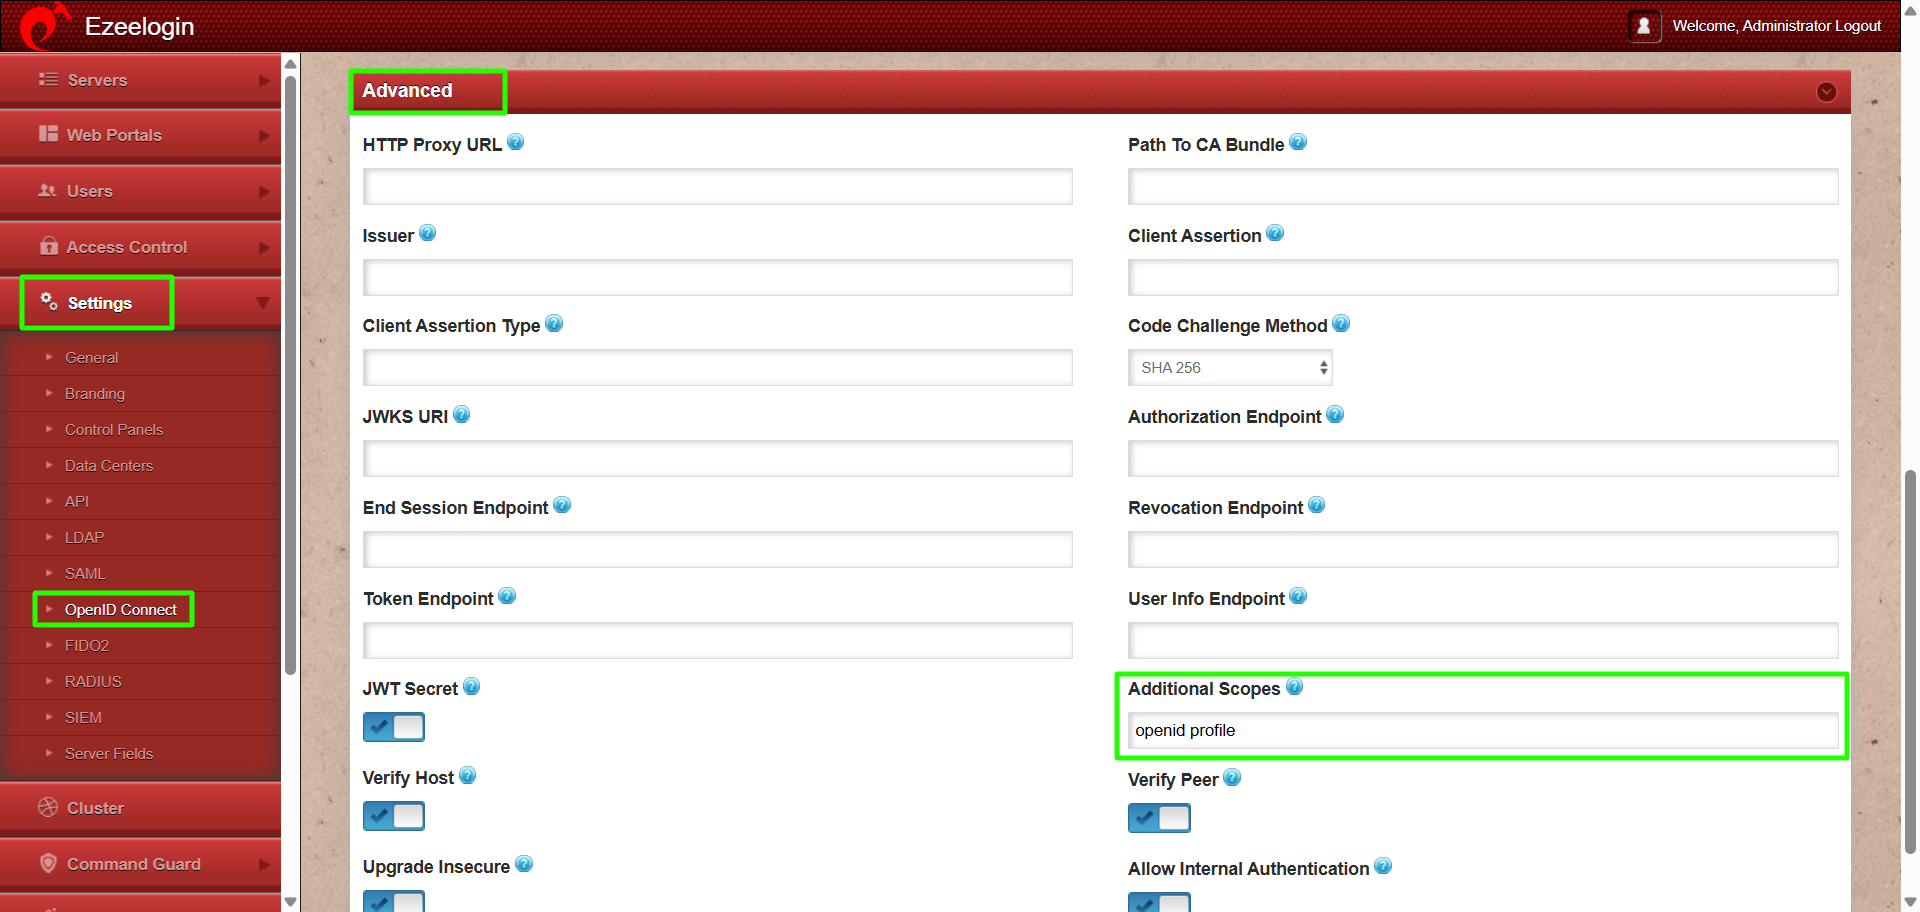
Step 1: Navigate to Settings -> OpenID Connect under OIDC advanced settings, specify the additional scopes separated by spaces, and save the settings.
This feature is available from Ezeelogin version 7.41.0. Refer article to upgrade Ezeelogin to the latest version.
Related Articles: