How to implement themes for your interface design
How can you set the login page themes, background, GUI themes and login page notice in web GUI?
Overview: This article describes how to customize the Ezeelogin web GUI by setting login themes, background images, GUI themes, logos, and titles for the login page, web panel, and terminal to enhance user experience and branding.
1. Add a theme to the login page of WebGUI.
The following steps would reflect globally on all users.
Step 1(A): Navigate to Settings > General > Miscellaneous > Login theme parameter > choose any of the options given (white/Dark/Wood/Papyrus) and Save it.
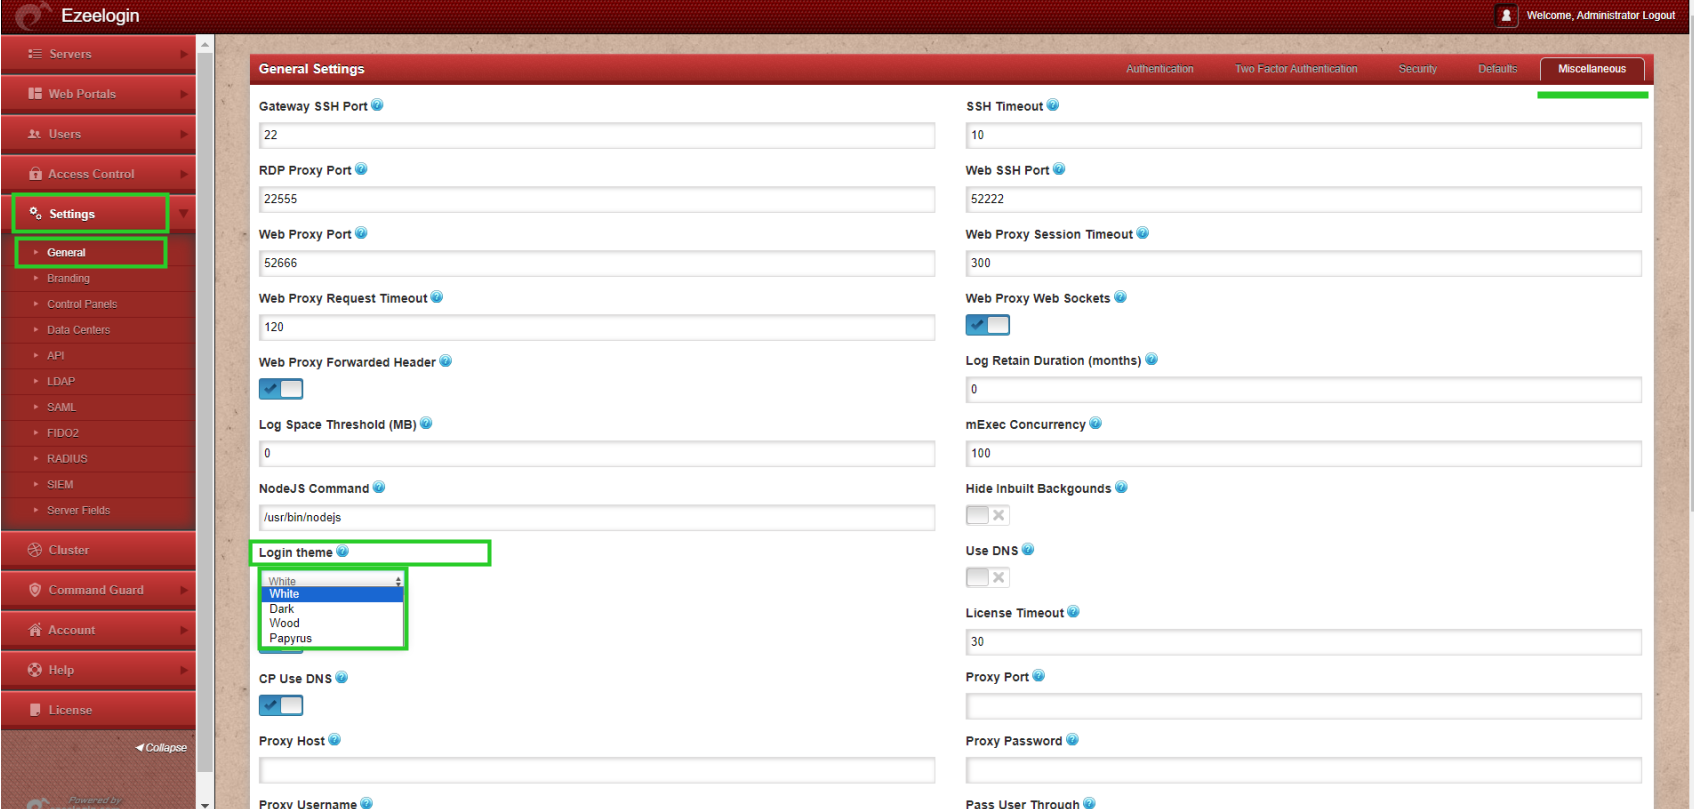
Step 1(B): Refer to the screenshots for login theme interfaces:


2. A sequential guide to adding a theme to the webGUI pages.
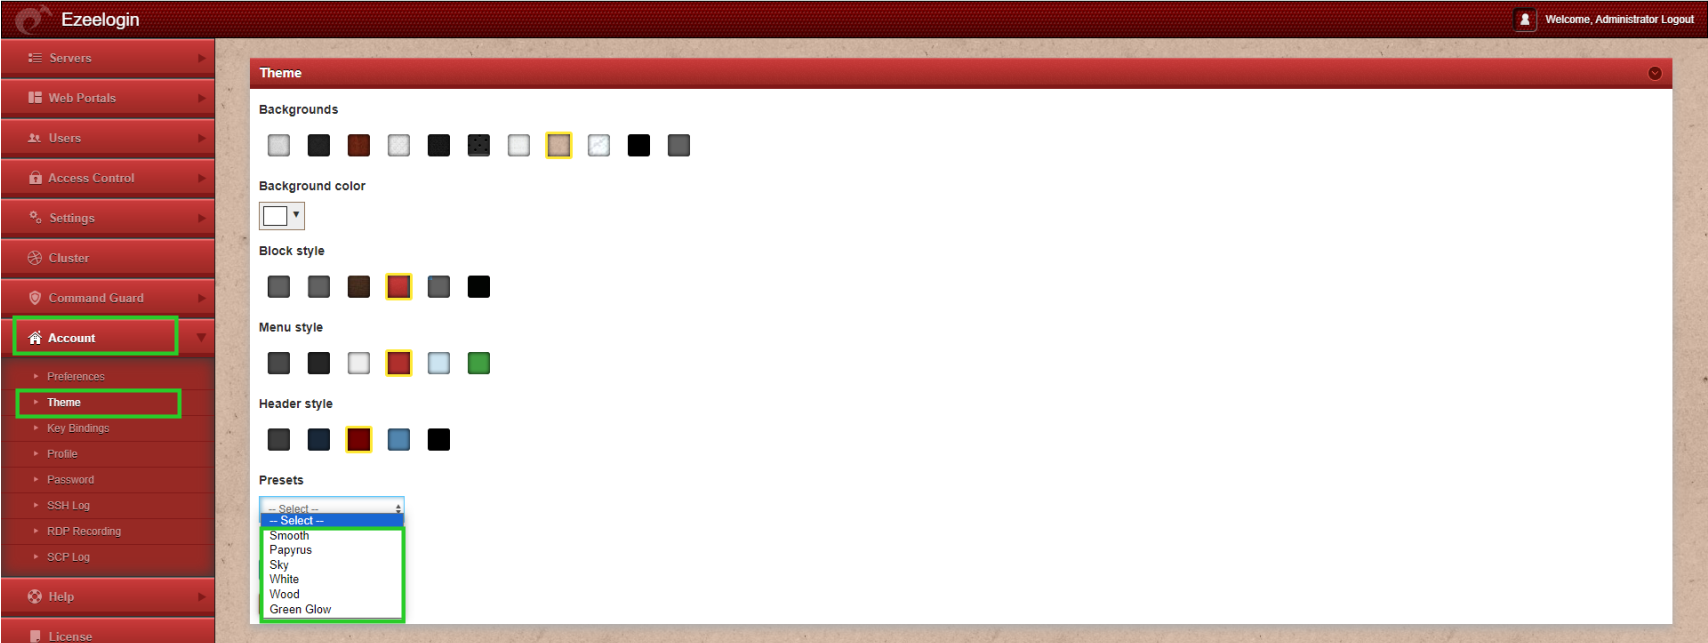
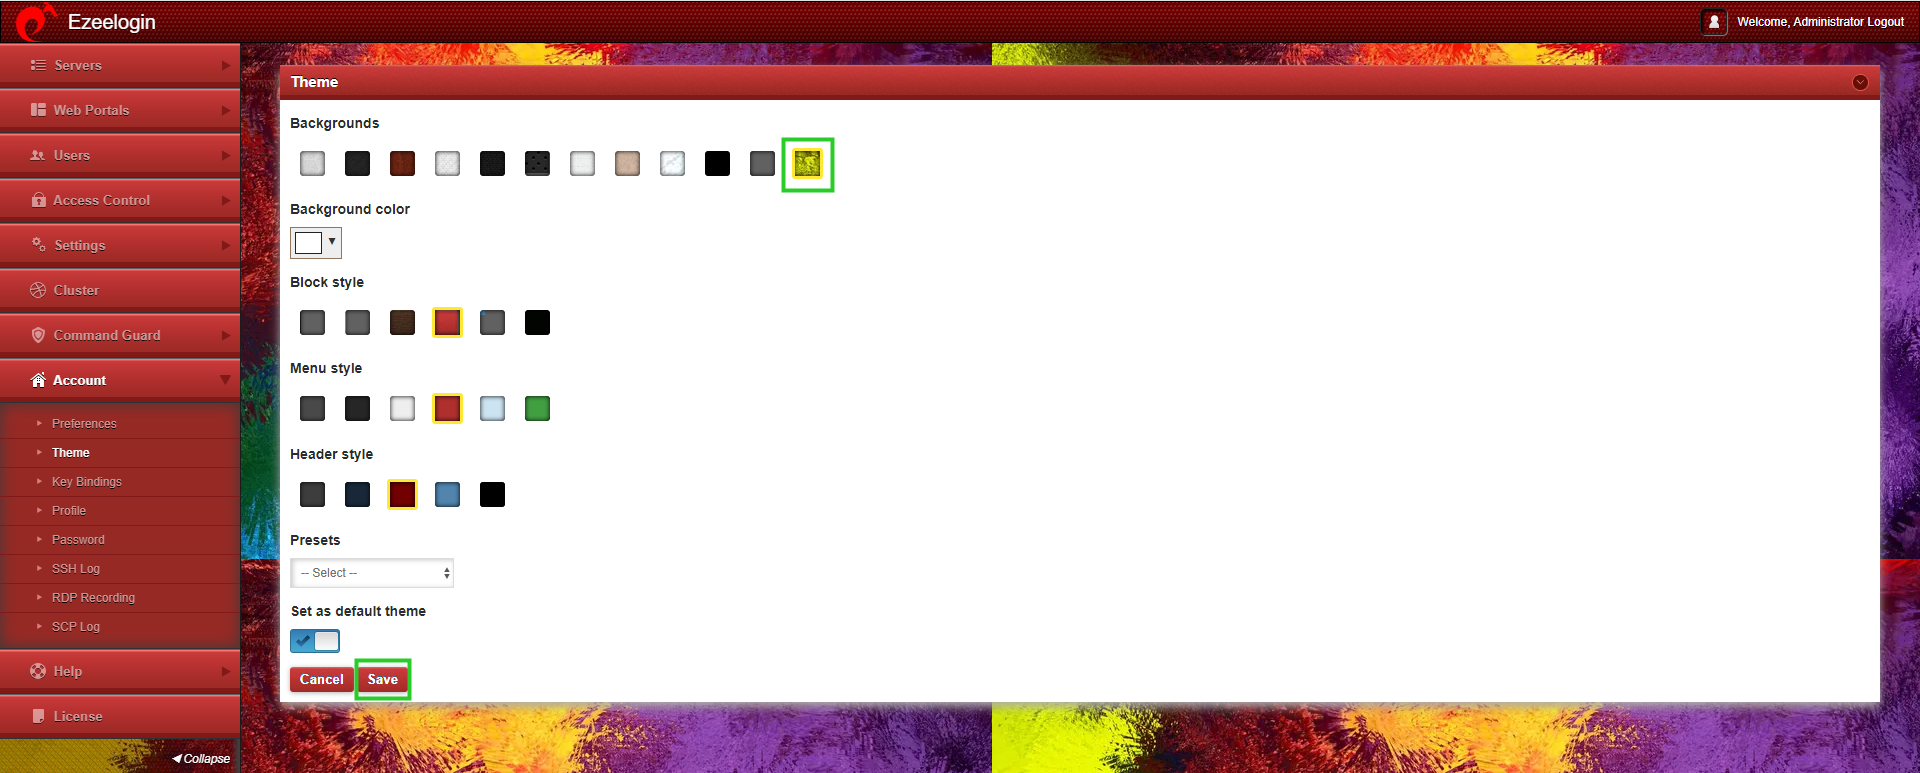
Step 2(A): Navigate to Account > Theme > choose the listed themes and set them as default. (Smooth, Papyrus, sky, white, wood, Green glow)
Setting them as the default will apply changes globally to all users.
Step 2(B): If you opt not to set it as the default theme, changes will only affect individual users.
3. Set logo in Ezeelogin web panel
It is also possible to incorporate a logo into the Ezeelogin Panel and include your brand name for branding purposes.
The following steps would reflect globally on all users.
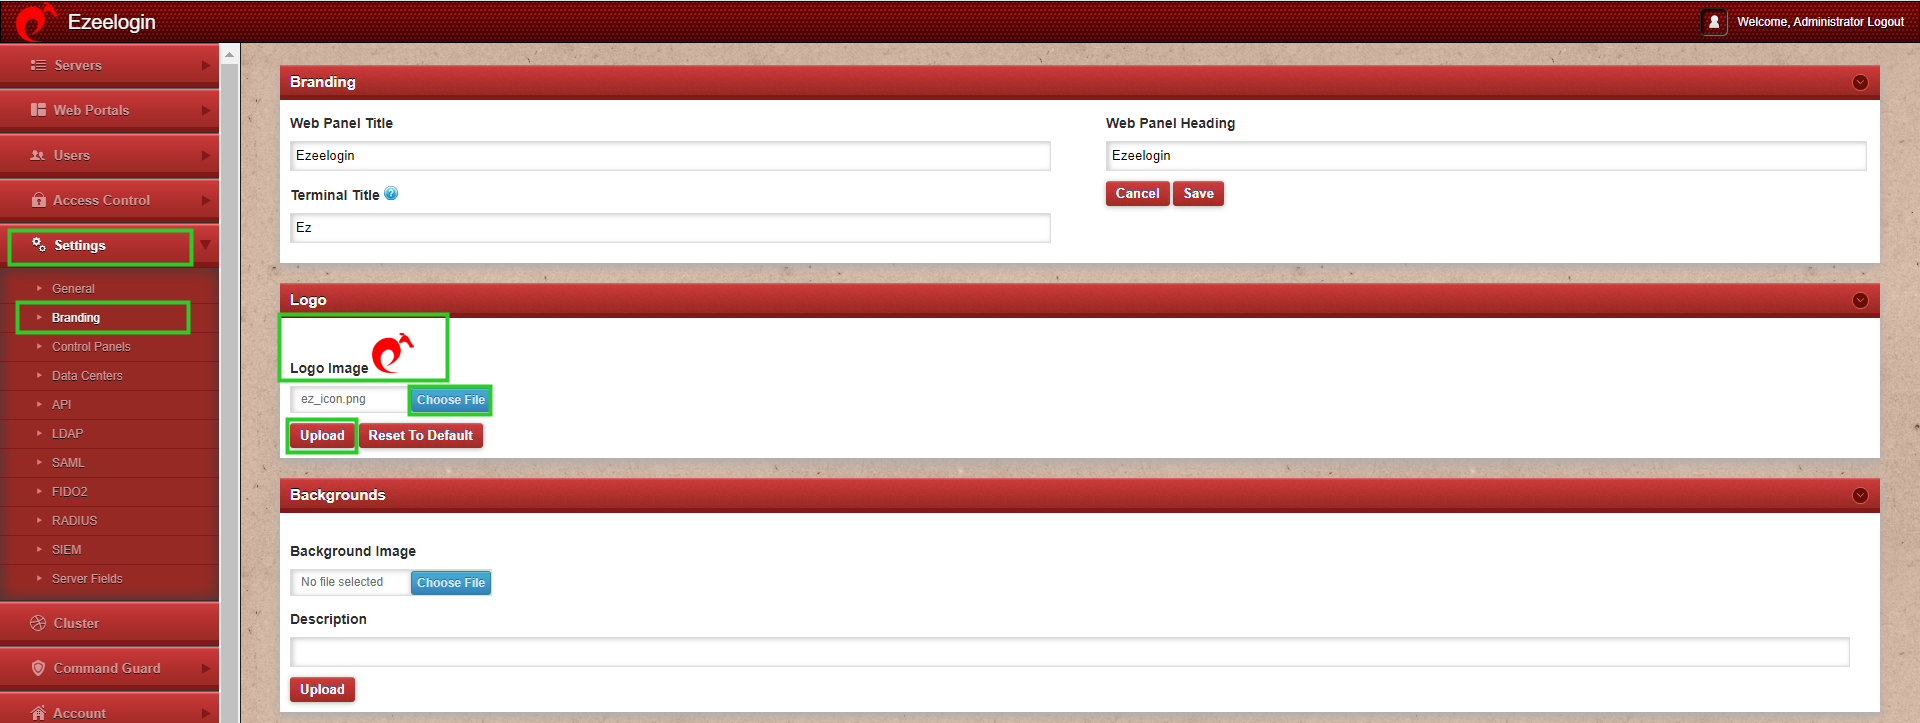
Step 3(A): Navigate to Settings > Branding > Add logo by choosing the file from your desktop and then upload it.
4. Customize the background image
Step 4(A): Choose the file from your desktop and add a description and upload it.
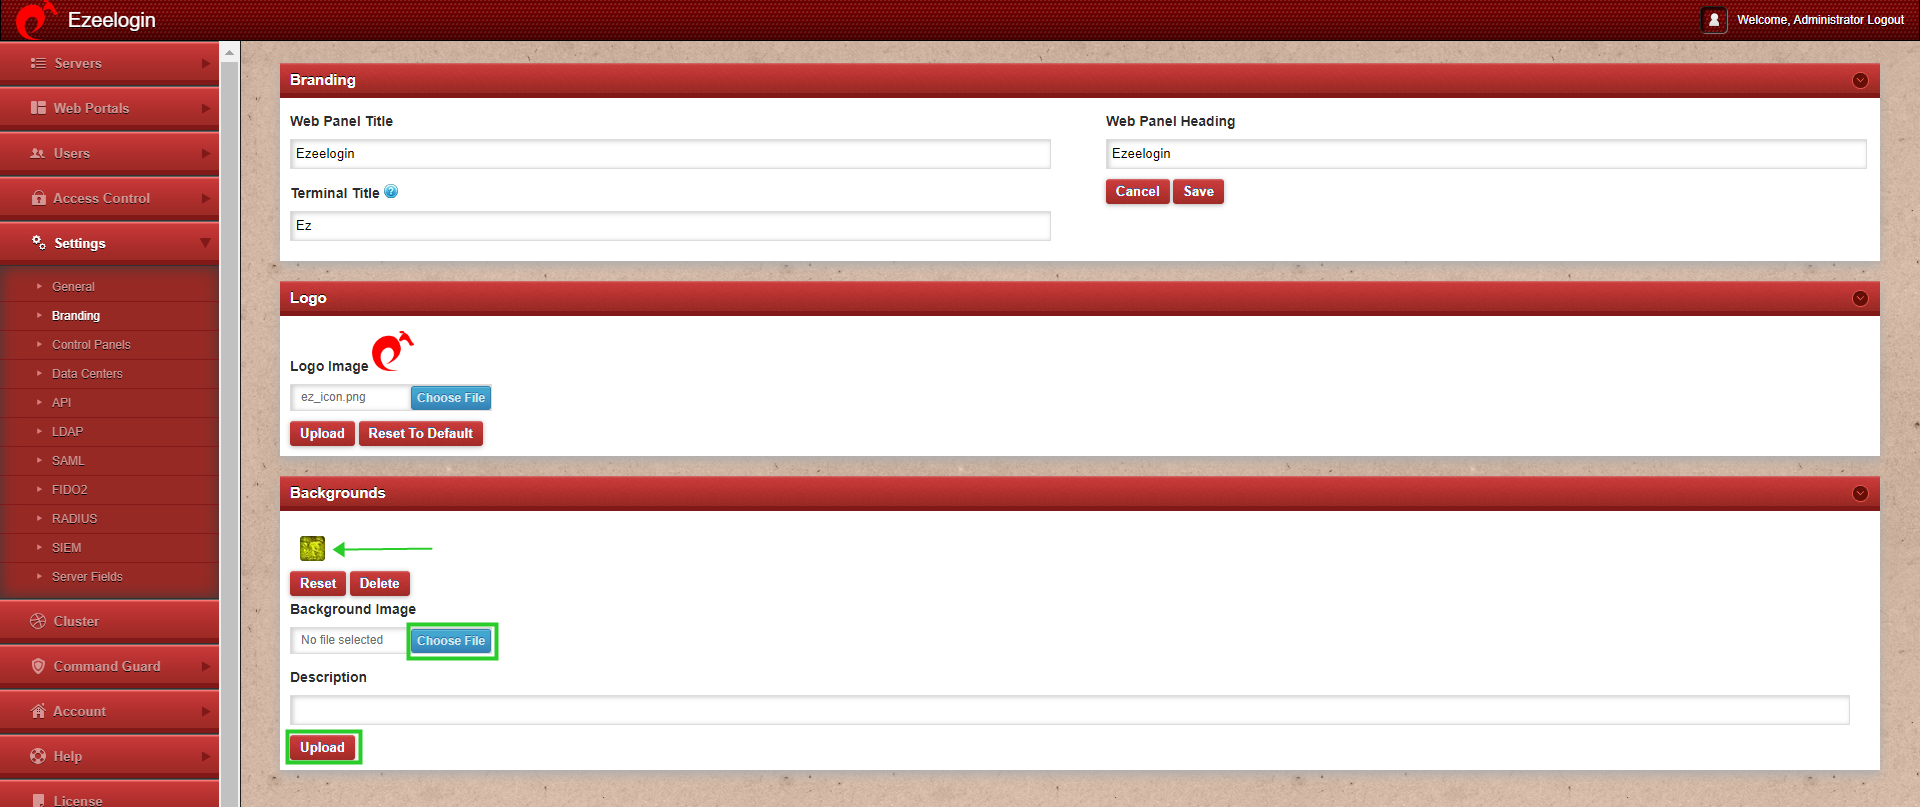
Step 4(B): Following this you will see the uploaded background image in the theme section under Account.
Step 4(C): Click on the uploaded background image and save it.
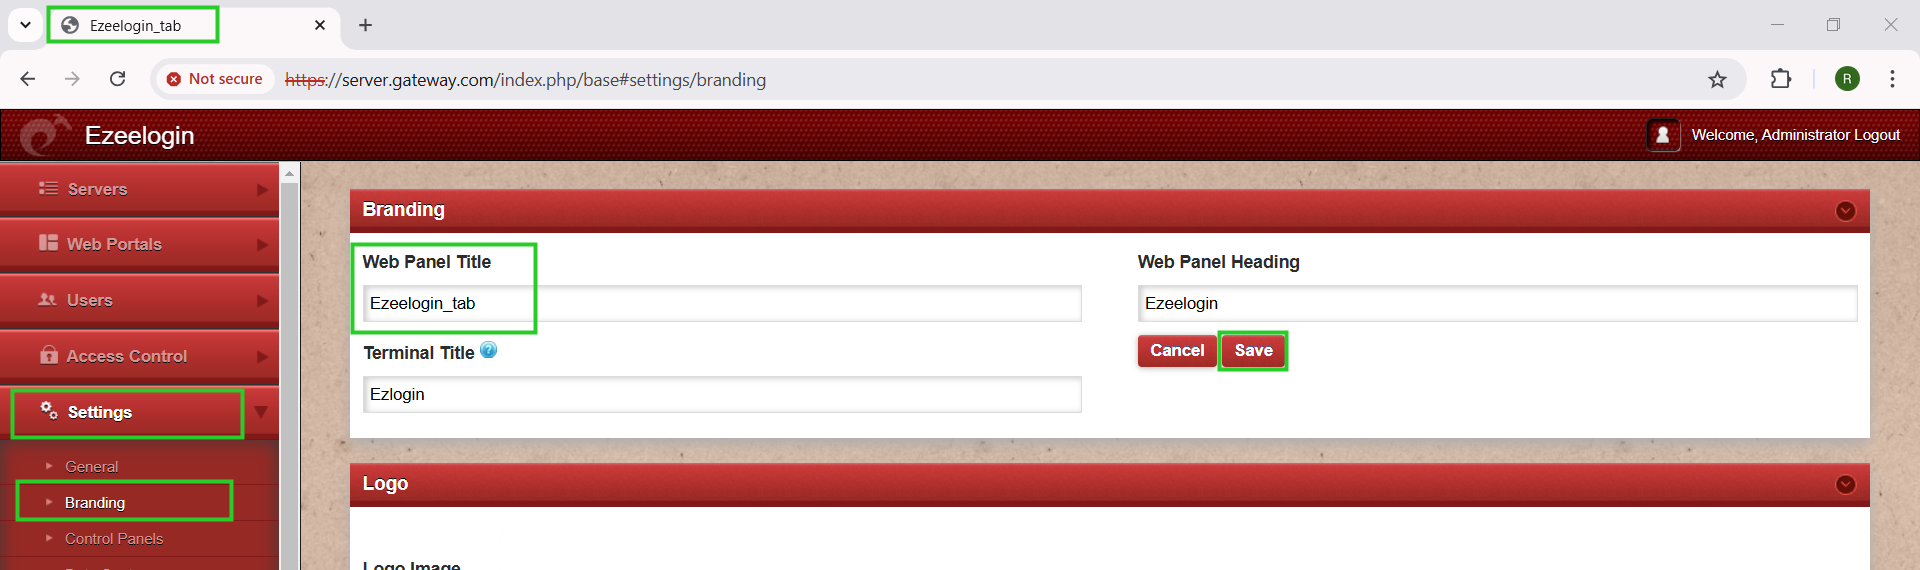
5. How to add/change the Web Panel Title.
Navigate to Settings > Branding > Web Panel Title > add/change the title > Save it.
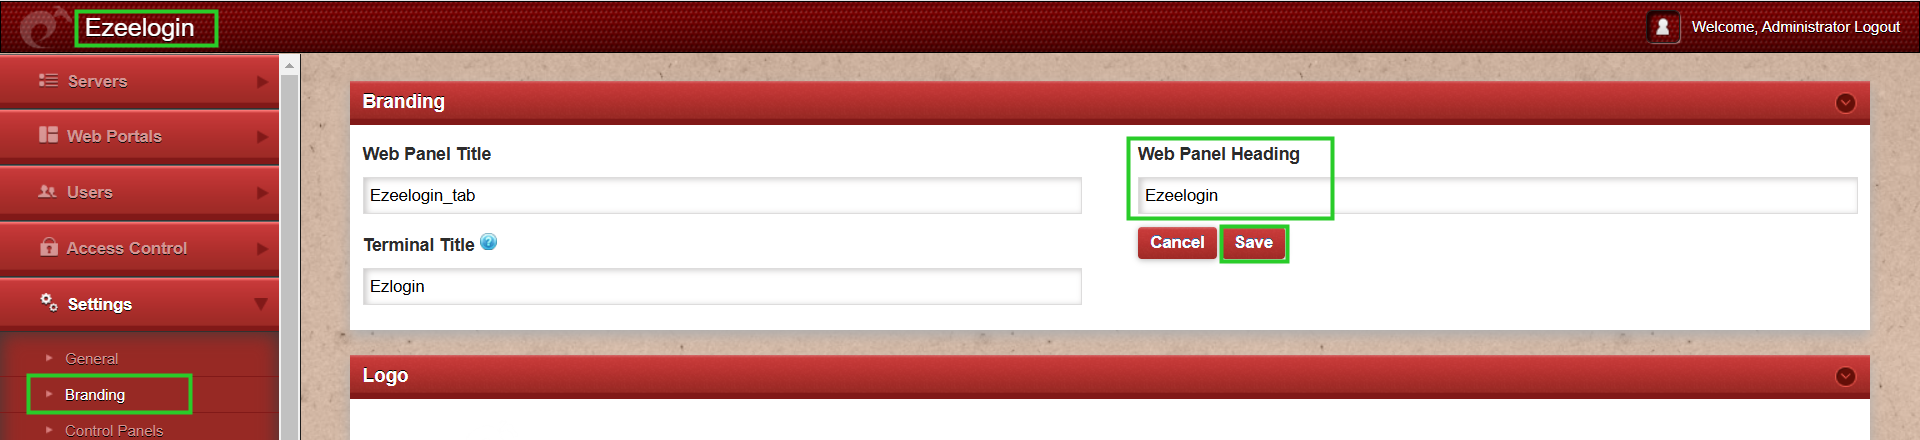
6. How to change the Web Panel Heading.
Navigate to Settings > Branding > locate the Web Panel Heading > add the respective heading and Save it.
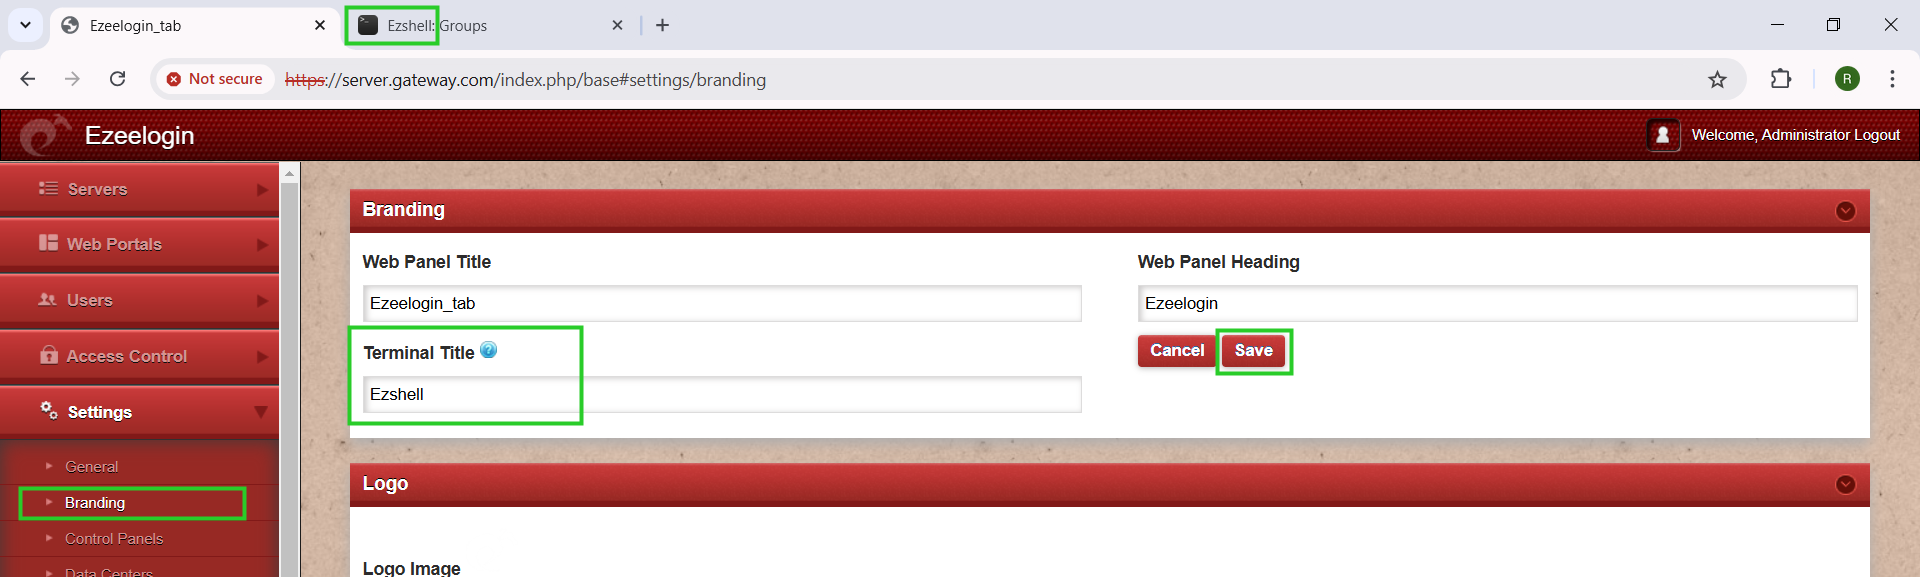
7. How to change the Terminal Title.
Navigate to Settings > Branding > locate the Terminal Title and add the respective shell title > Save it.
Related Articles: