How to configure Yubikey two factor authentication in ssh ?
How to enable/disable Yubikey 2FA (Two-factor Authentication) in Ezeelogin?
Overview: This article provides a comprehensive guide on configuring and managing Yubikey two-factor authentication (2FA) for SSH jump host.
.png)
Refer to the YouTube video to Configure Yubikey’s two-factor authentication in ssh jump host.
1. How to enable Yubikey?
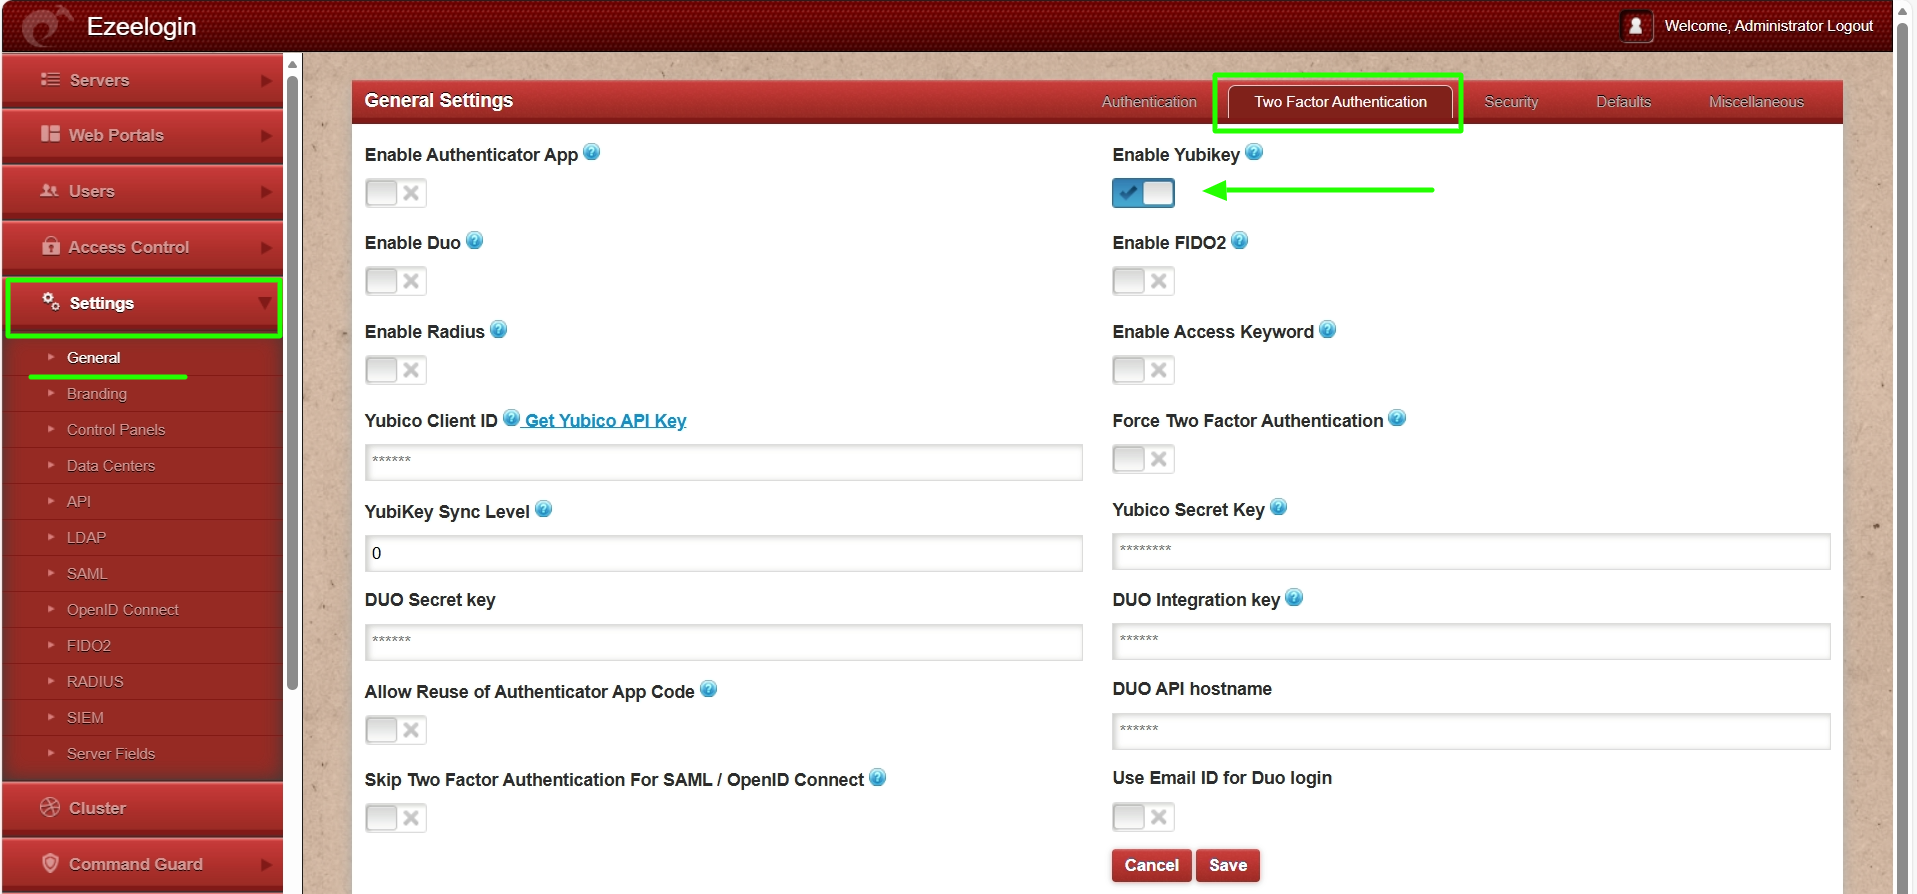
Step 1(A): Log in to the Ezeelogin GUI as an admin privileged user, navigate to Settings -> General -> Two Factor Authentication, and enable Yubikey.
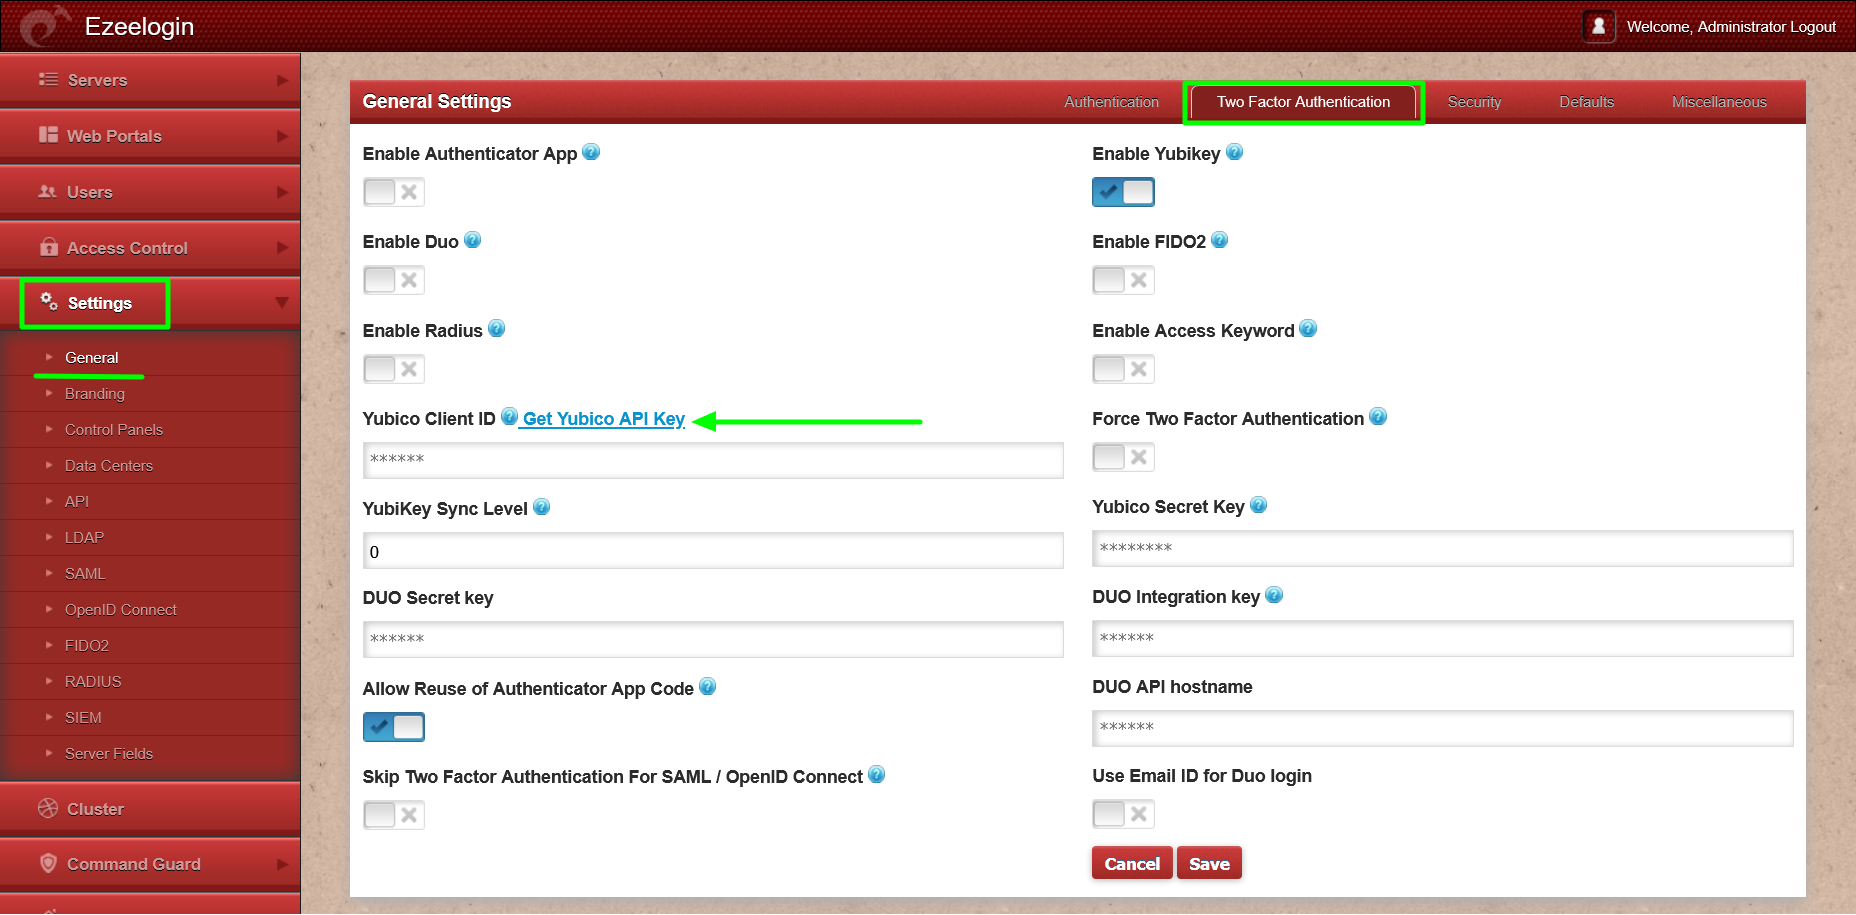
Step 1(B): Click on "Get Yubico API Key" to obtain the Yubico Client ID and secret key.
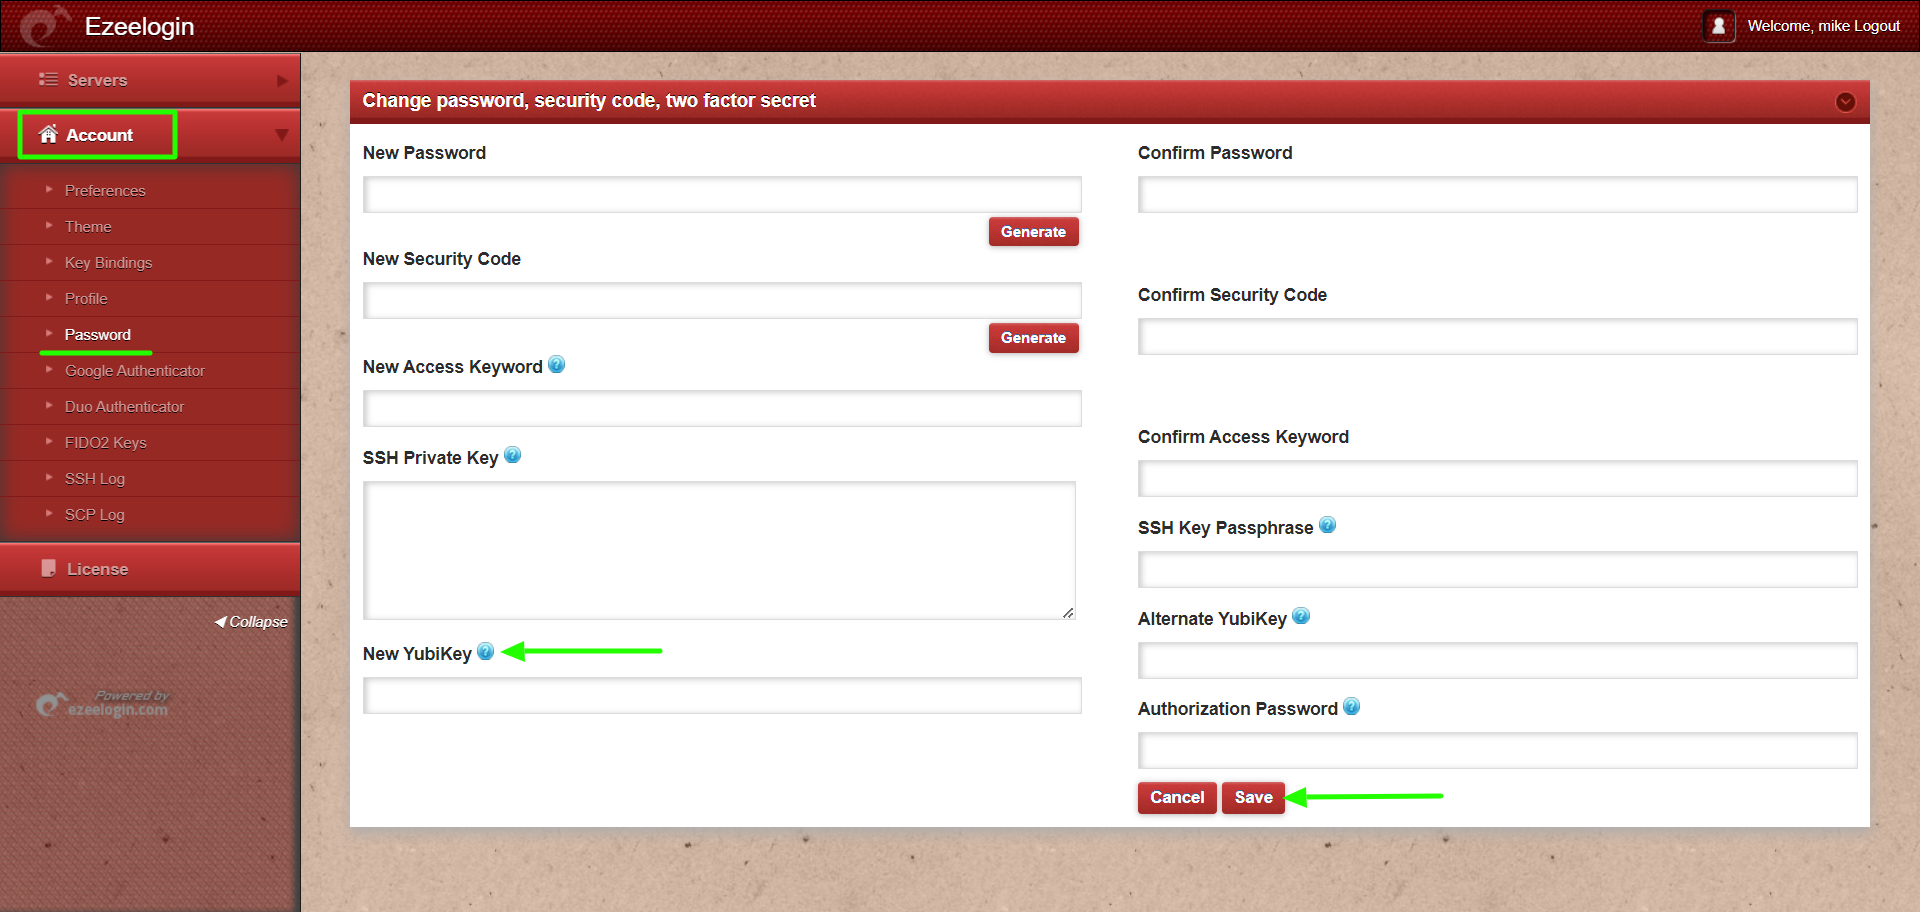
Step 1(C): To set up Yubikey for user authentication, navigate to Account -> Password -> New Yubikey and click on save after providing the authorization password(password of the currently logged in user).
Step 1(D): Log in to the Ezeelogin GUI using the Yubikey 2FA method.

Step 1(E): The backend 2fa method will also be now using Yubikey.


2. Disable Yubikey 2FA from the GUI.
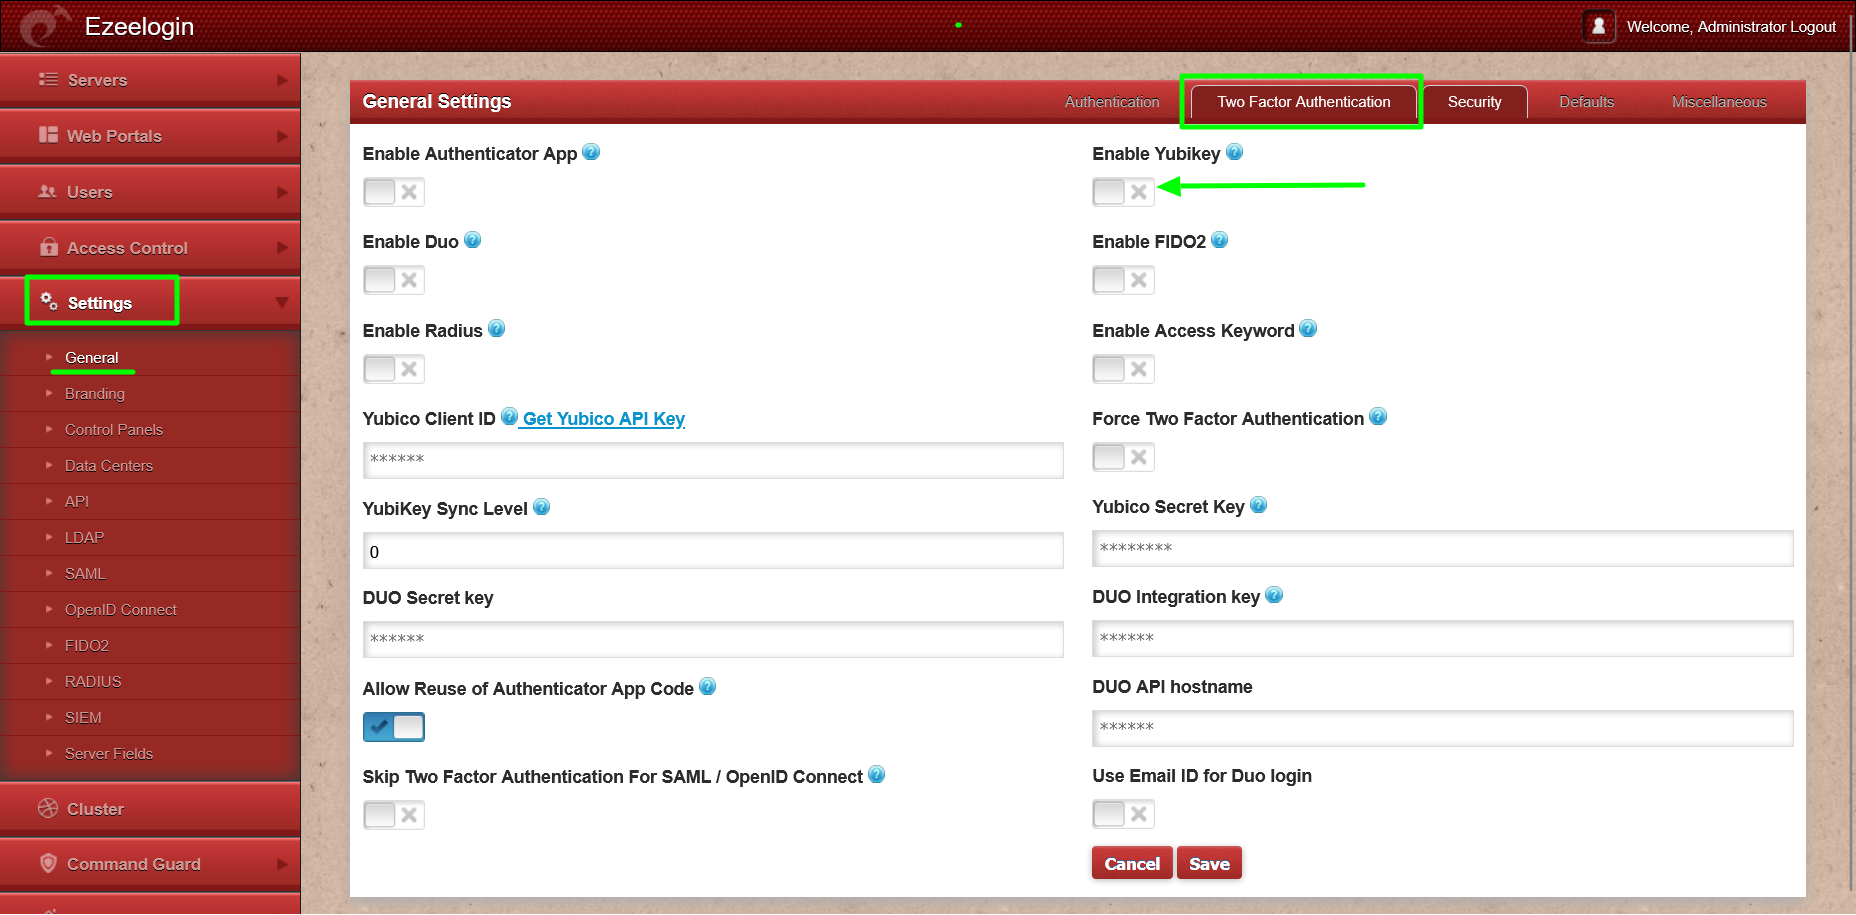
Step 2(A): To disable Yubikey from Ezeelogin GUI, navigate to Settings -> General -> Two-factor Authentication and disable Yubikey.
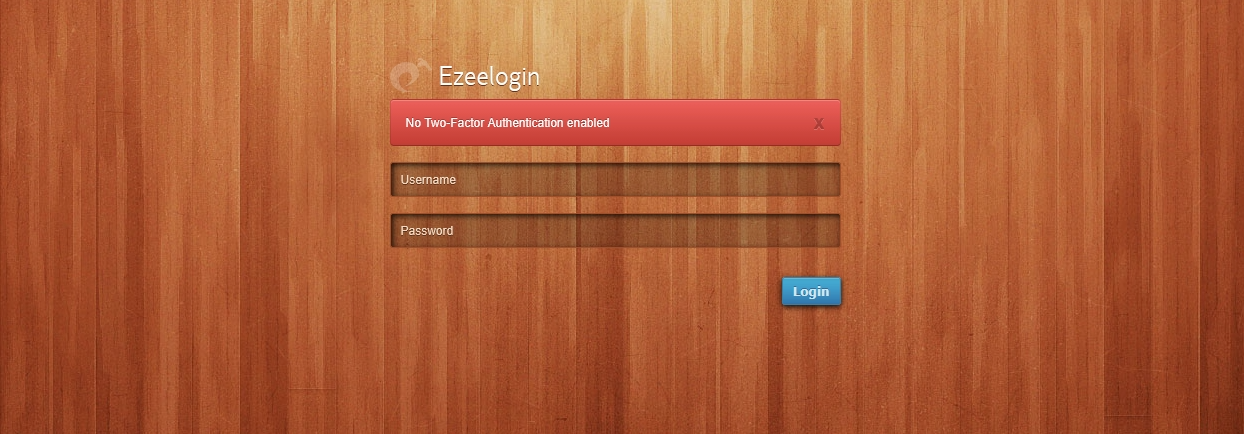
This error "No Two-Factor Authentication enabled" happens when we enforce Two-Factor authentication without enabling any of the Two-Factor authentications. Run the following command to disable Force Two Factor Authentication.
Yubikey outbound URLs to be whitelisted:
Following are the Yubikey outbound URLs to be whitelisted in the firewall.
1. ’https://api.yubico.com/wsapi/2.0/verify’
2. ’https://api2.yubico.com/wsapi/2.0/verify’
3. ’https://api3.yubico.com/wsapi/2.0/verify’
4. ’https://api4.yubico.com/wsapi/2.0/verify’
5. ’https://api5.yubico.com/wsapi/2.0/verify’
Yubikey Library requires access to the above URLs. Also, do check out the article for the list of YubiKey API servers that the YubiKey client would utilize https://developers.yubico.com/yubikey-val/Getting_Started_Writing_Clients.html