Enable and Disable DNS for server hostname while adding in servers and for control panel access
How Do You Manage DNS for Servers: Adding IP-Only Hosts, Disabling DNS, and Control Panel Resolution?
Overview: This article outlines how to configure global DNS settings, add IP-only servers, and manage DNS resolution for control panel logins, including enabling or disabling DNS and setting default options.
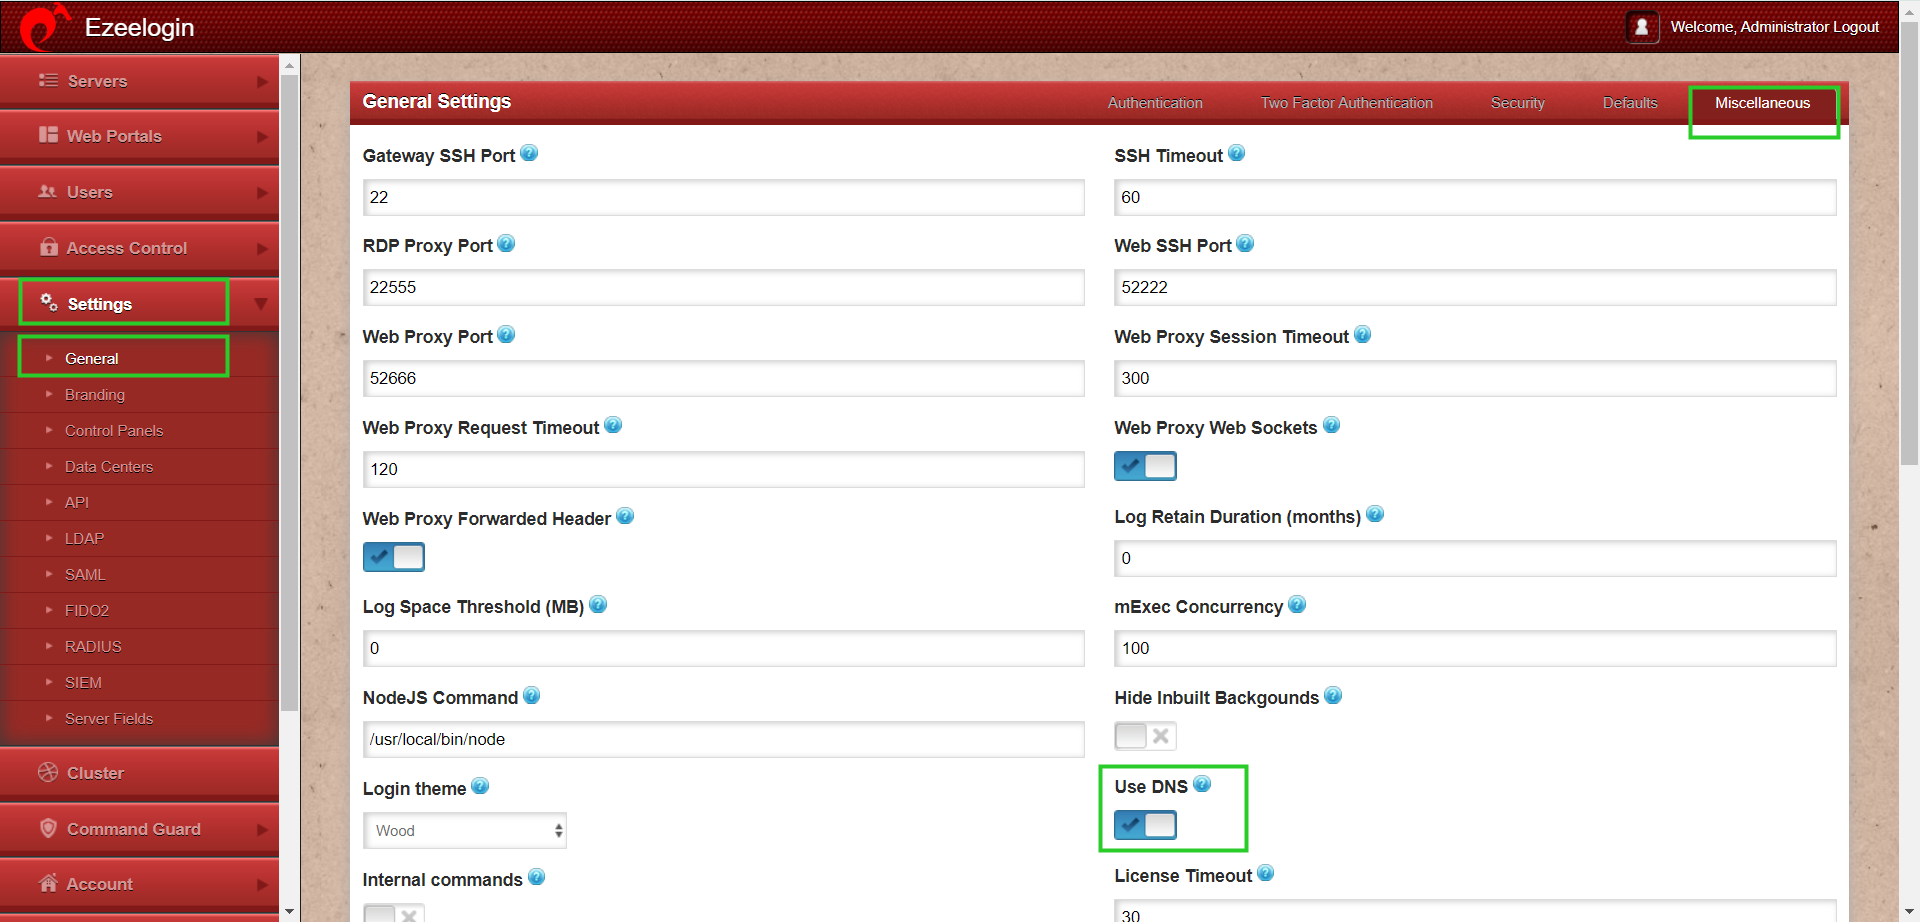
Step 1: To set the default DNS setting globally, go to Settings-> General-> Miscellaneous-> Use DNS
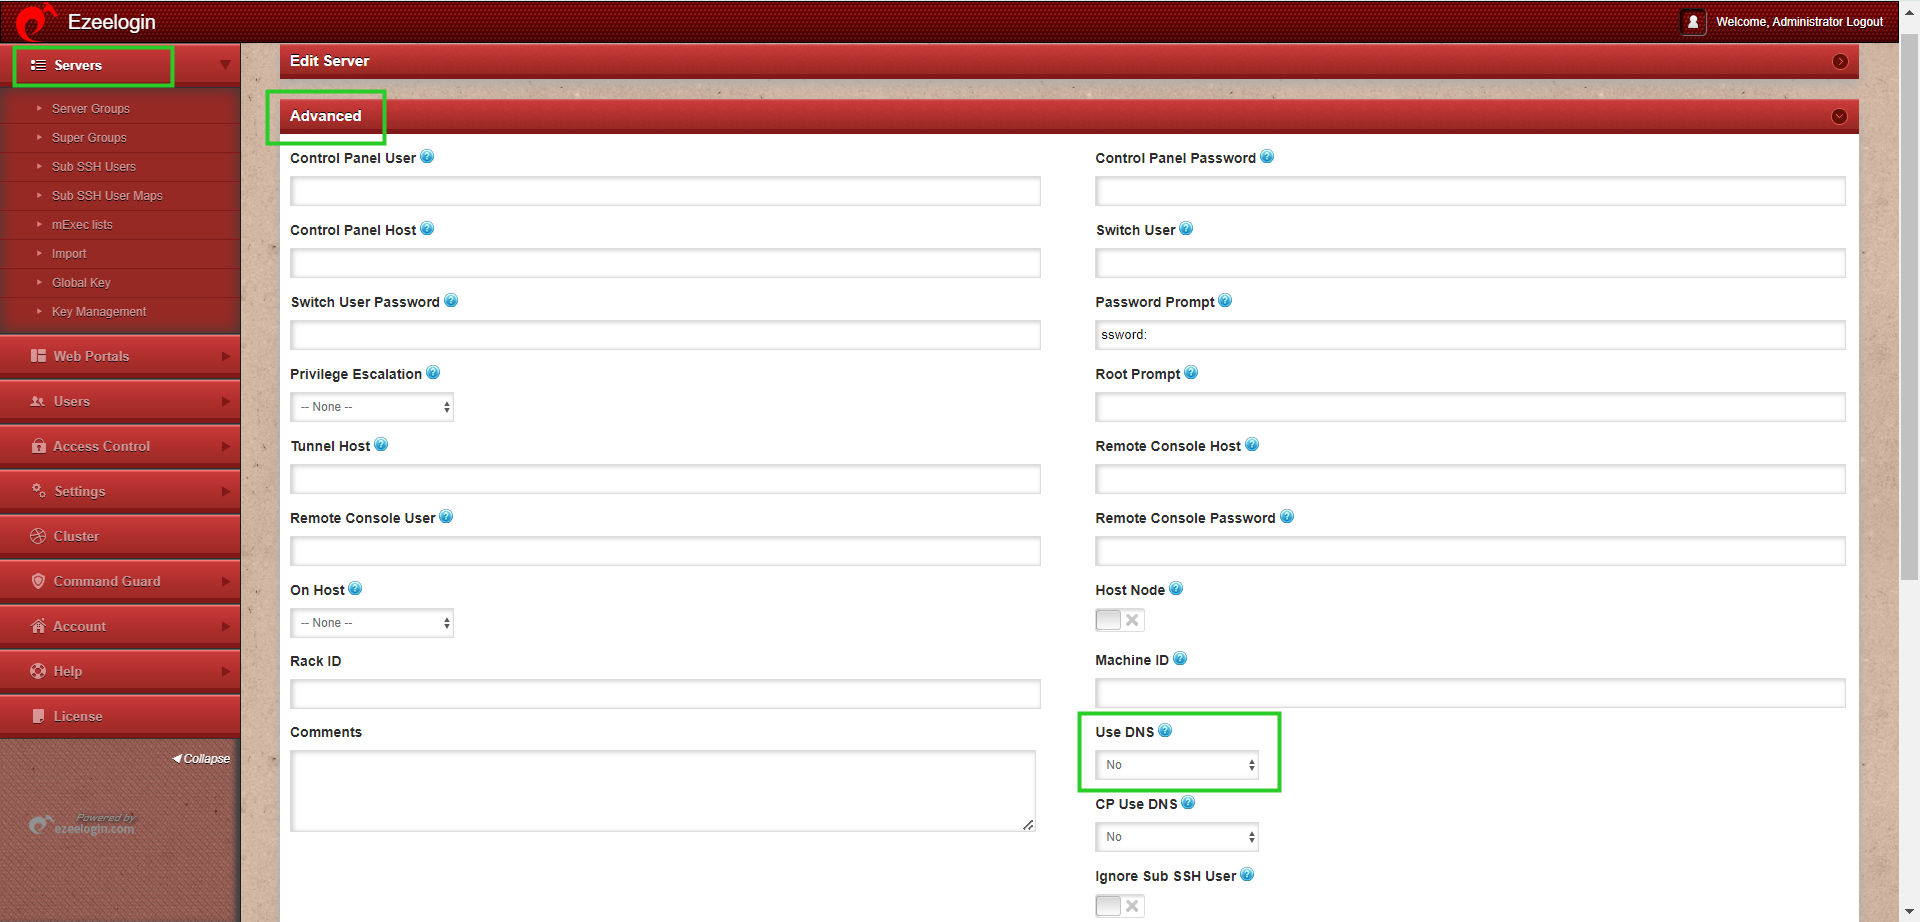
Step 2: DNS resolution can be disabled and a server can be added using the IP address alone. To do this, go to Servers -> Add Server -> Advanced -> Use DNS -> NO
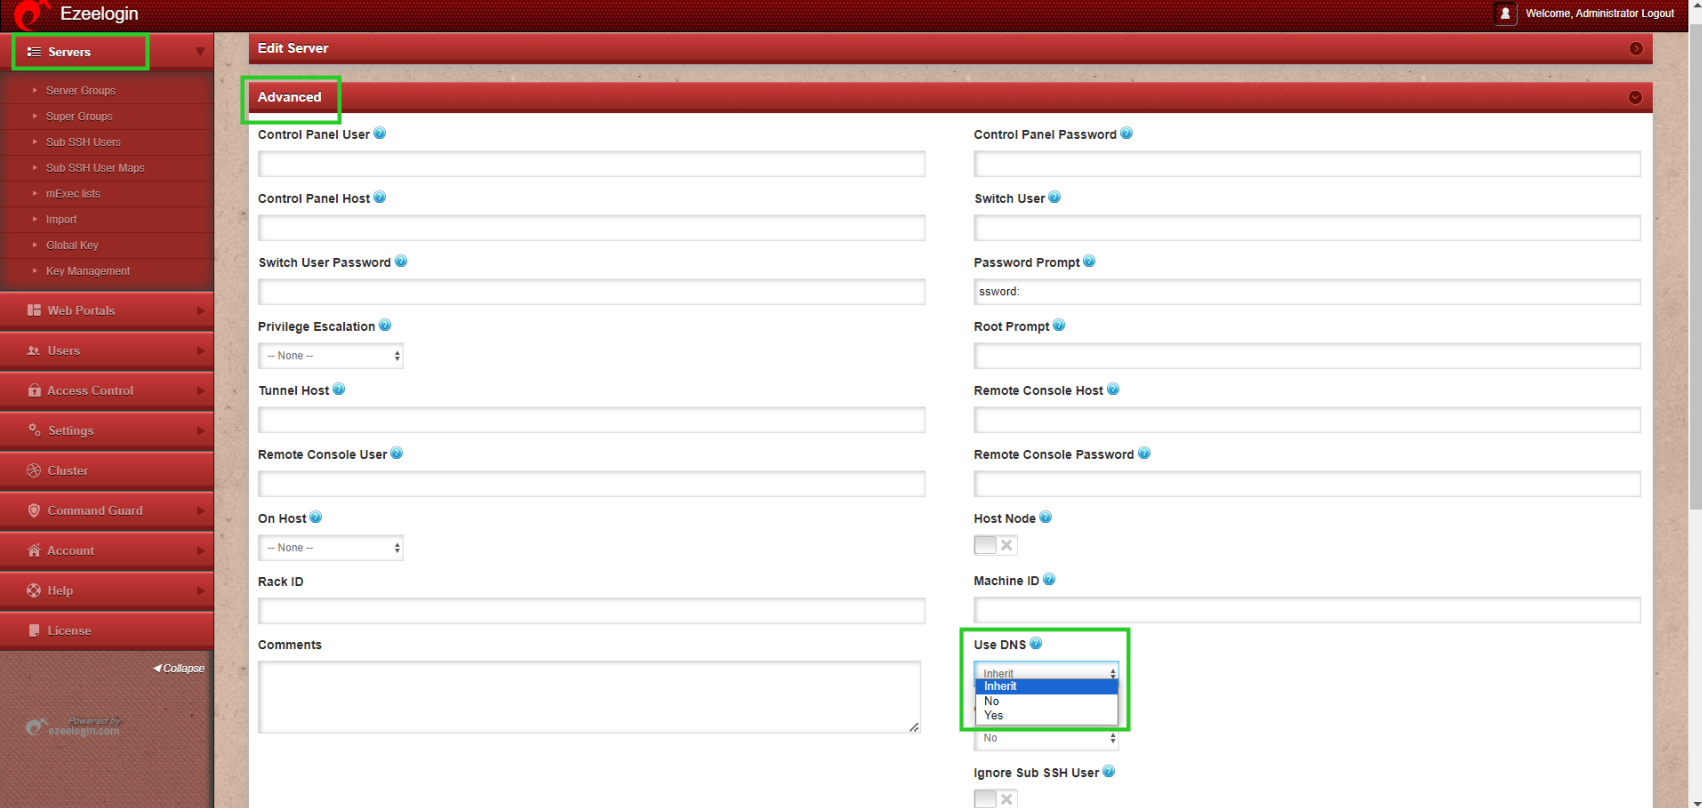
Step 3: If the use of DNS is yes, Ezeelogin will try to resolve the server hostnames using DNS instead of taking the IP provided in the gateway server for SSH login to the server. This can be helpful when server IPs change often and the DNS is updated.
(In this case, the SSH login via the Gateway server will work correctly even if the IP in the gateway server is incorrect). When you choose 'inherit' the default global values are used.
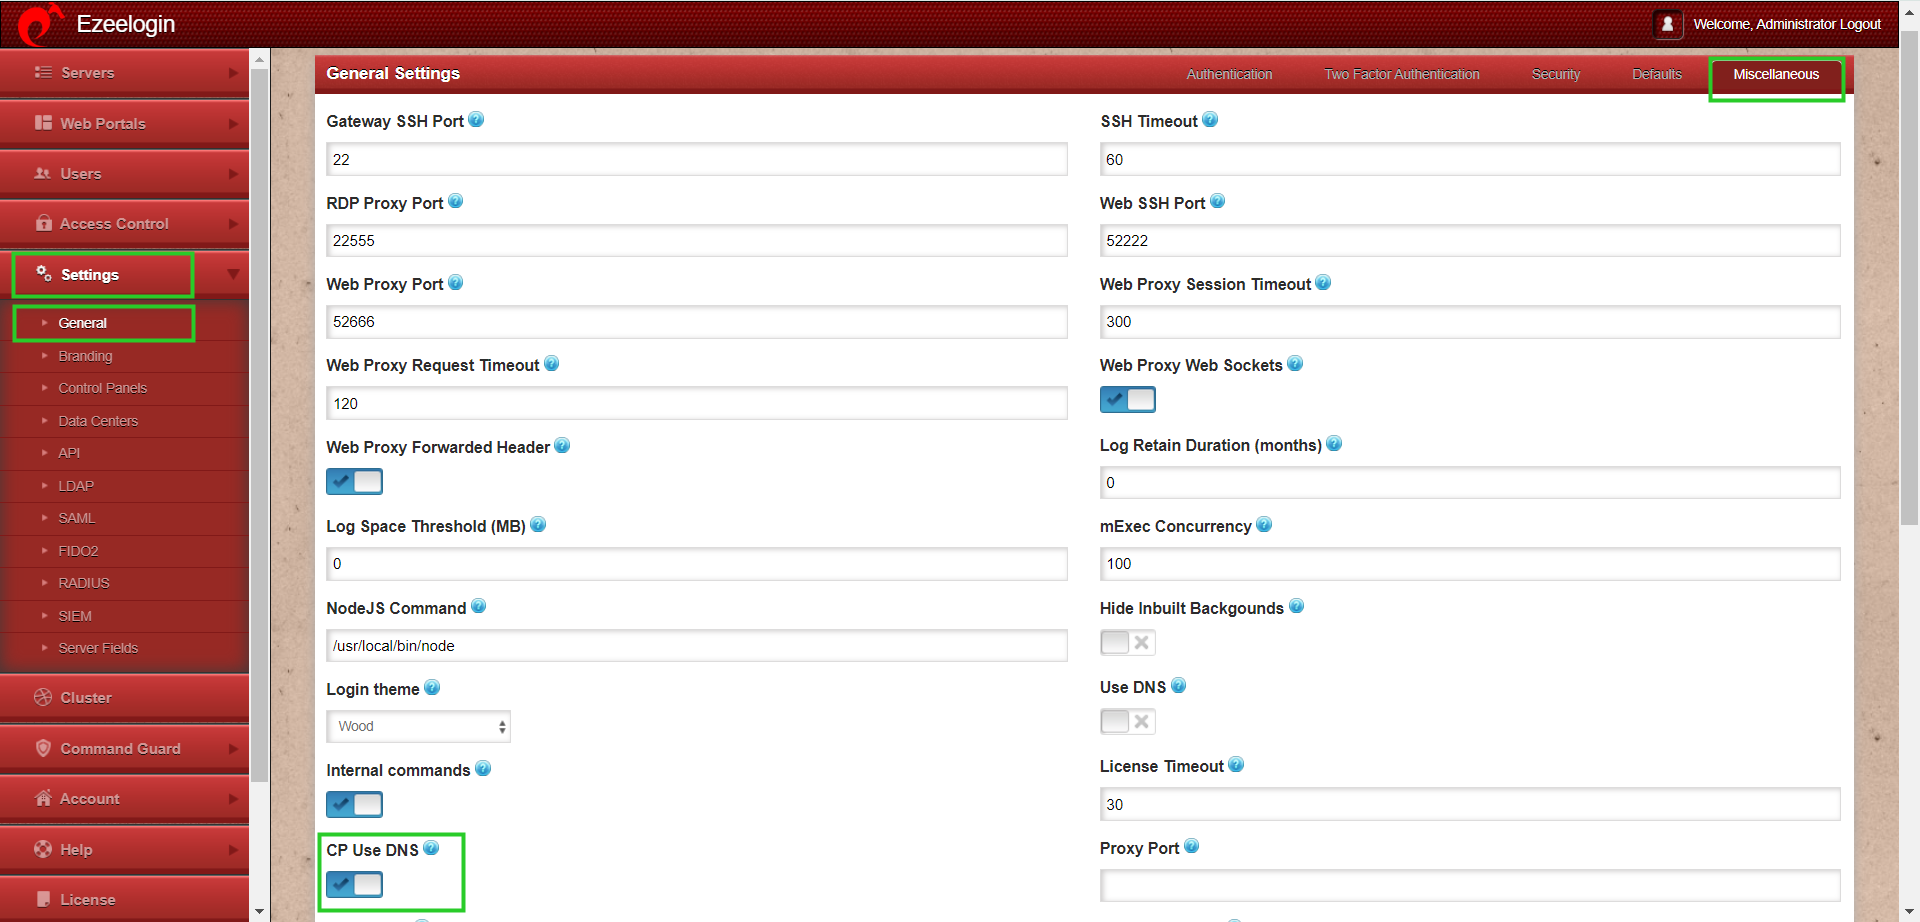
Step 4: To set the control panel DNS setting globally go to Settings -> General -> Miscellaneous -> CP Use DNS.
Step 5: To disable DNS for the control panel for a server go to Servers -> Add Server -> Advanced-> CP Use Dns-> NO
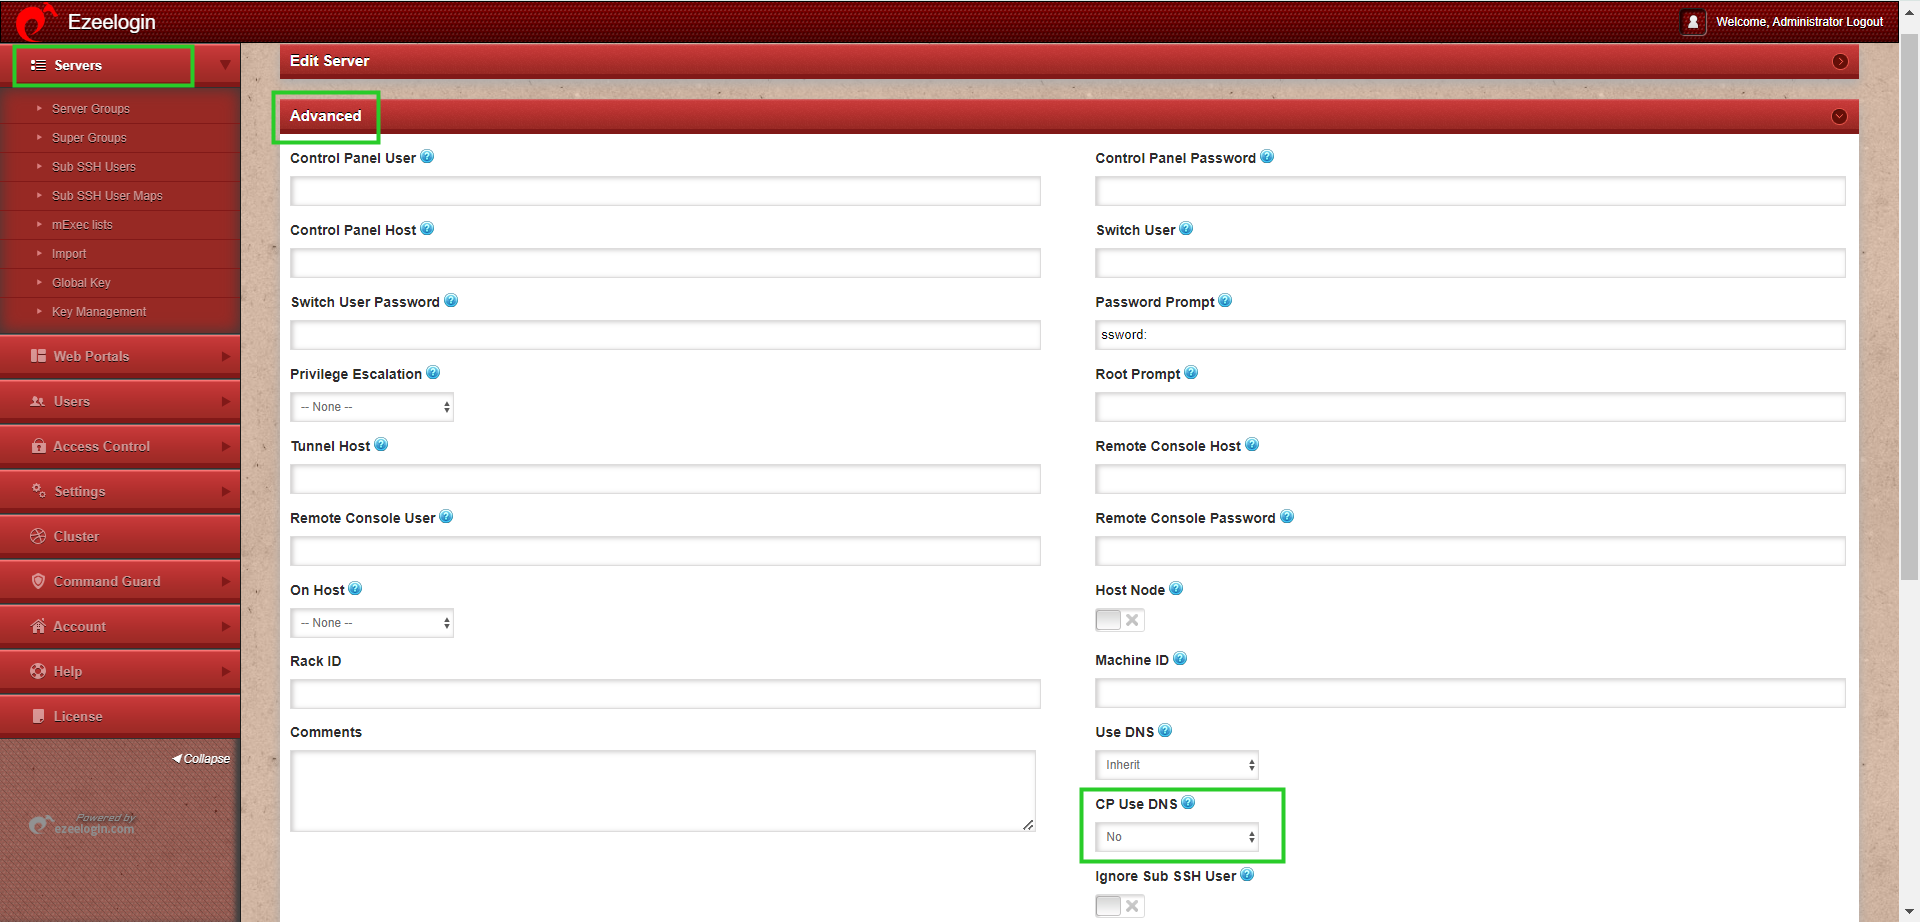
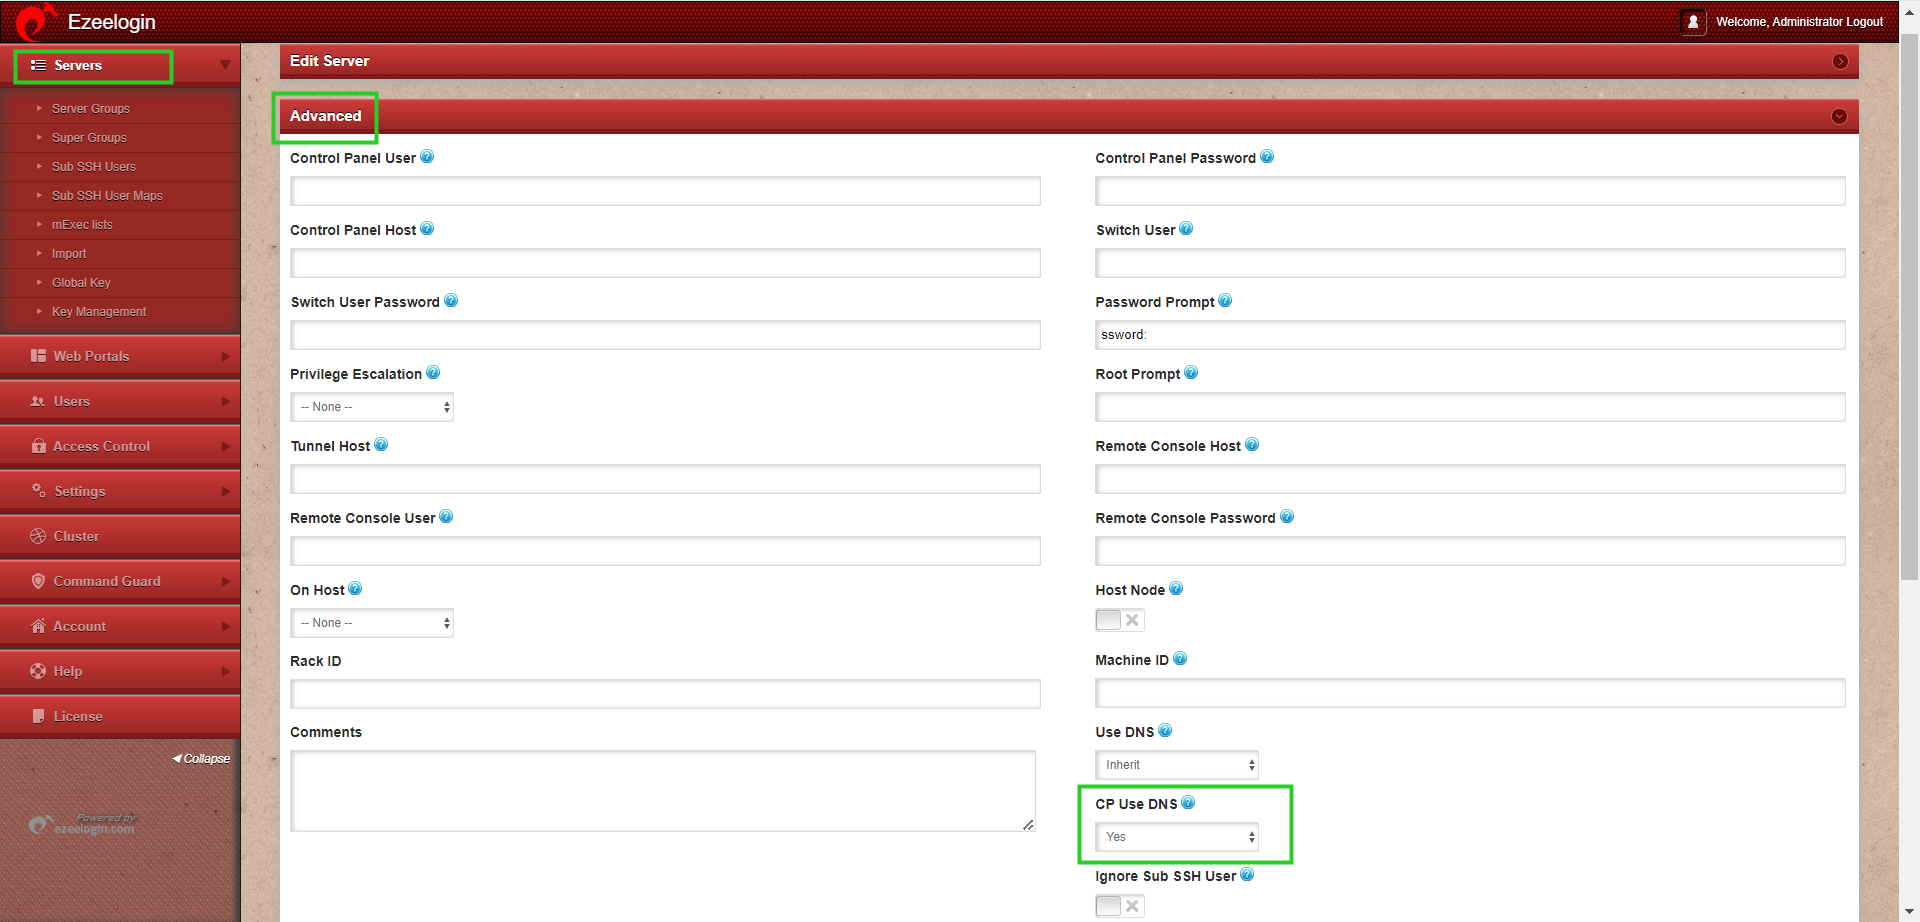
Step 6: To enable DNS for the control panel for a server go to Servers -> Add Server -> Advanced -> CP Use DNS -> yes
Thus, Proper DNS management, including global settings, IP-only hosts, and control panel resolution, for reliable server access, and configuration.