Add custom fields on server add form
How to add custom fields on the server add form in Ezeelogin?
Overview: This article helps Ezeelogin gateway users on how to add custom server fields to the server add form.
Step 1. Login to Ezeelogin GUI, click on the settings -> server field -> add custom server field
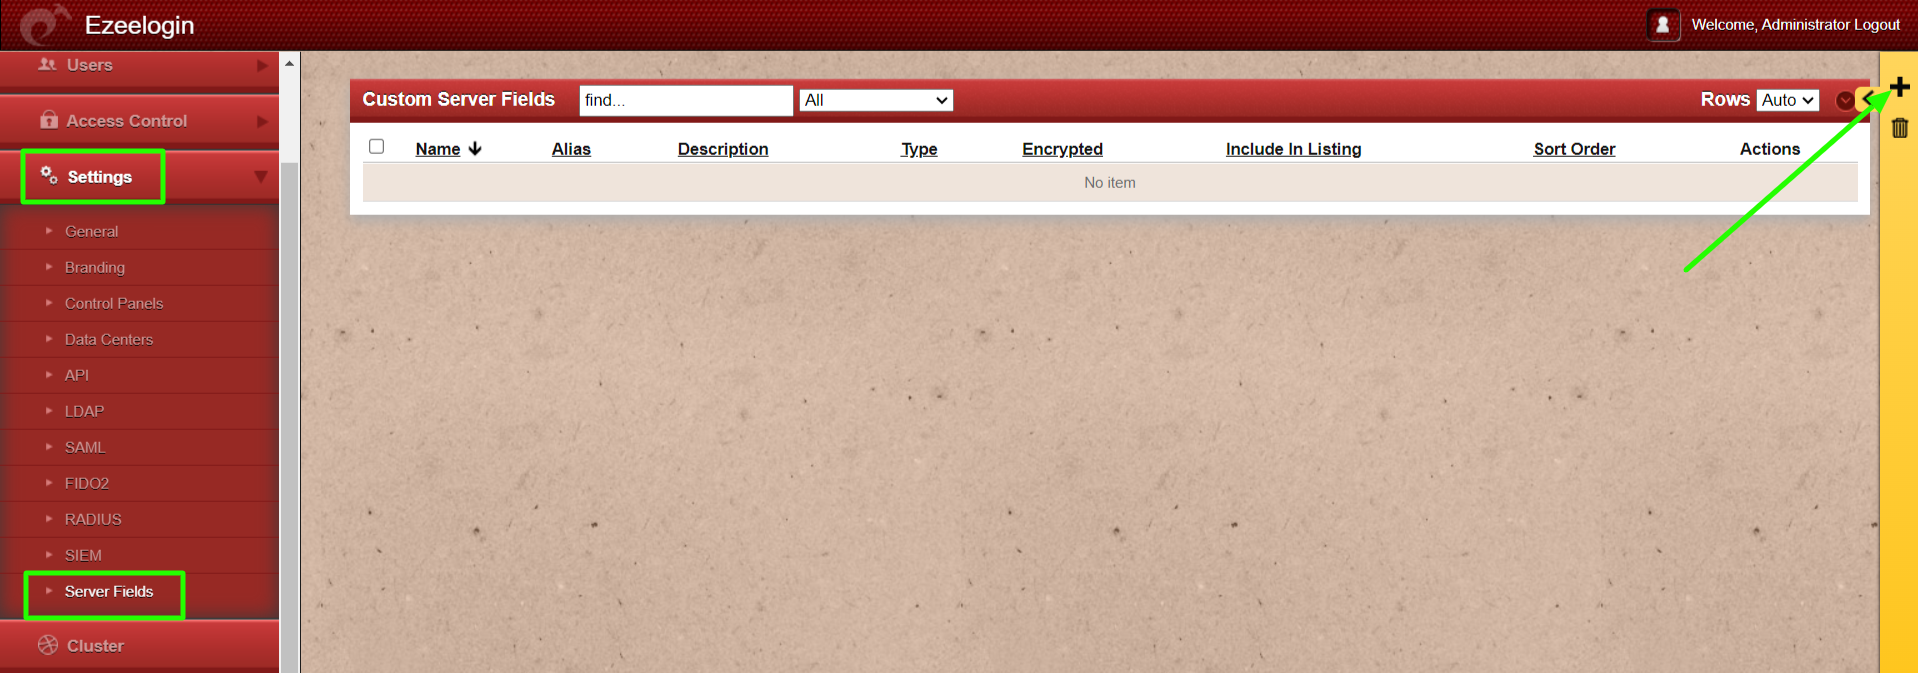
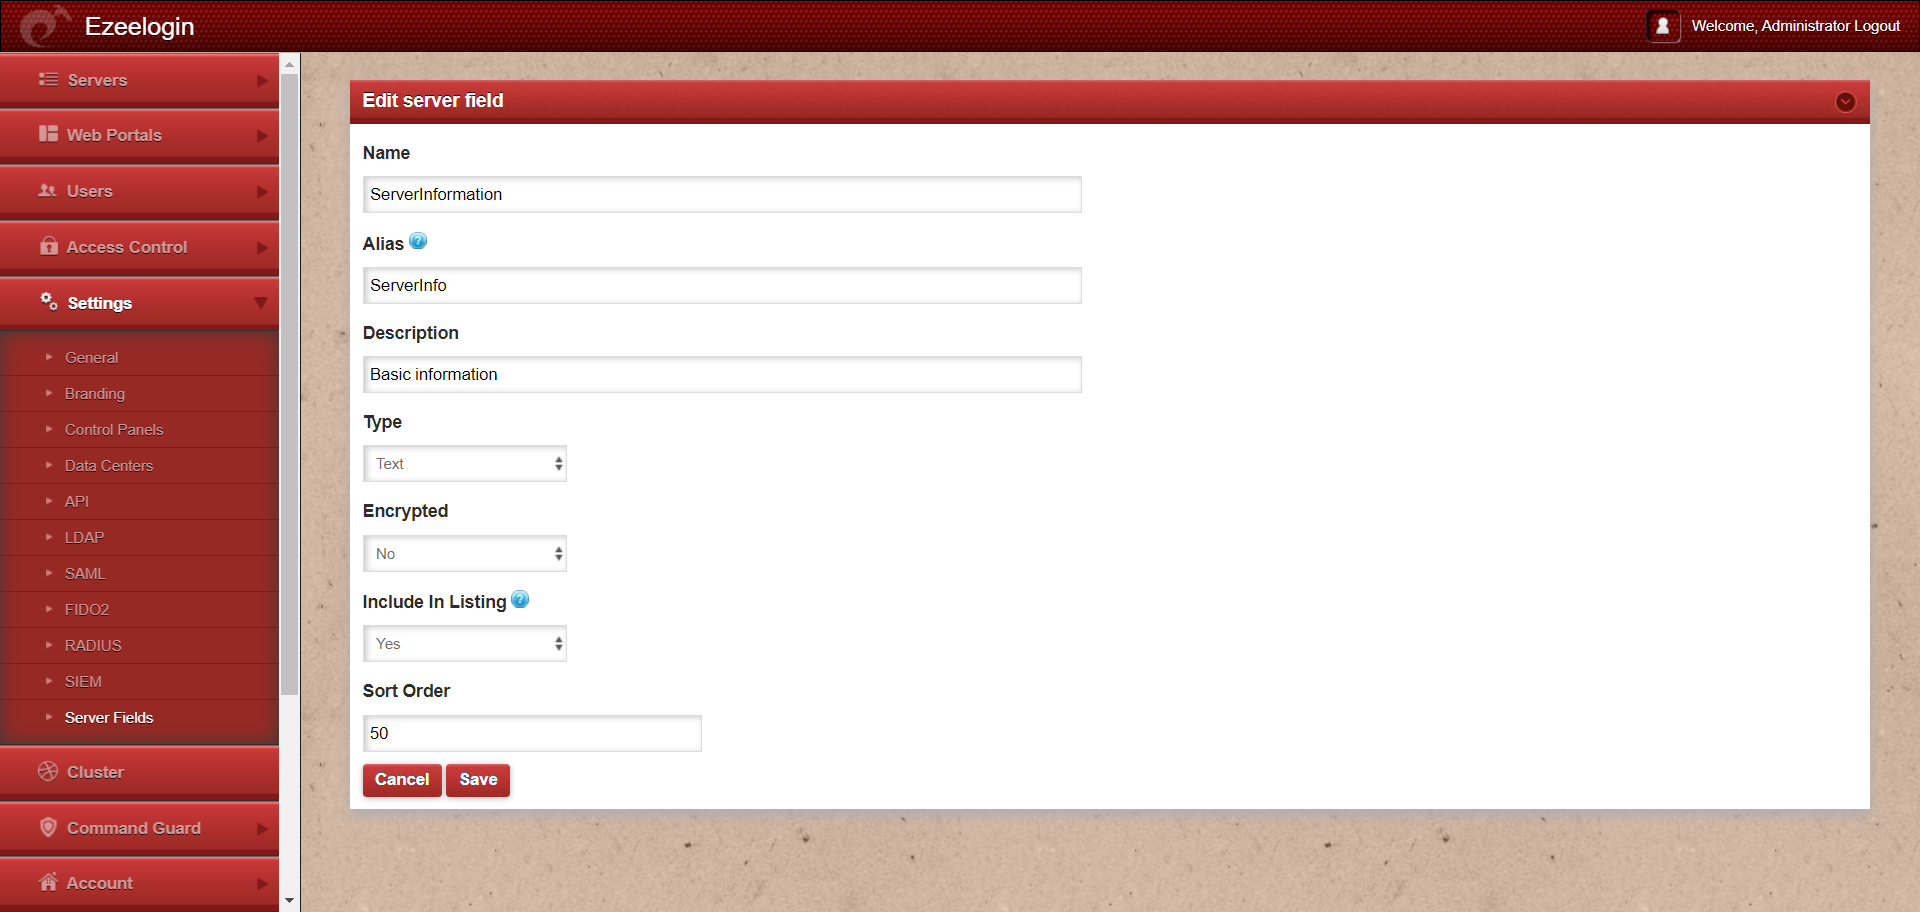
Step 2. Provide the details for the custom server field
- Name: A name for the custom server field
- Alias: The column title name shown in server listing.
- Description: Brief description on the custom server field
- Type: Type of the custom server field added.
- Encrypted: Shows if the information stored in the field would be encrypted or not.
- Include In Listing: If enabled, the filed will be displayed in the server listing.
- Sort order: The order number determines the position of the field in the server edit page. Lower values would be
- Actions: To add or delete custom fields.
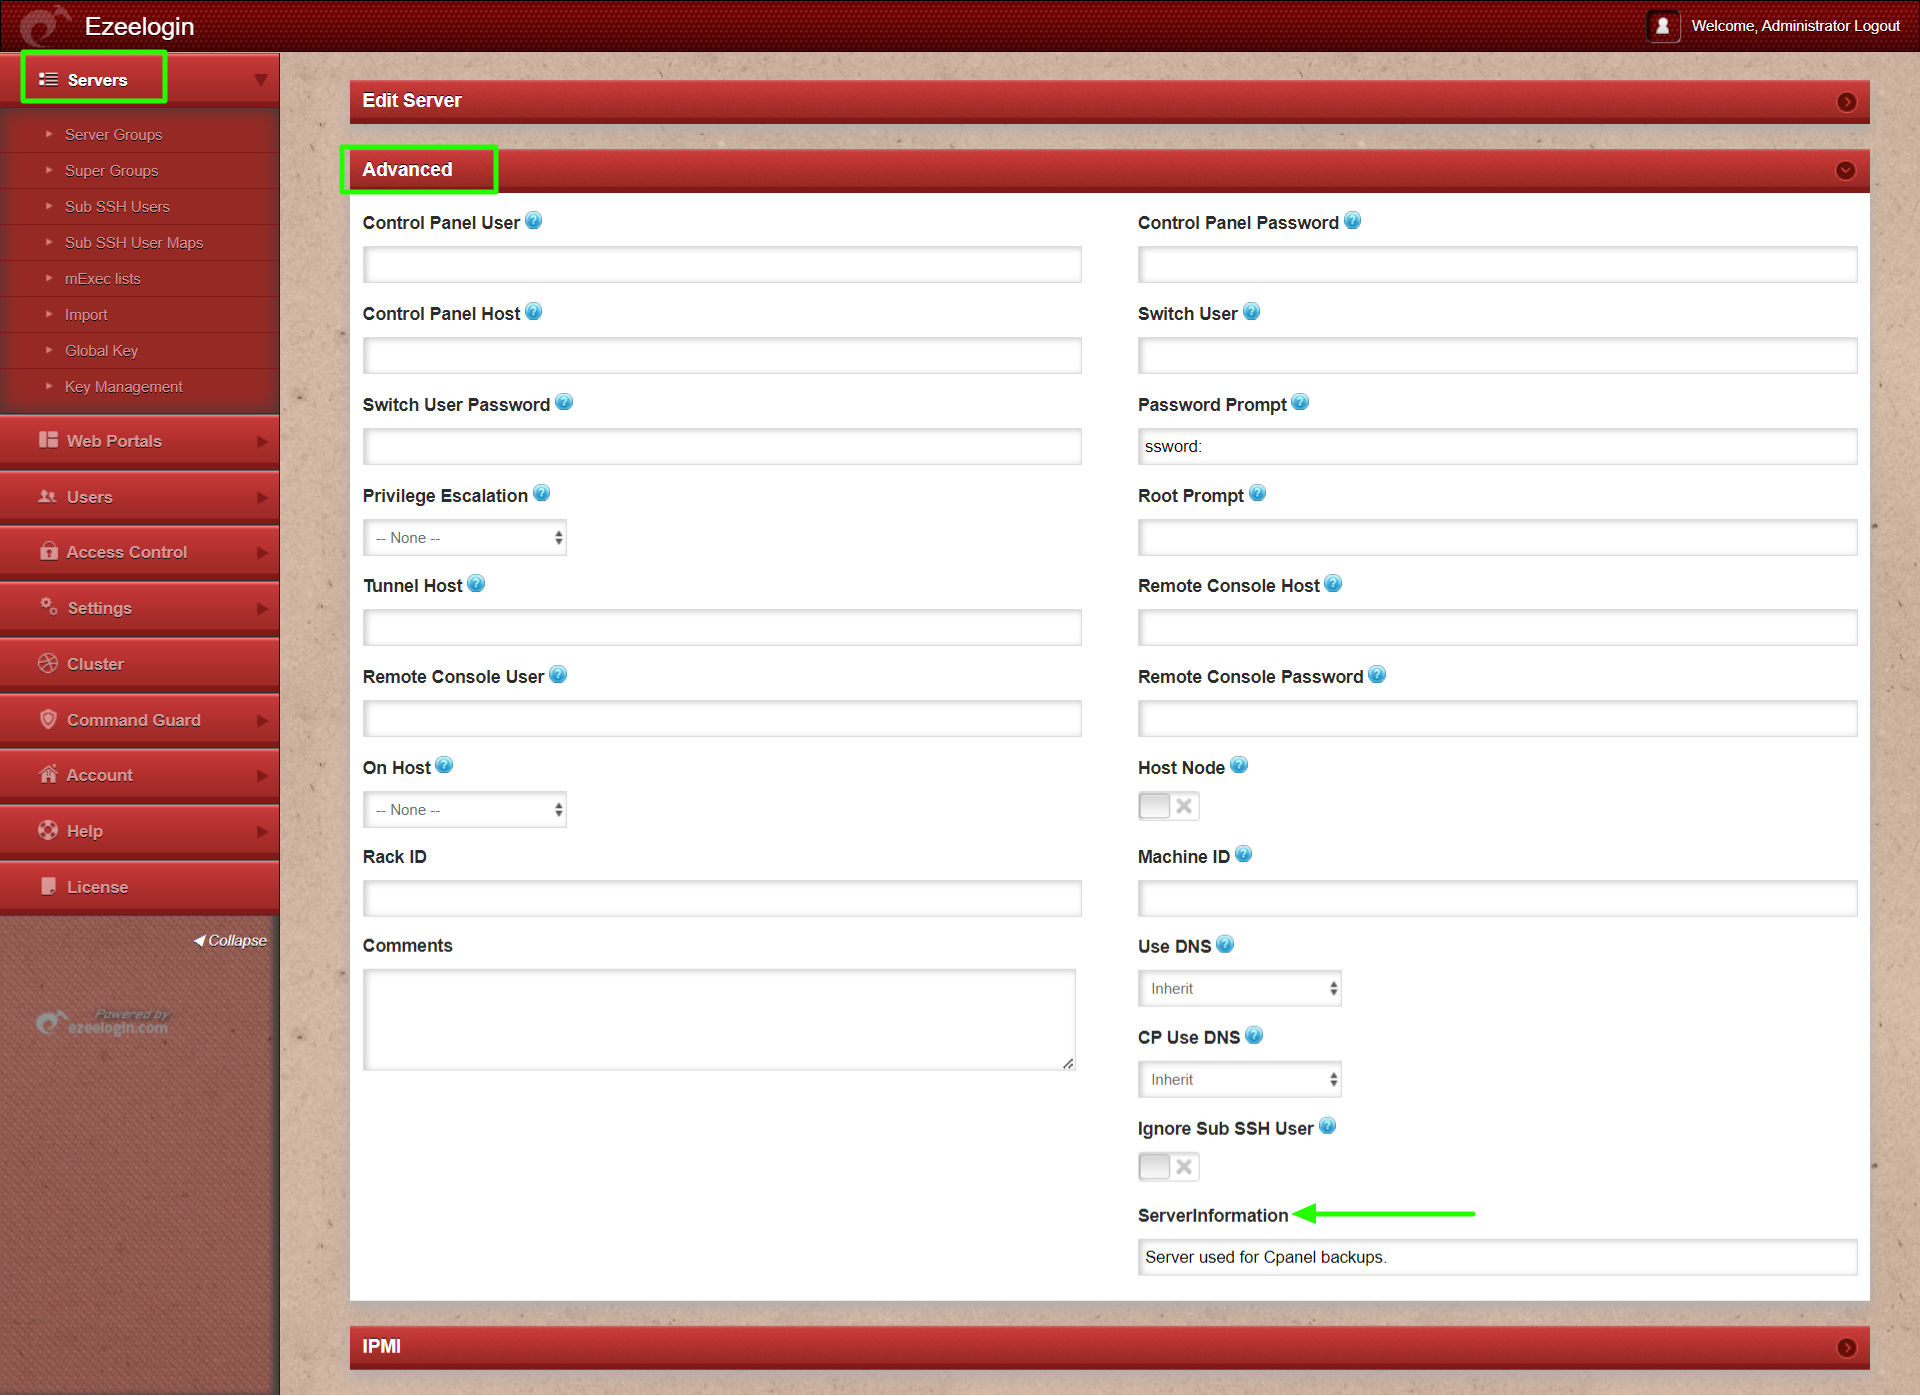
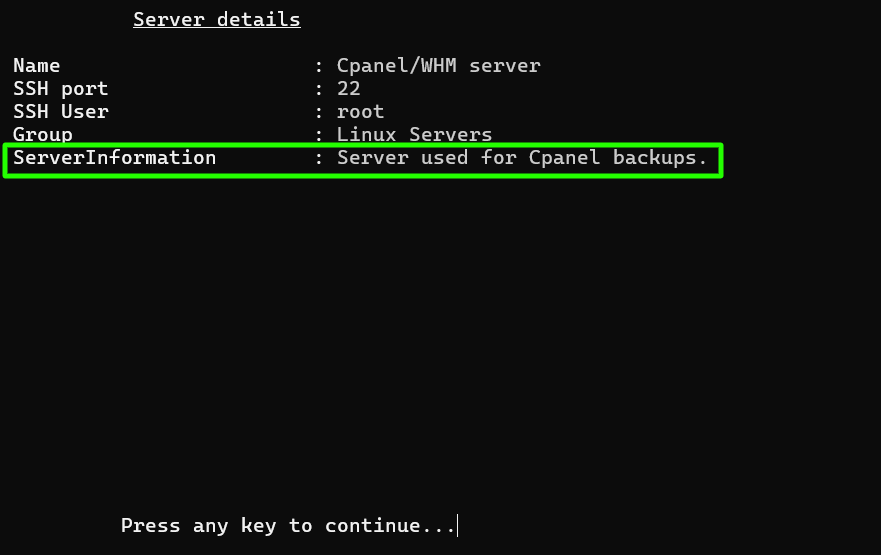
Step 3. The custom field can be viewed while adding a server by navigating to Servers -> Add Server -> Advanced section.
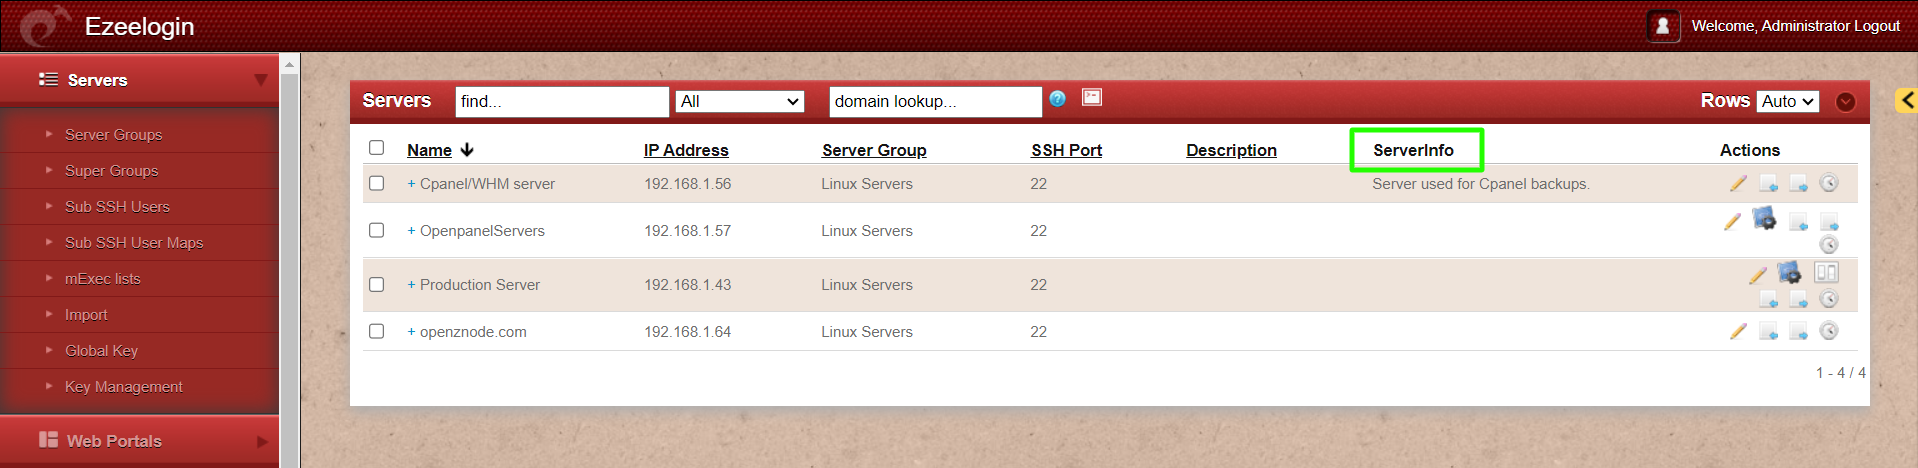
Step 4. When 'Include In Listing' is enabled, the custom server field appears in the server listing and is displayed under the name specified in the 'Alias' column.
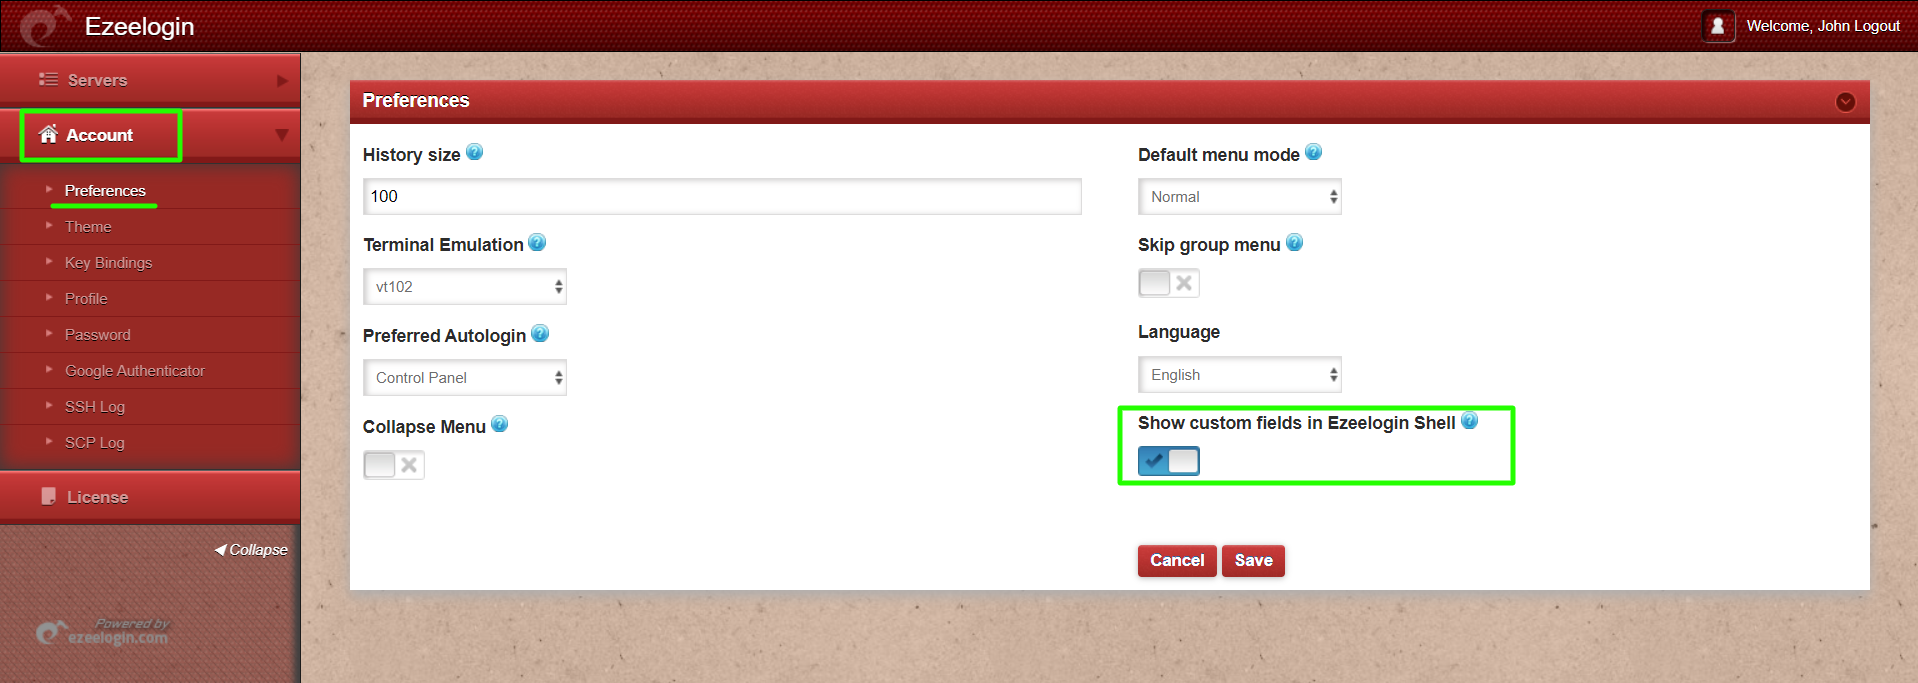
Step 5. To view custom server fields in Ezeelogin shell(ezsh) for gateway users, make sure to enable Show Custom Fields for the each individual gateway users in Ezeelogin GUI by clicking on the Account -> Preferences ->Show custom fields in Ezeelogin Shell
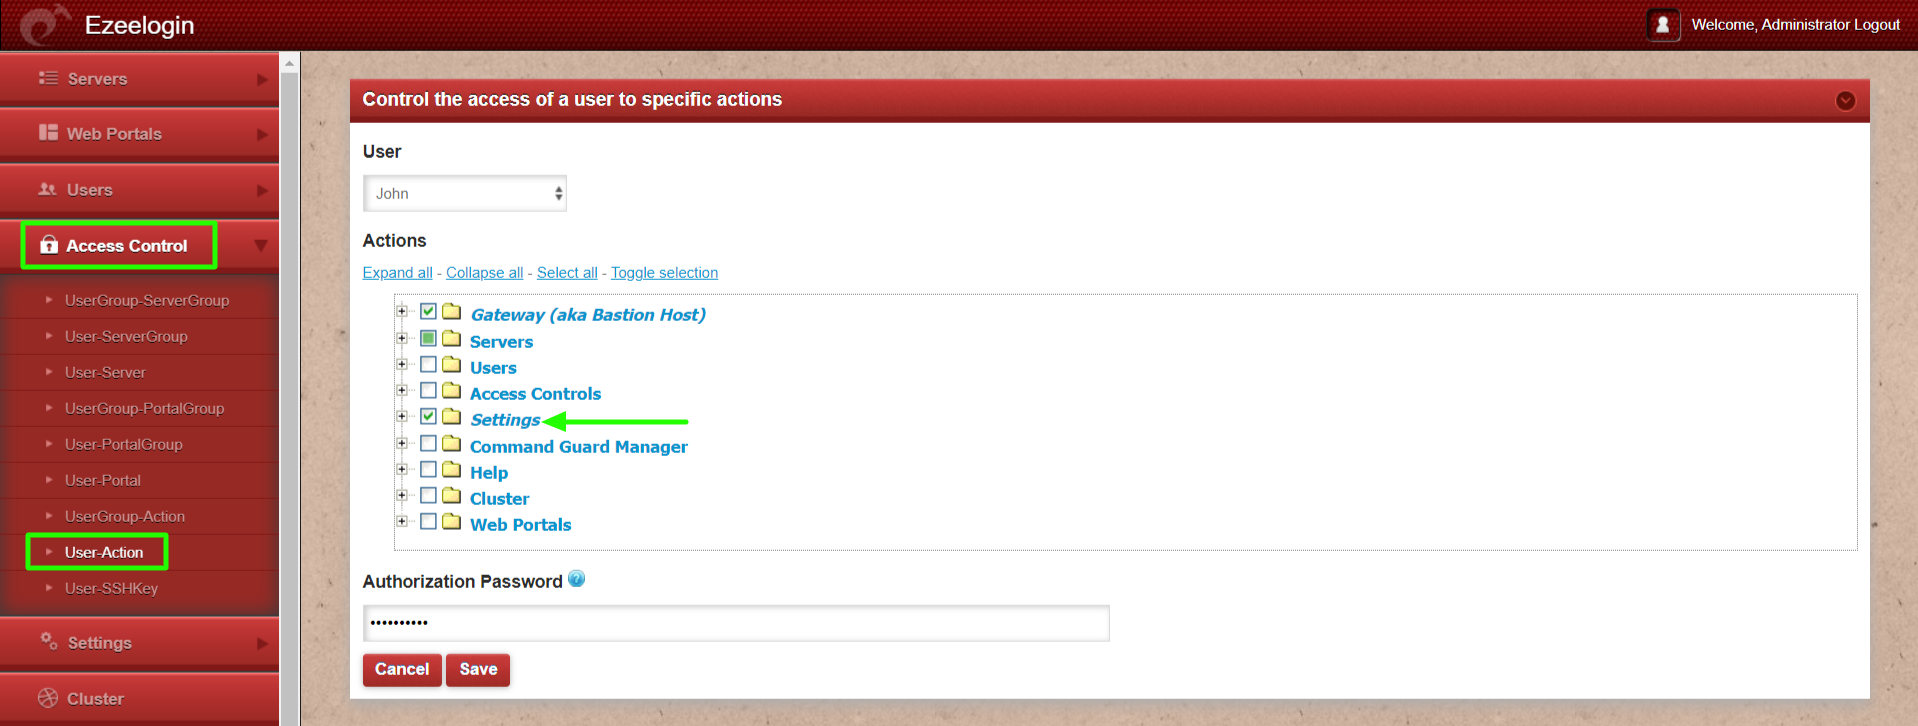
Step 6. Use the access control to grant the custom server field access and view server details access to non admin users. Access control -> User-Action -> Servers (View Server Details) and Access control -> User-Action -> Settings

How to enable custom server field for all users in ezeelogin?
Related Articles:
Enable Custom Server fields for Ezeelogin Users from database
Migrate the custom server fields from Ezeelogin version 7.0 to the latest version