How to install OpenLDAP and phpldapadmin in CentOS?
How to Install OpenLDAP and phpldapadmin in CentOS 7?
Overview: This article explains how to install OpenLDAP and phpldapadmin in CentOS 7.
Step 1: Install openldap packages.
root@centos ~]# yum install openldap openldap-servers openldap-clients -y
Step 2: Start and enable openldap service.
root@centos ~]# systemctl start slapd && systemctl enable slapd
Step 3: Create an admin LDIF file and replace olcSuffix and olcRootDN.
root@centos ~]# vim bind.ldif
dn: olcDatabase={2}hdb,cn=config
changetype: modify
replace: olcSuffix
olcSuffix: dc=centos,dc=com
dn: olcDatabase={2}hdb,cn=config
changetype: modify
replace: olcRootDN
olcRootDN: cn=admin,dc=centos,dc=com
Step 4: To make these changes, run ldapmodify command with the appropriate name.
root@centos ~]# ldapmodify -Y EXTERNAL -H ldapi:/// -f bind.ldif
Step 5: Run the below command to generate a password for admin user.
root@centos ~]# slappasswd
New password:
Re-enter new password:
{SSHA}lPFlwdh9G8O4OVQ7WPtNjWz5bgx53HcO
Step 6: Create a password LDIF file and replace the password with yours.
root@centos ~]# vim password.ldif
dn: olcDatabase={2}hdb,cn=config
changeType: modify
add: olcRootPW
olcRootPW: {SSHA}lPFlwdh9G8O4OVQ7WPtNjWz5bgx53HcO
Step 7: To make these changes, run ldapmodify command with the appropriate name.
root@centos ~]# ldapmodify -Y EXTERNAL -H ldapi:/// -f password.ldif
Step 8: To allow access to the LDAP database, replace olcAccess attribute with yours.
root@centos ~]# vim config.ldif
dn: olcDatabase={1}monitor,cn=config
changetype: modify
replace: olcAccess
olcAccess: {0}to * by dn.base="gidNumber=0+uidNumber=0,cn=peercred,cn=external, cn=auth" read by dn.base="cn=admin,dc=centos,dc=com" read by * none
Step 9: To make these changes, run ldapmodify command with the appropriate name.
root@centos ~]# ldapmodify -Y EXTERNAL -H ldapi:/// -f config.ldif
Step 10: Use ldapsearch to validate the attribute that has changed.
root@centos ~]# ldapsearch -Y EXTERNAL -H ldapi:/// -b cn=config olcDatabase=\*
Step 11: Check configuration with the below command.
root@centos ~]# slaptest -u
Step 12: Create a LDIF file that saves the base DN.
root@centos ~]# vim base.ldif
dn: dc=centos,dc=com
o: ldap
objectclass: dcobject
objectclass: organization
Step 13: Run ldapadd command with the bind DN and enter admin password to add base.ldif.
root@centos ~]# ldapadd -f base.ldif -H ldapi:/// -D cn=admin,dc=centos,dc=com -W
Enter LDAP Password:
Step 14: Install phpldapadmin package.
root@centos ~]# yum -y install phpldapadmin
Step 15: Edit phpldapadmin configuration file and comment #Require local and add a new line Require all granted.
root@centos ~]# vim /etc/httpd/conf.d/phpldapadmin.conf
#Require local
Require all granted
Step 16: Update the configuration file located at /etc/phpldapadmin/config.php to match the example shown below.
root@centos ~]# vim /etc/phpldapadmin/config.php
$servers->setValue('server','name','CentOS LDAP');
$servers->setValue('server','host','127.0.0.1');
$servers->setValue('server','port',389);
$servers->setValue('server','base',array('dc=centos,dc=com'));
$servers->setValue('login','attr','dn');
// $servers->setValue('login','attr','uid');
$servers->setValue('login','bind_id','cn=admin,dc=centos,dc=com');
$config->custom->appearance['hide_template_warning'] = true;
Step 17: After making the changes, open the browser and access your LDAP administration dashboard with http://server_ip/phpldapadmin
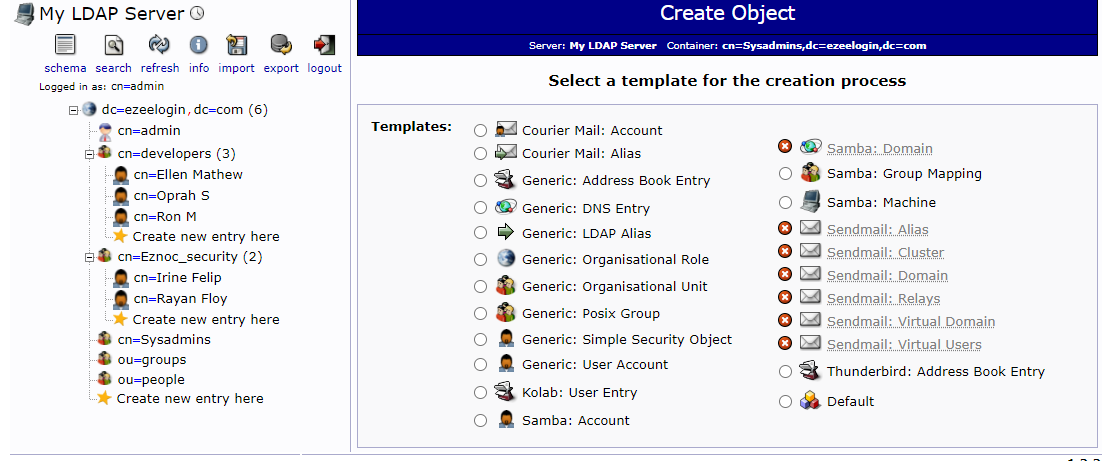
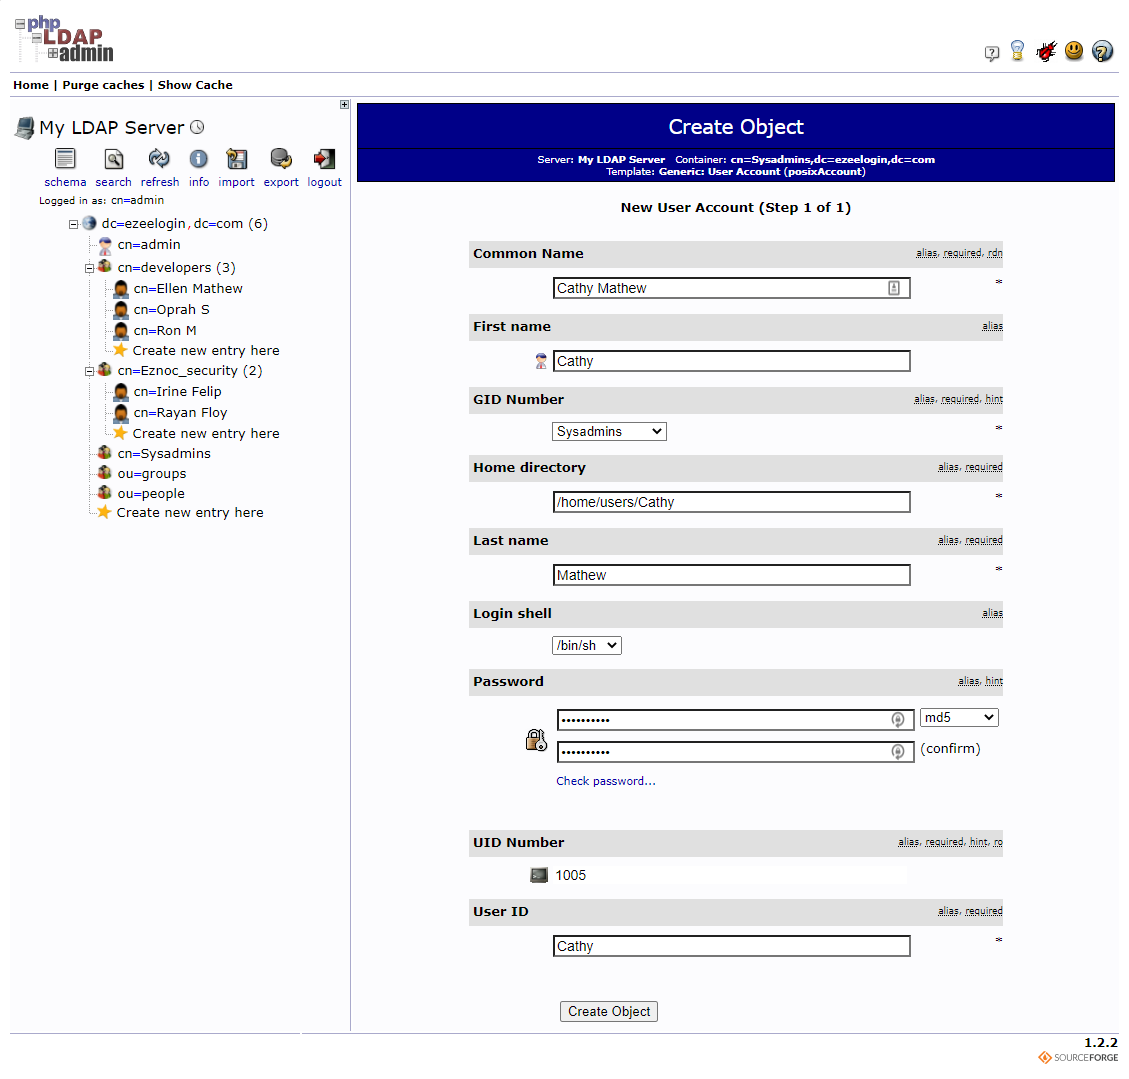
Step 18: The following image shows the GUI of phpldapadmin.

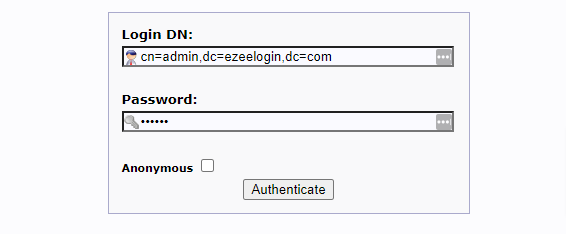
Step 19: Click on the " login" button at the top left corner of GUI to log in to the admin dashboard.
Related Articles: