Integrate Authentik SSO with Jumpserver
Integrate Authentik SSO with Ezeelogin SSH Gateway
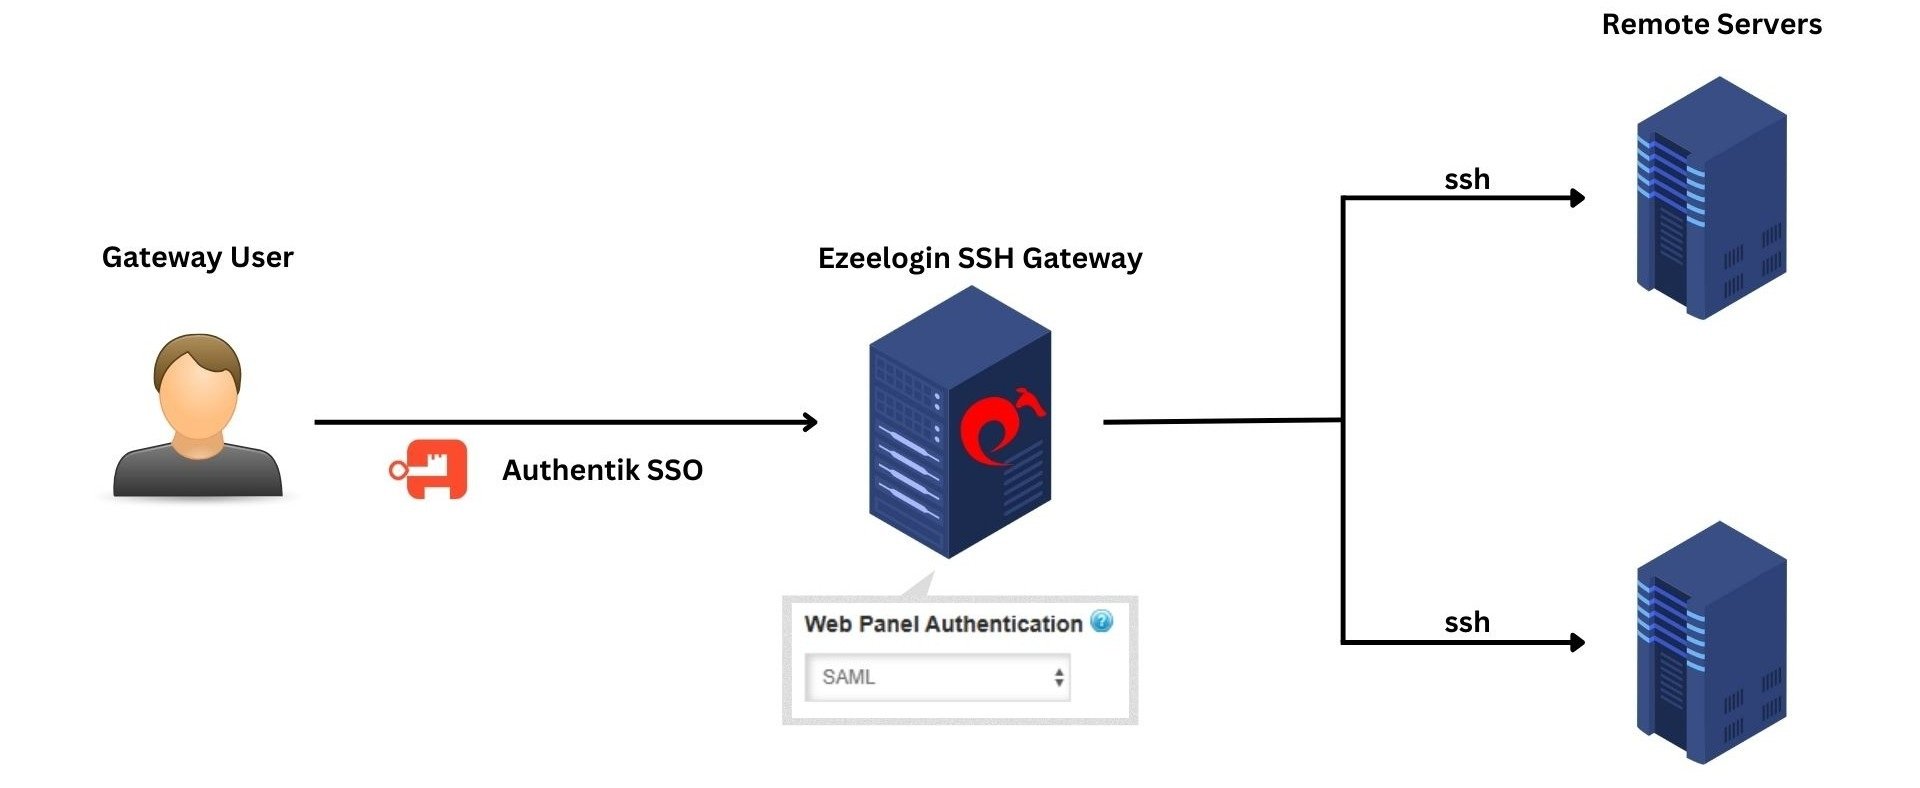
Overview: This article will help Ezeelogin admin users to integrate Authentik SSO with Ezeelogin gateway server.
SAML is an authentication mechanism for web applications.
It's based on web protocols and it cannot be used for user authentication over SSH.
Step 1: Login to Authentik administrator dashboard and add Providers under Application tab.

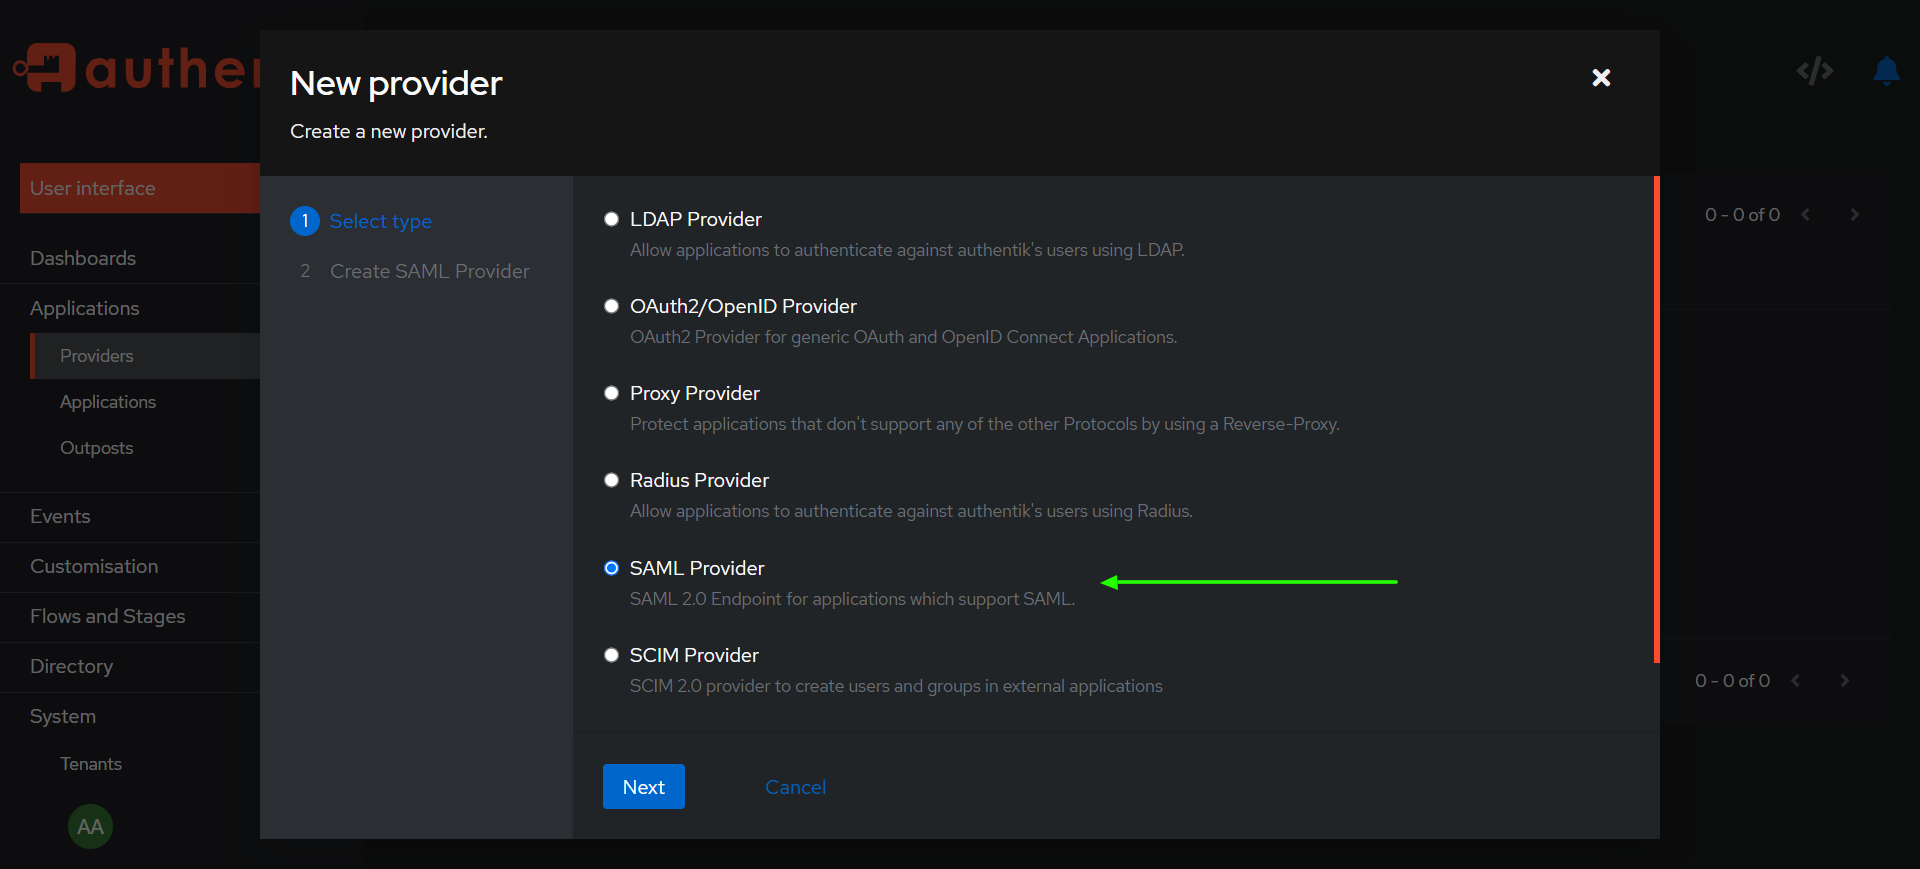
Step 2: Select SAML Provider and click next.
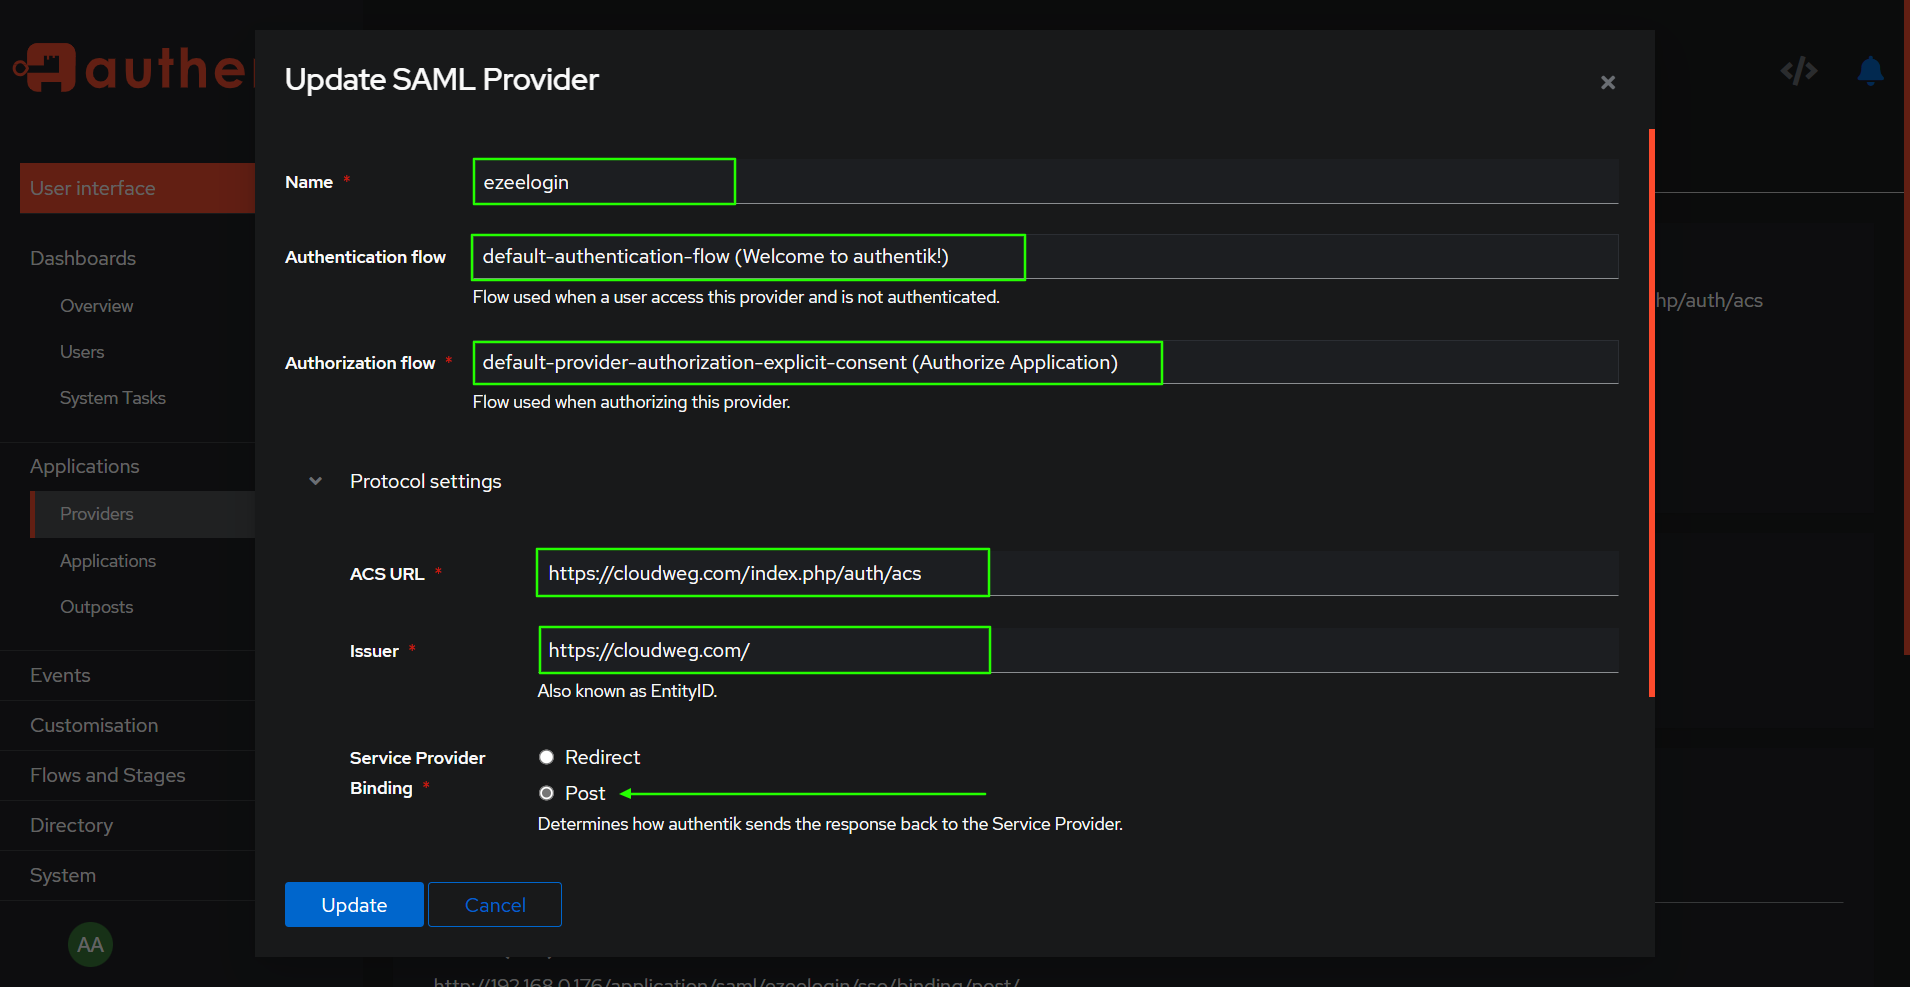
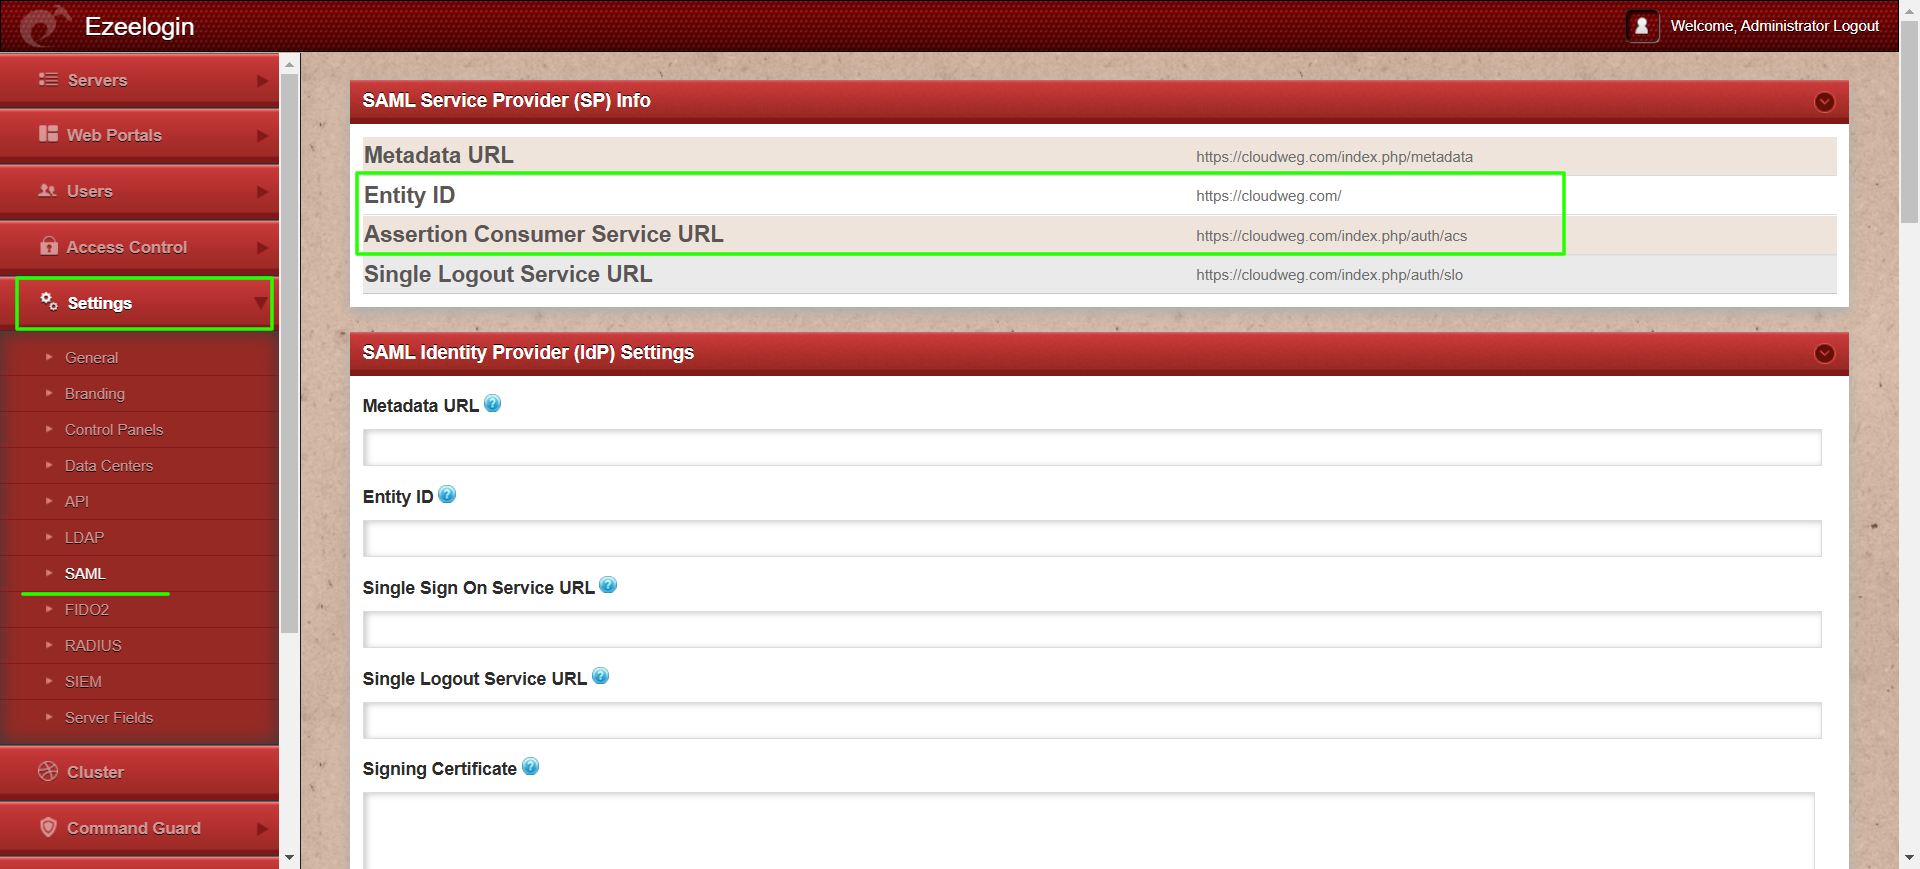
Step 3: Provide a name for the SAML provider and set both the Authentication Flow and Authorization Flow to default. Under Protocol Settings, paste the ACS URL and Entity ID from the Ezeelogin SAML settings in the GUI, select POST then click Finish.
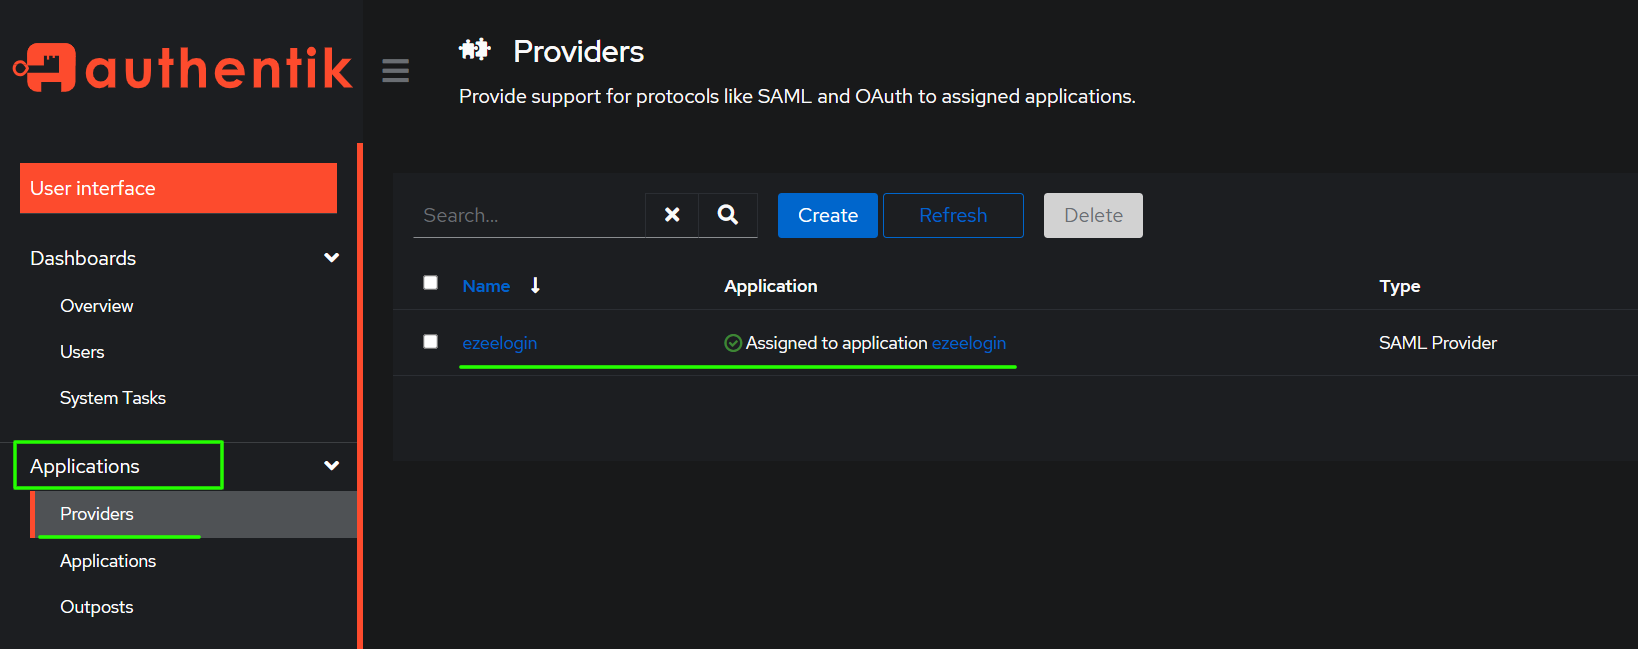
Step 4: After successfully creating the SAML provider, it will be listed under the Providers tab and display a warning message stating, "Provider not assigned to any application."

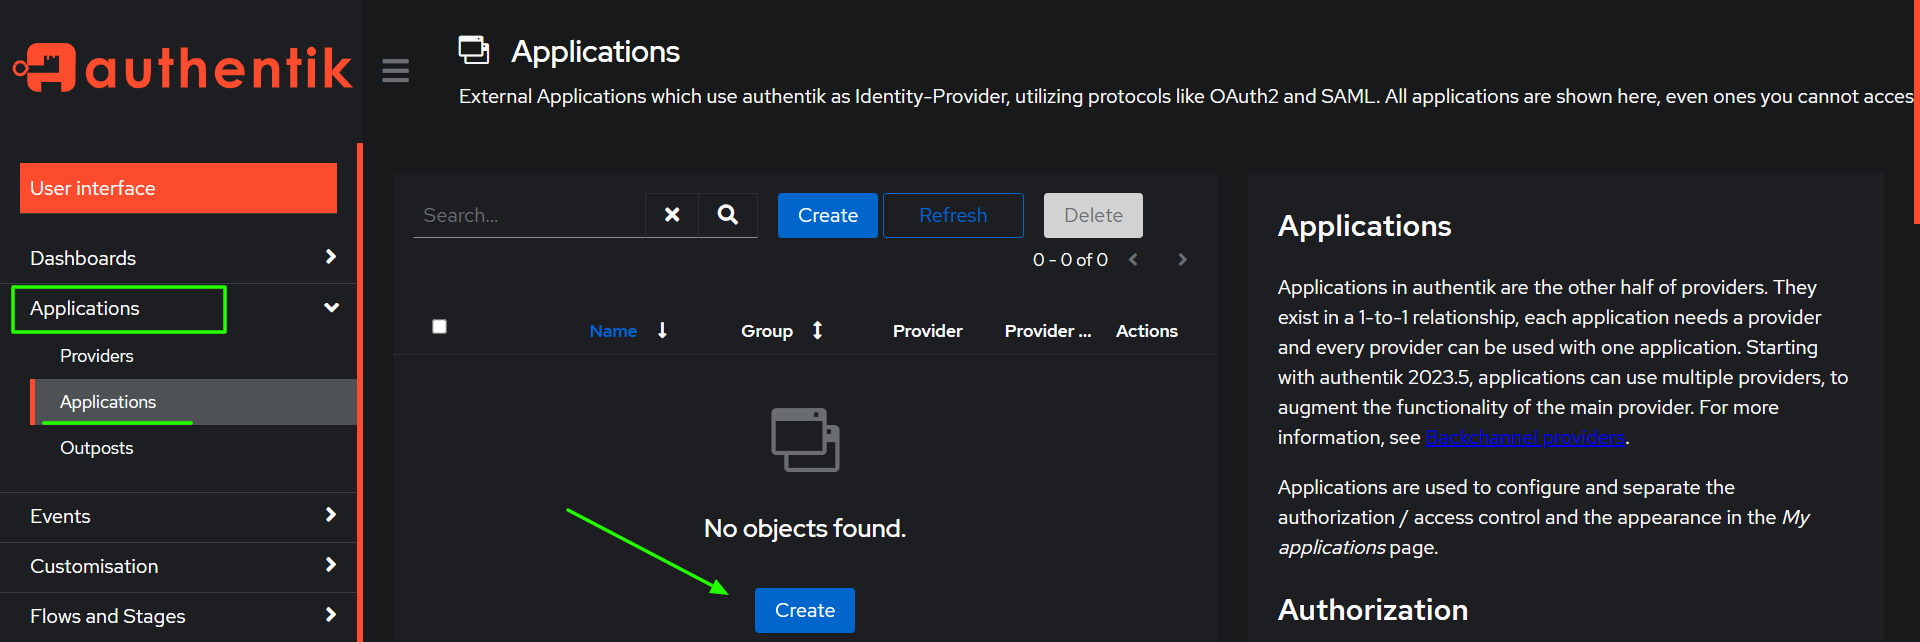
Step 5: Add an Application under the Applications tab.
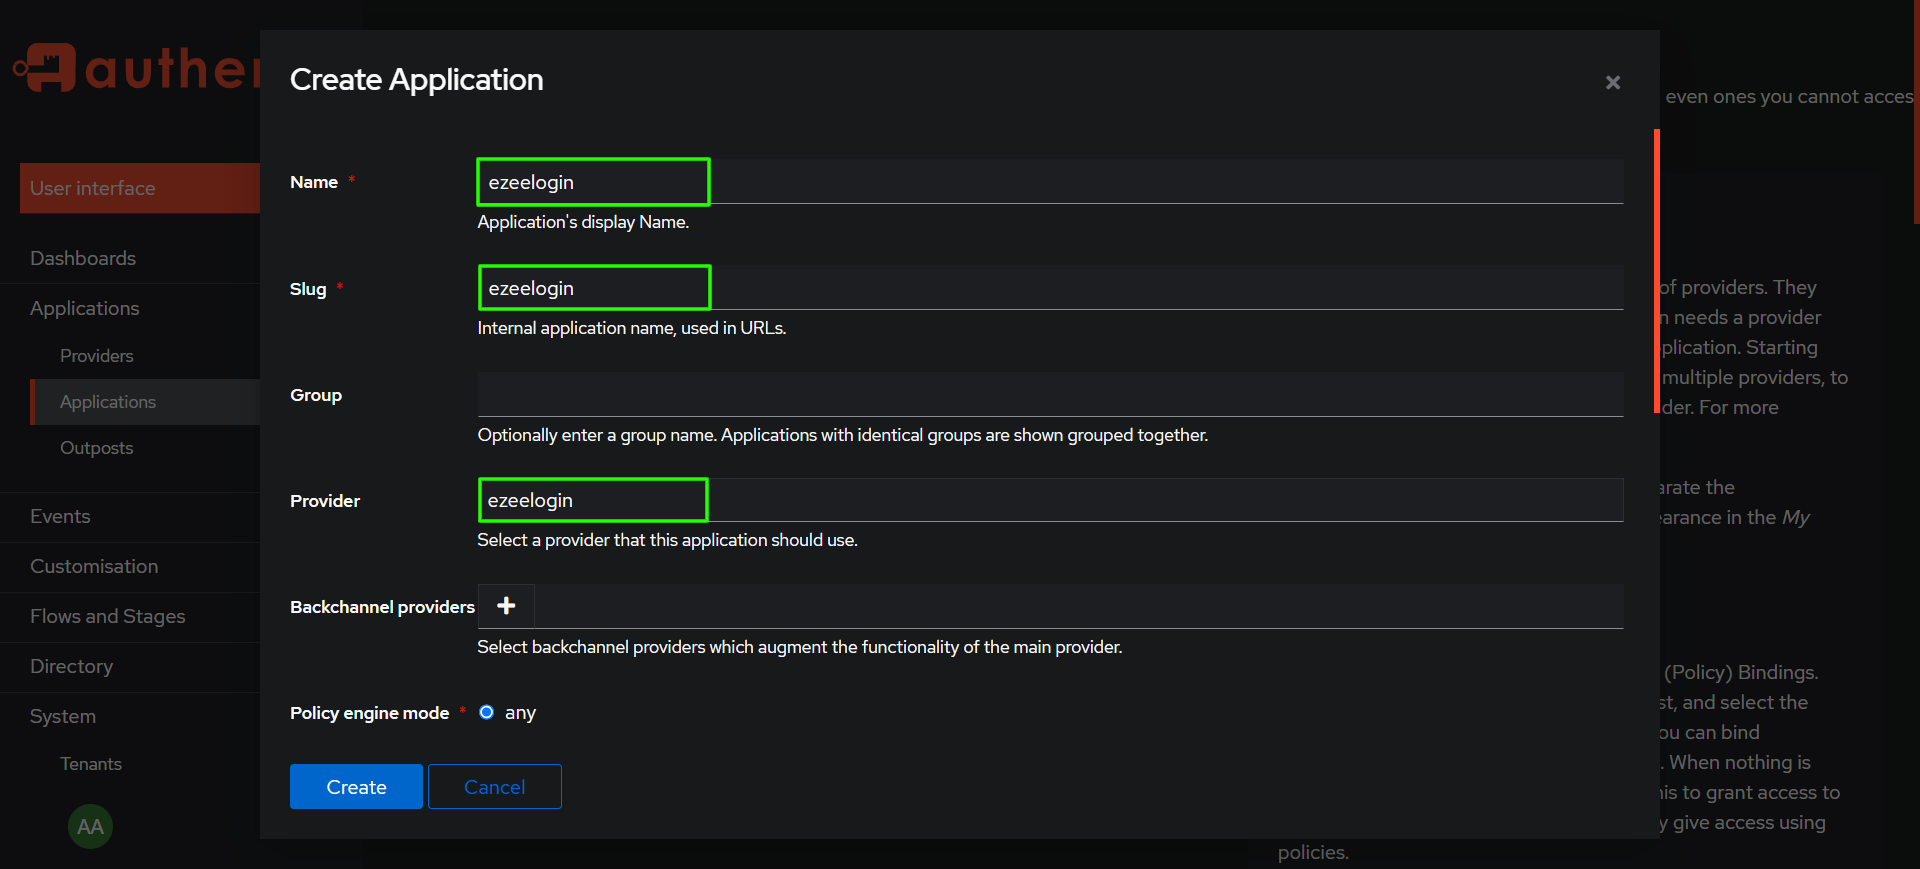
Step 6: Provide a name for the application, select the provider using the drop-down box, and create the application.
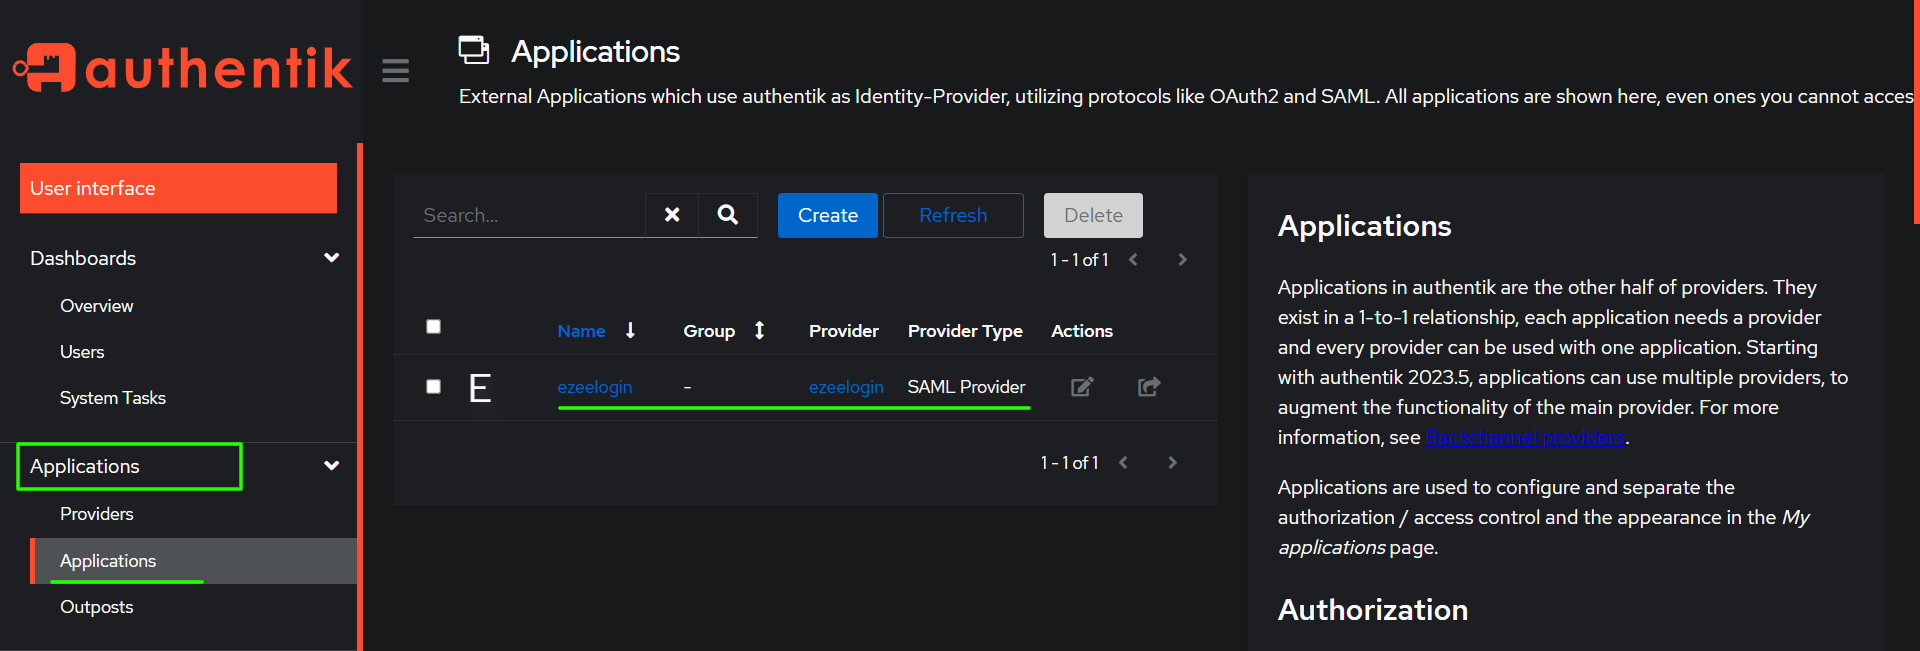
Step 7: After the successful creation of the application, it will be listed under the Applications tab. Also, check the Providers tab to see if the previous warning message has disappeared.
Step 8: Generate new Certificate-Key Pair for Ezeelogin and provide a name for certificate and click generate.
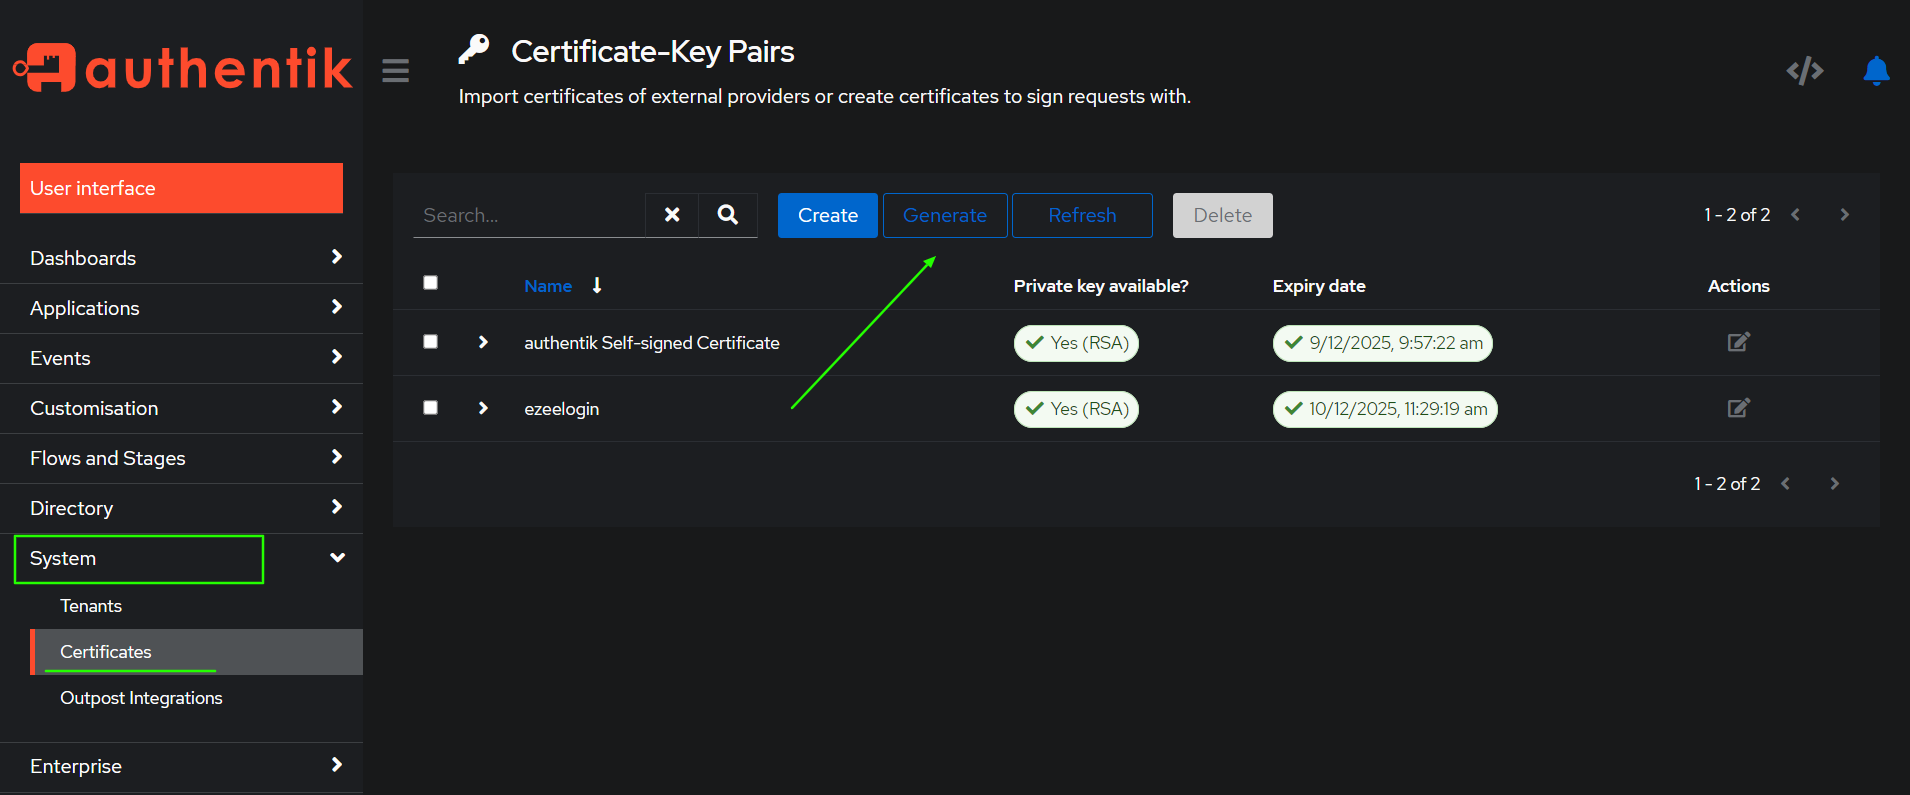
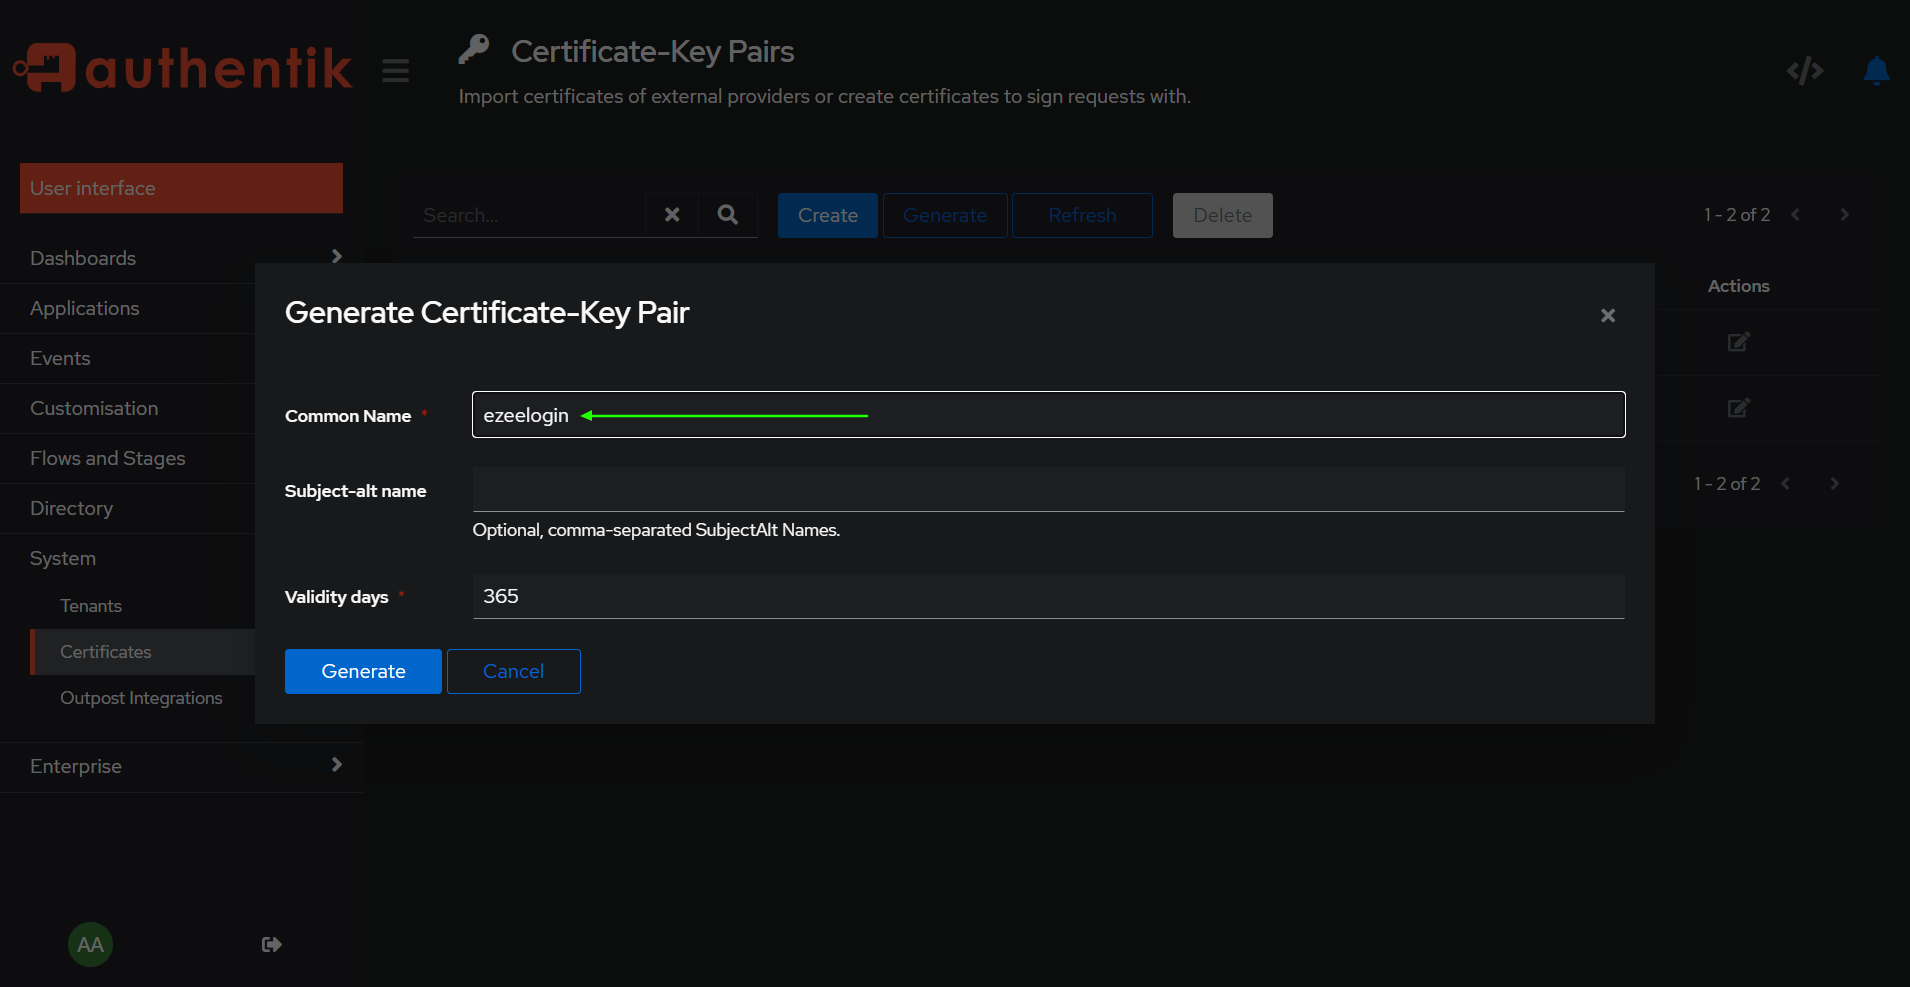
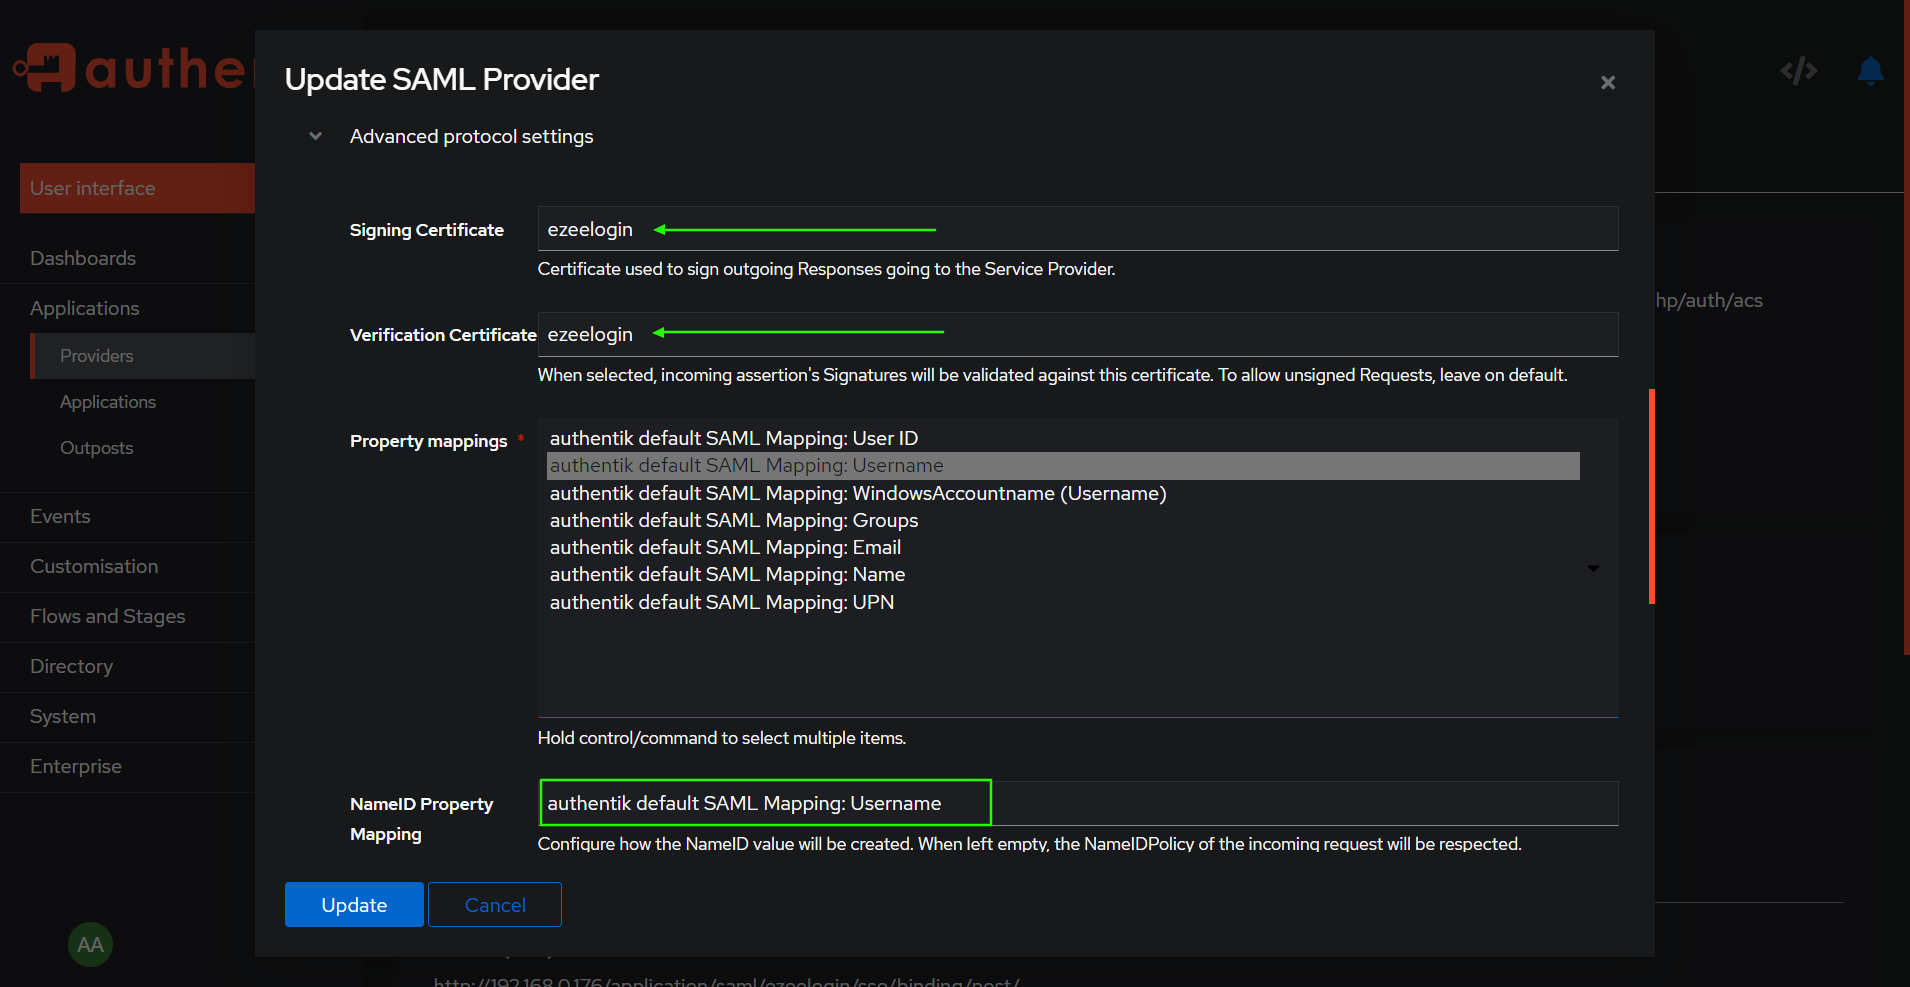
Step 9: Edit the Application provider, map the certificate, and configure the NameID property mapping, then click Update.

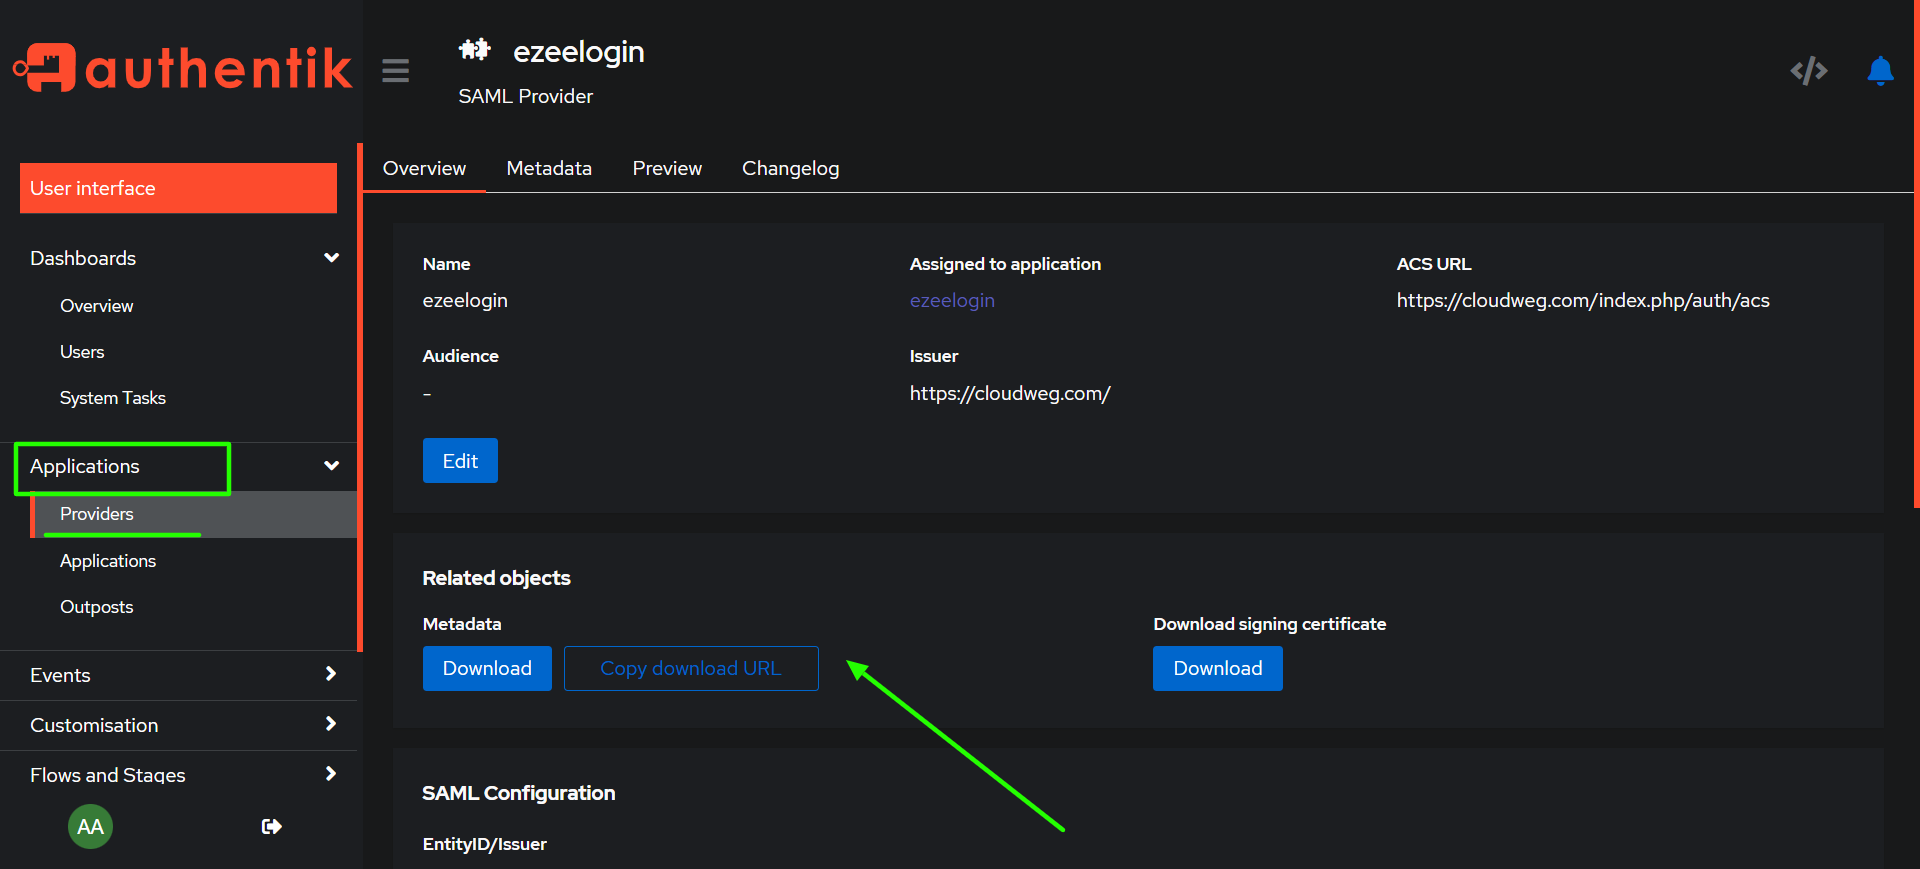
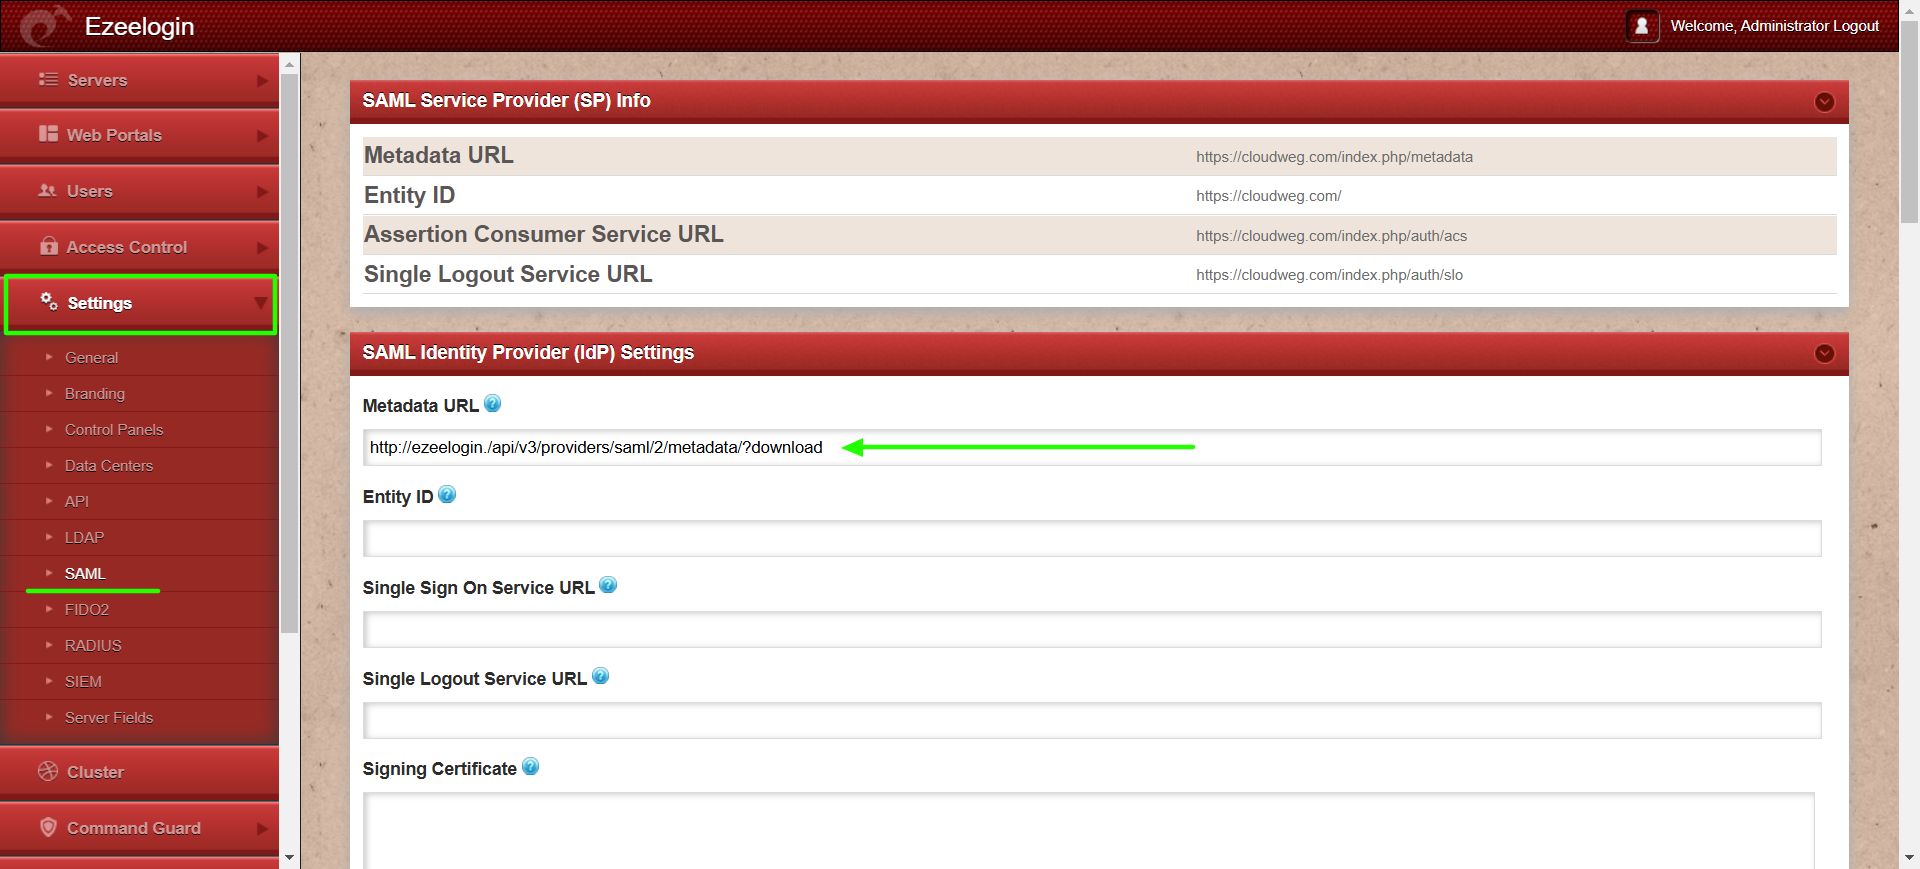
Step 10: Click on the provider name, copy the download URL, paste it into the Ezeelogin GUI, and click "Fetch" to automatically populate the data and save the settings.

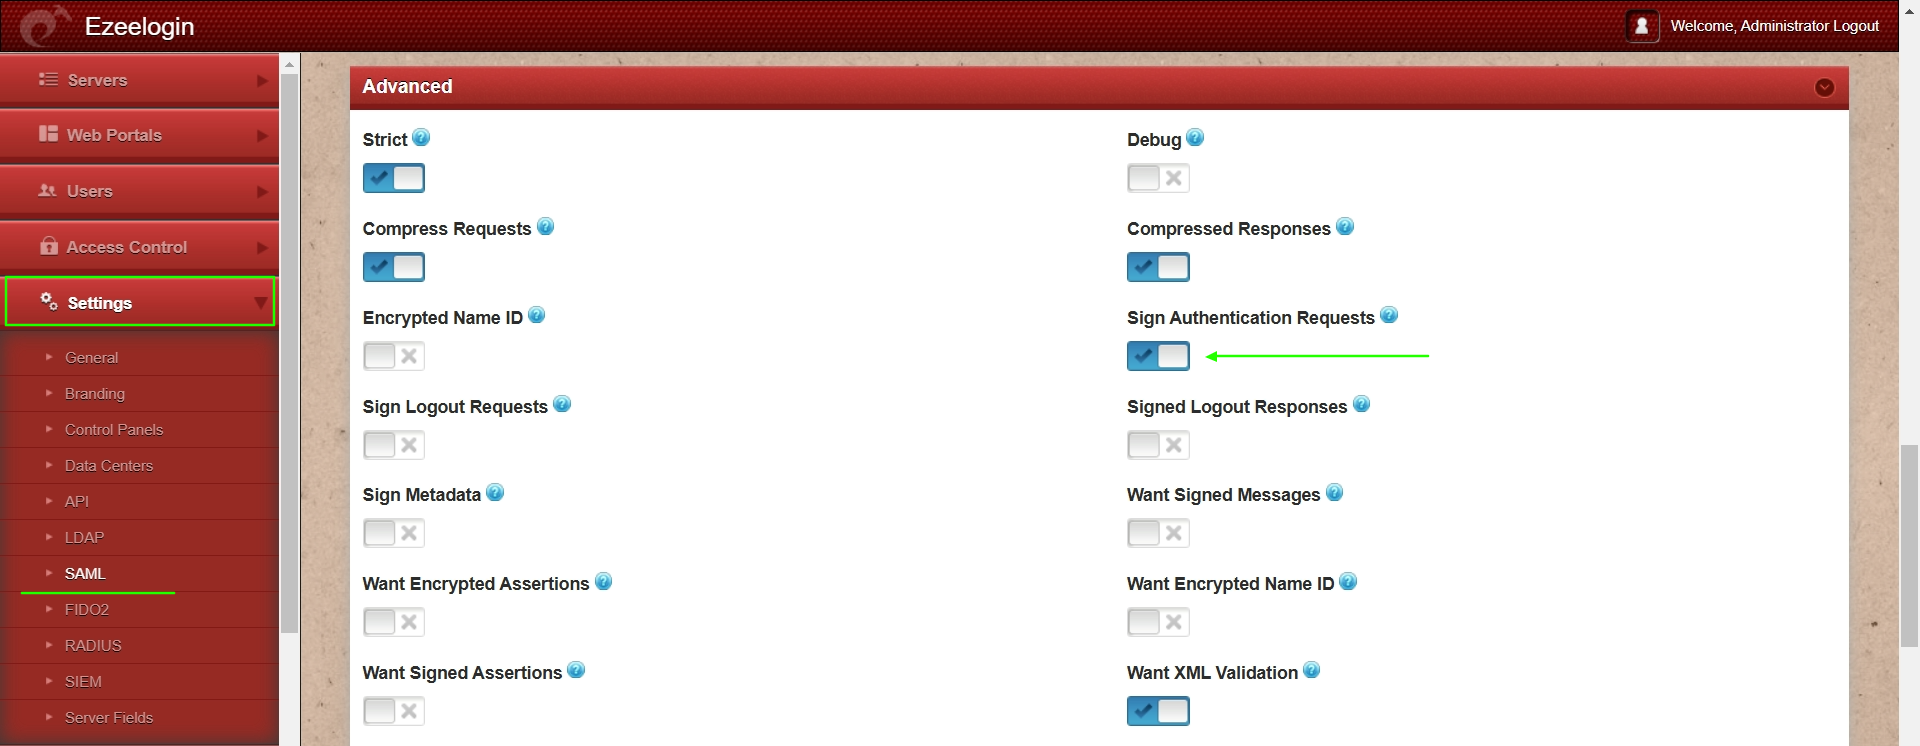
Step 11: Edit the SAML settings in the Ezeelogin GUI, and in the advanced section, enable Sign Authentication Requests.
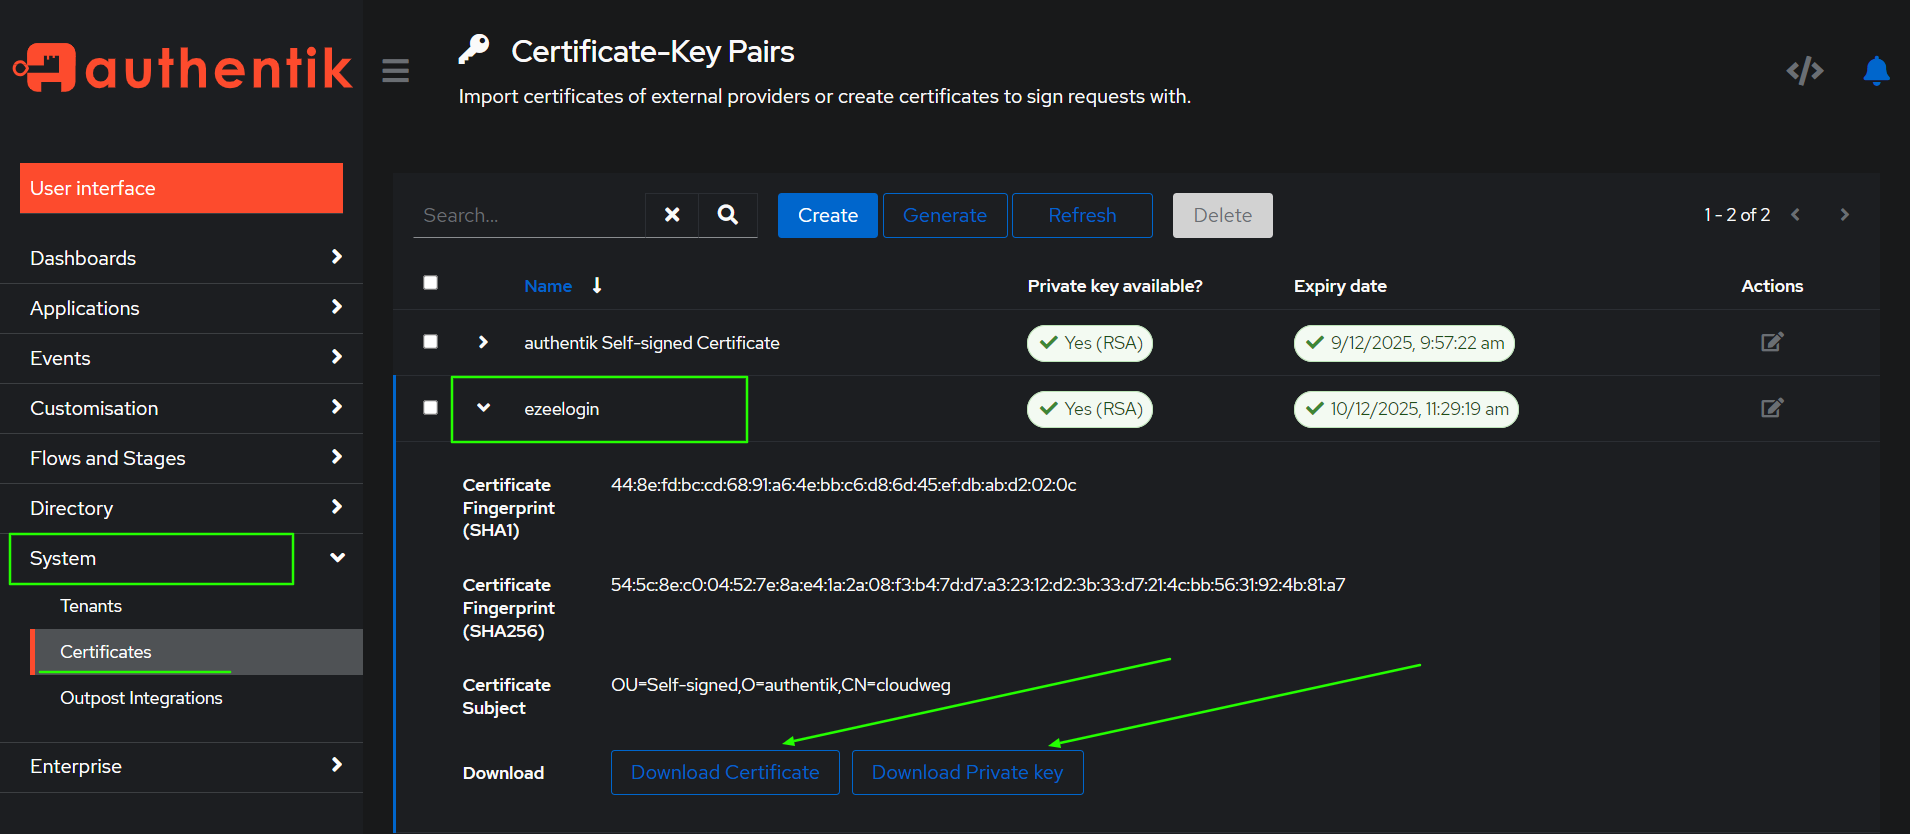
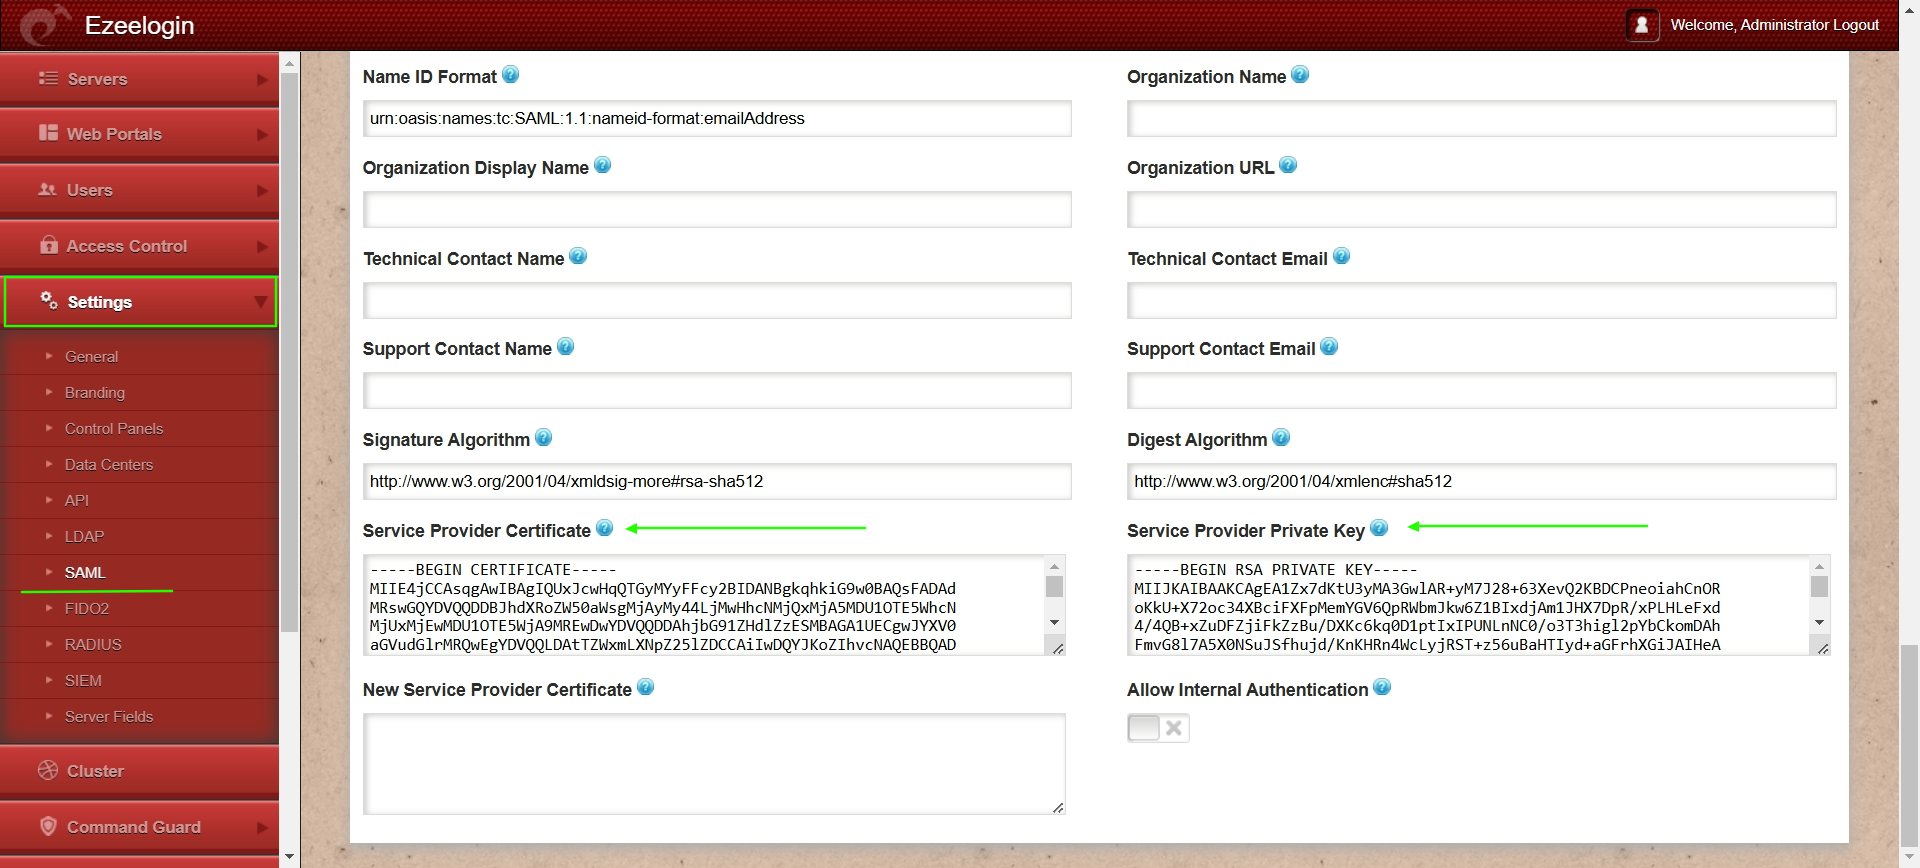
Step 12: Download the certificate and private key, and paste them into the Ezeelogin SAML settings.
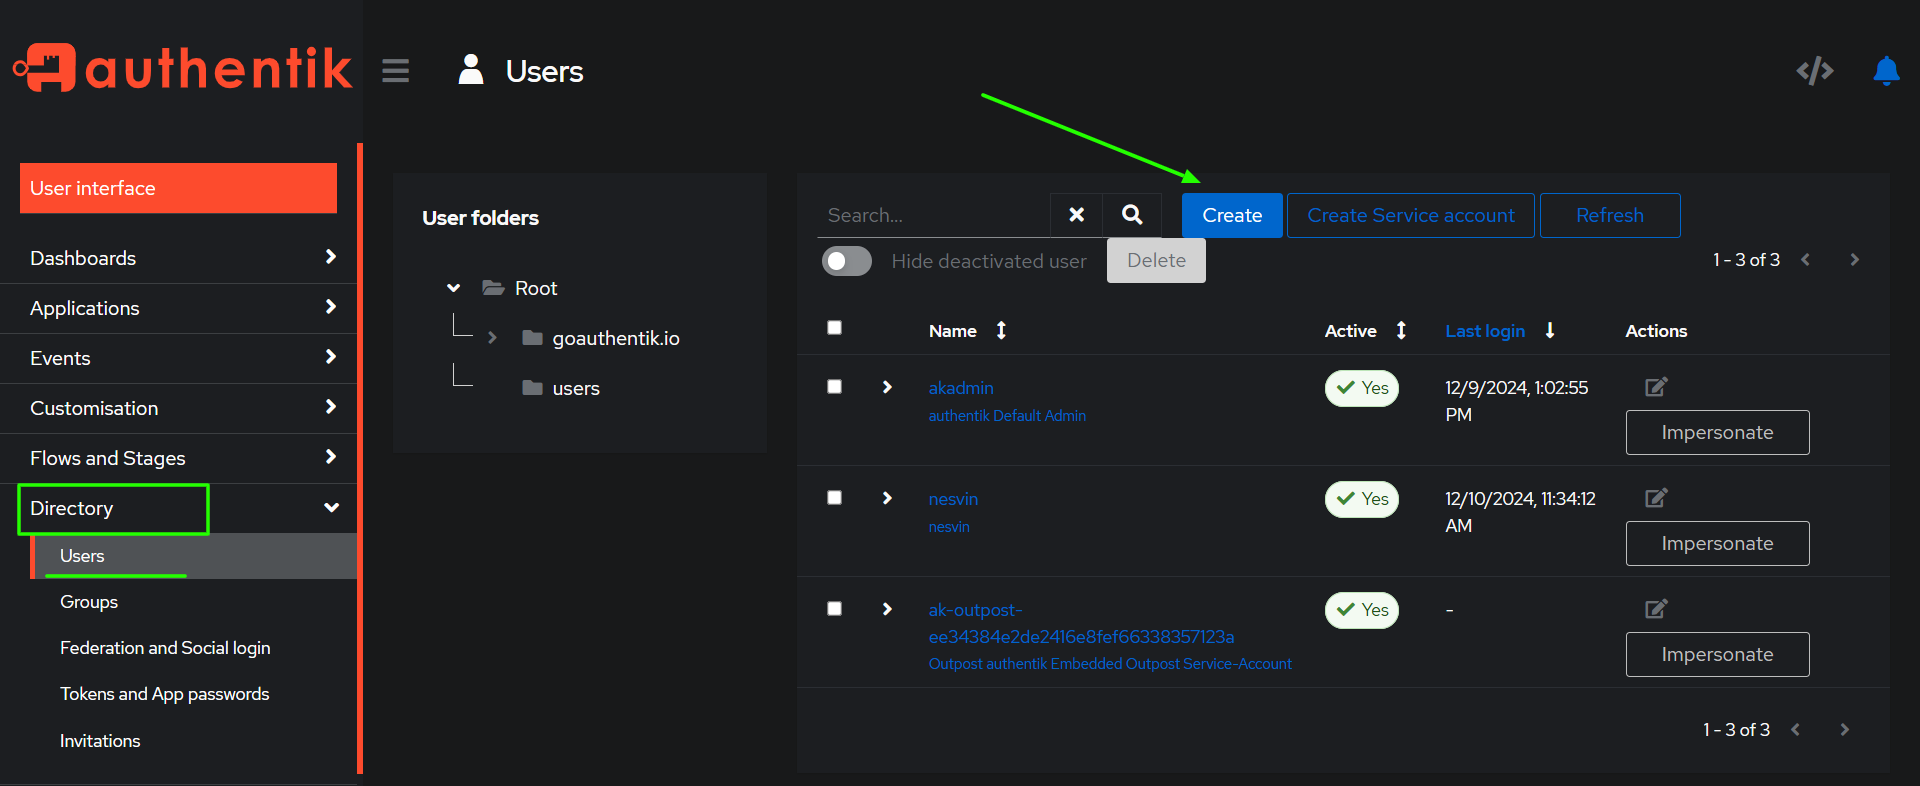
Step 13: Add a new user to use the application.
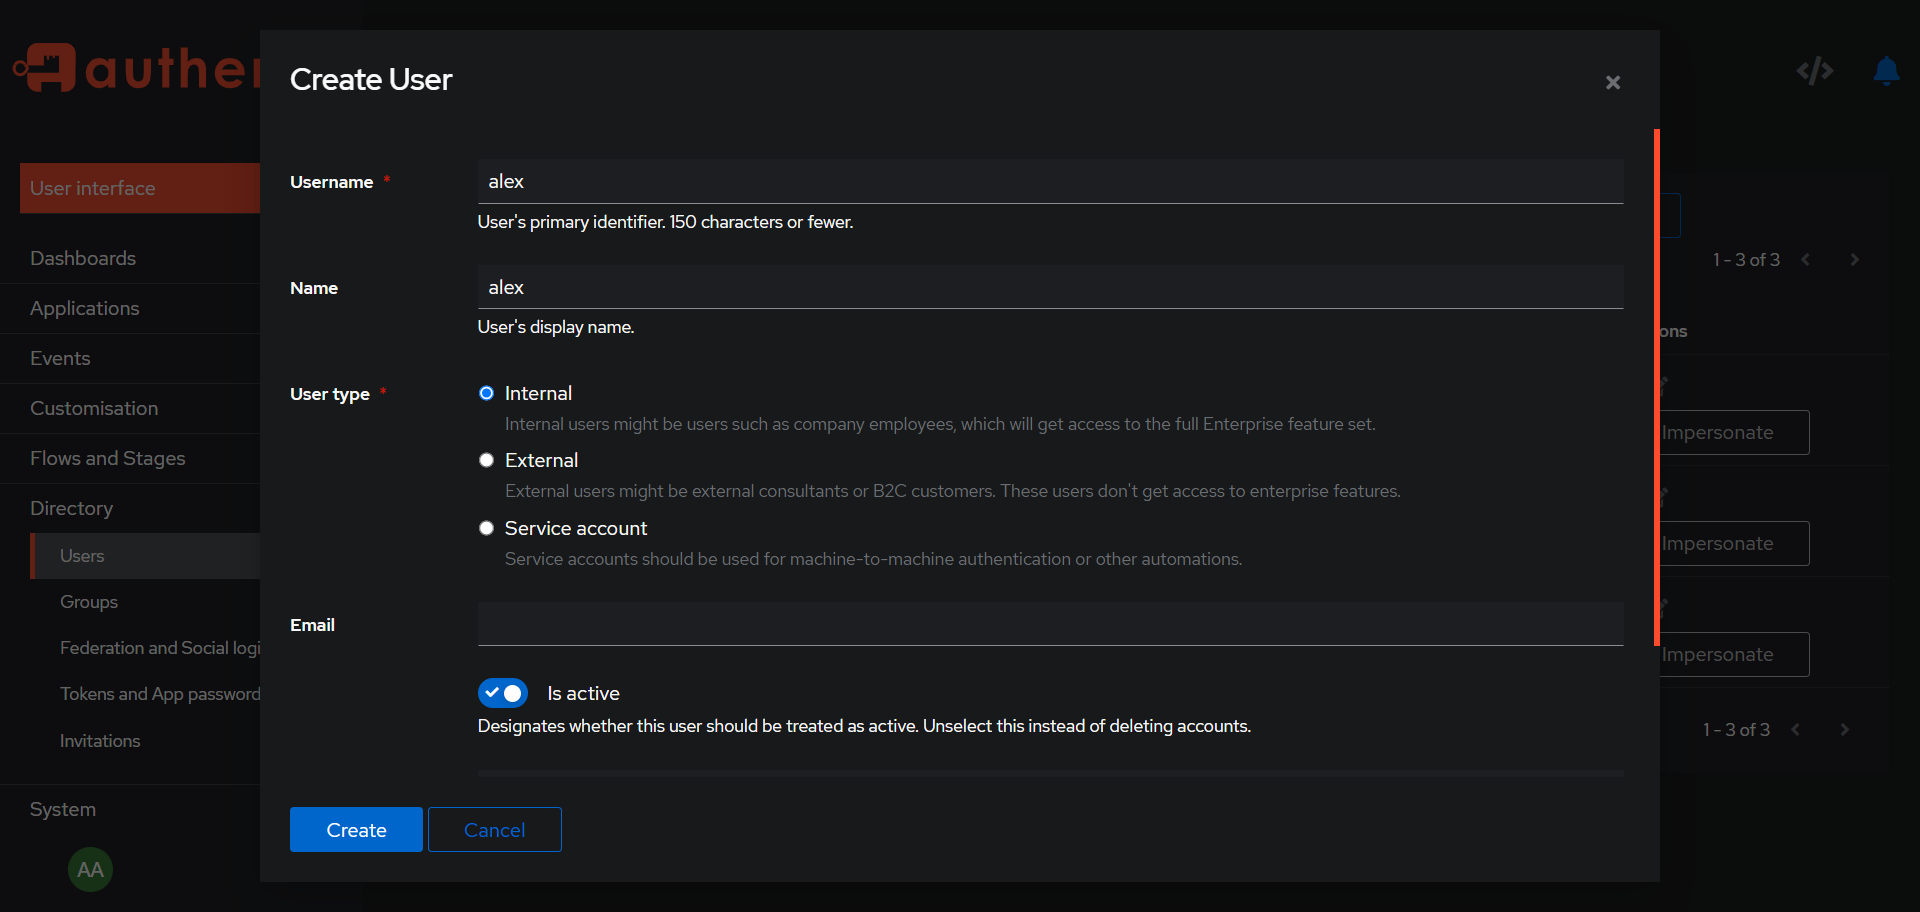
Step 14: Provide the username and name, select Internal, and then create the user.
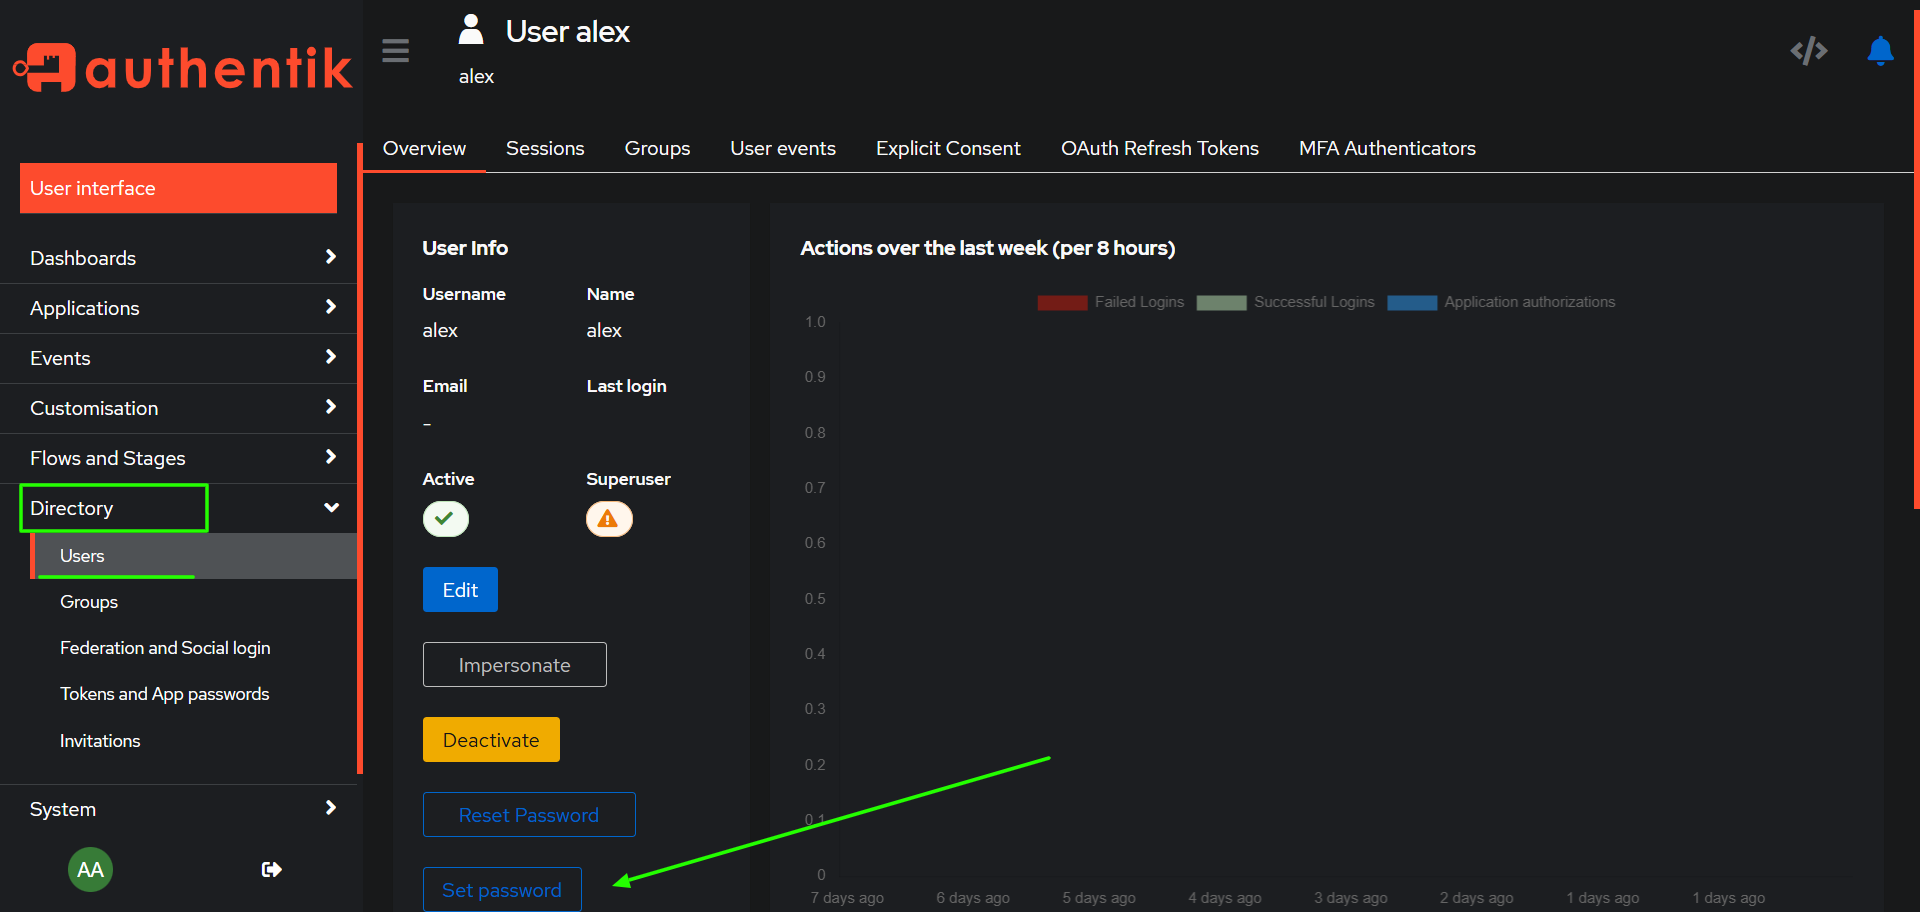
Step 15: Edit the user and set password for the new user.
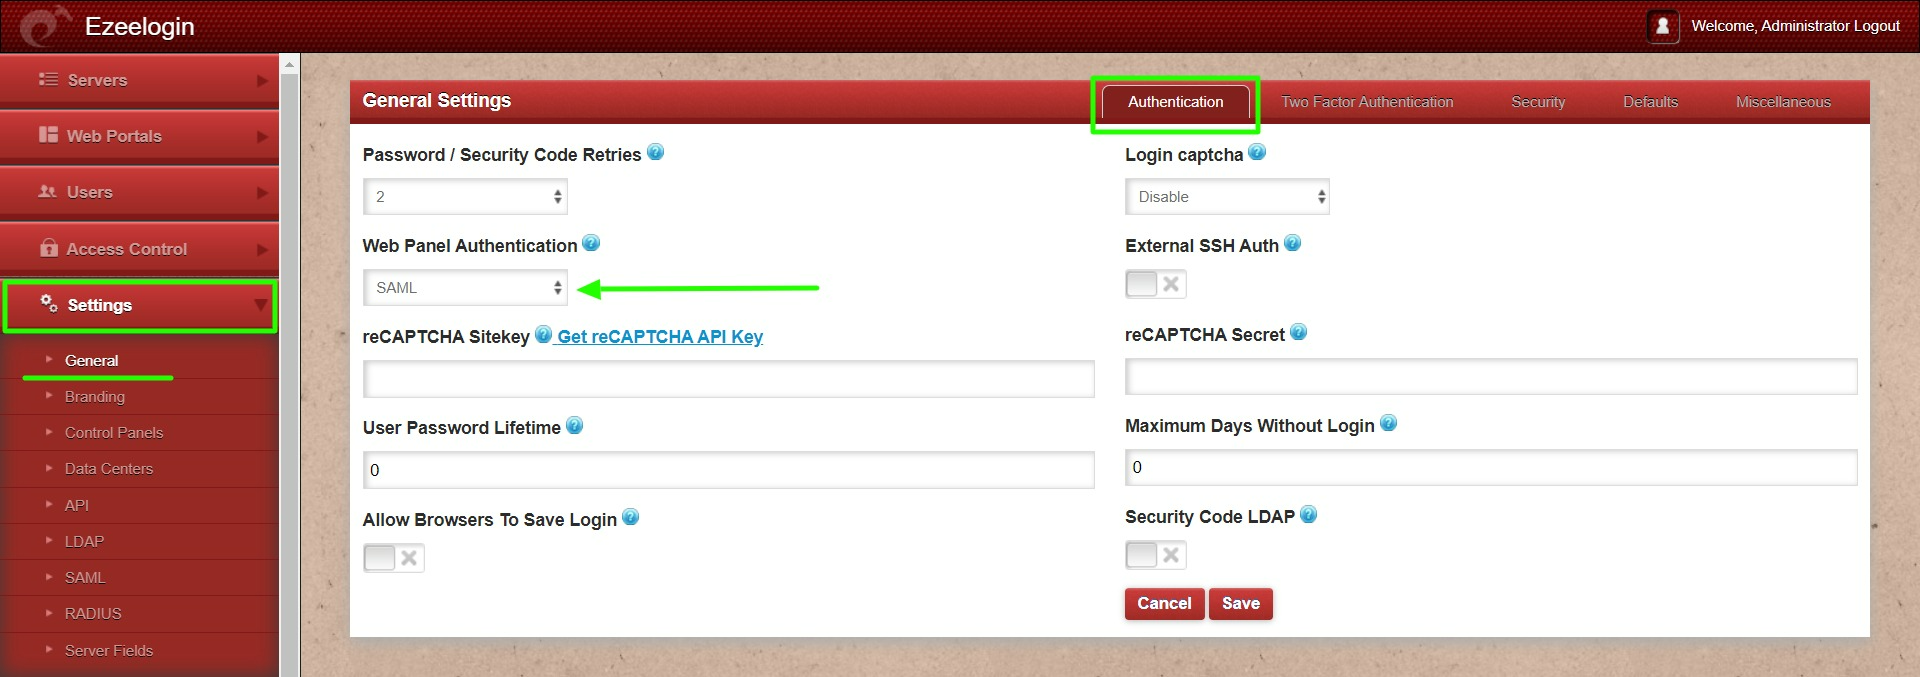
Step 16: Change Web panel Authentication to SAML from Ezeelogin GUI > Settings > General >Authentication
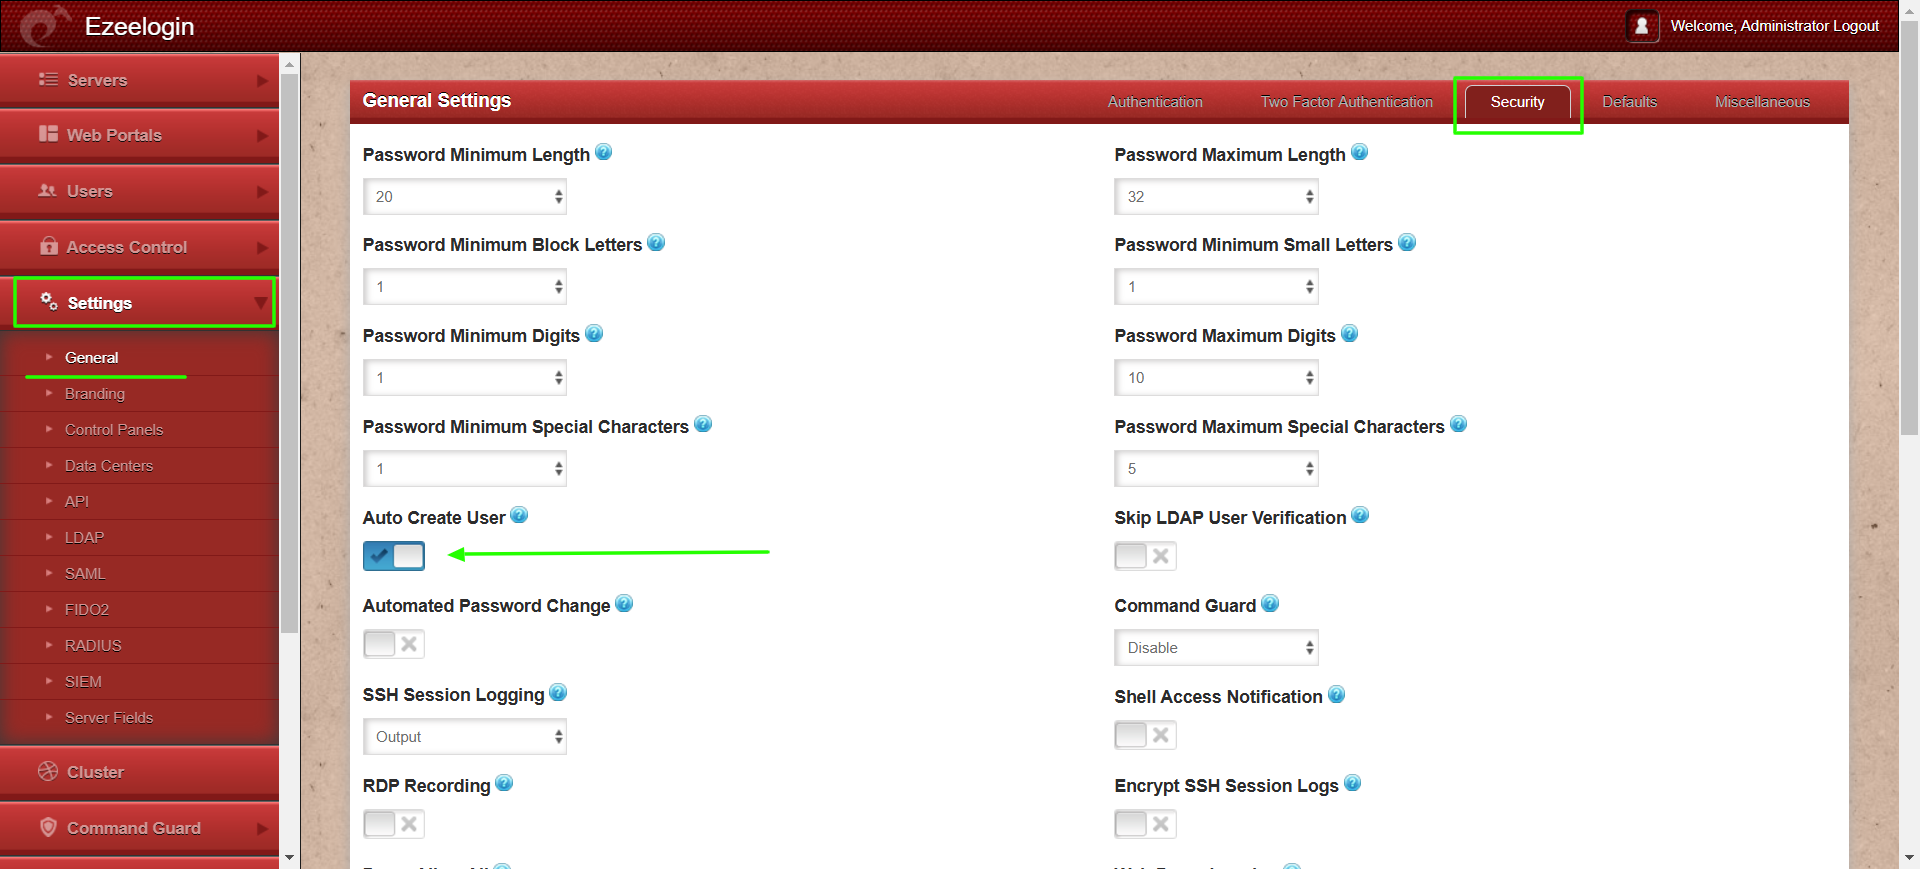
Step 17: Enable Auto Create User from Ezeelogin GUI -> Settings -> General -> Security -> Enable Auto Create User.

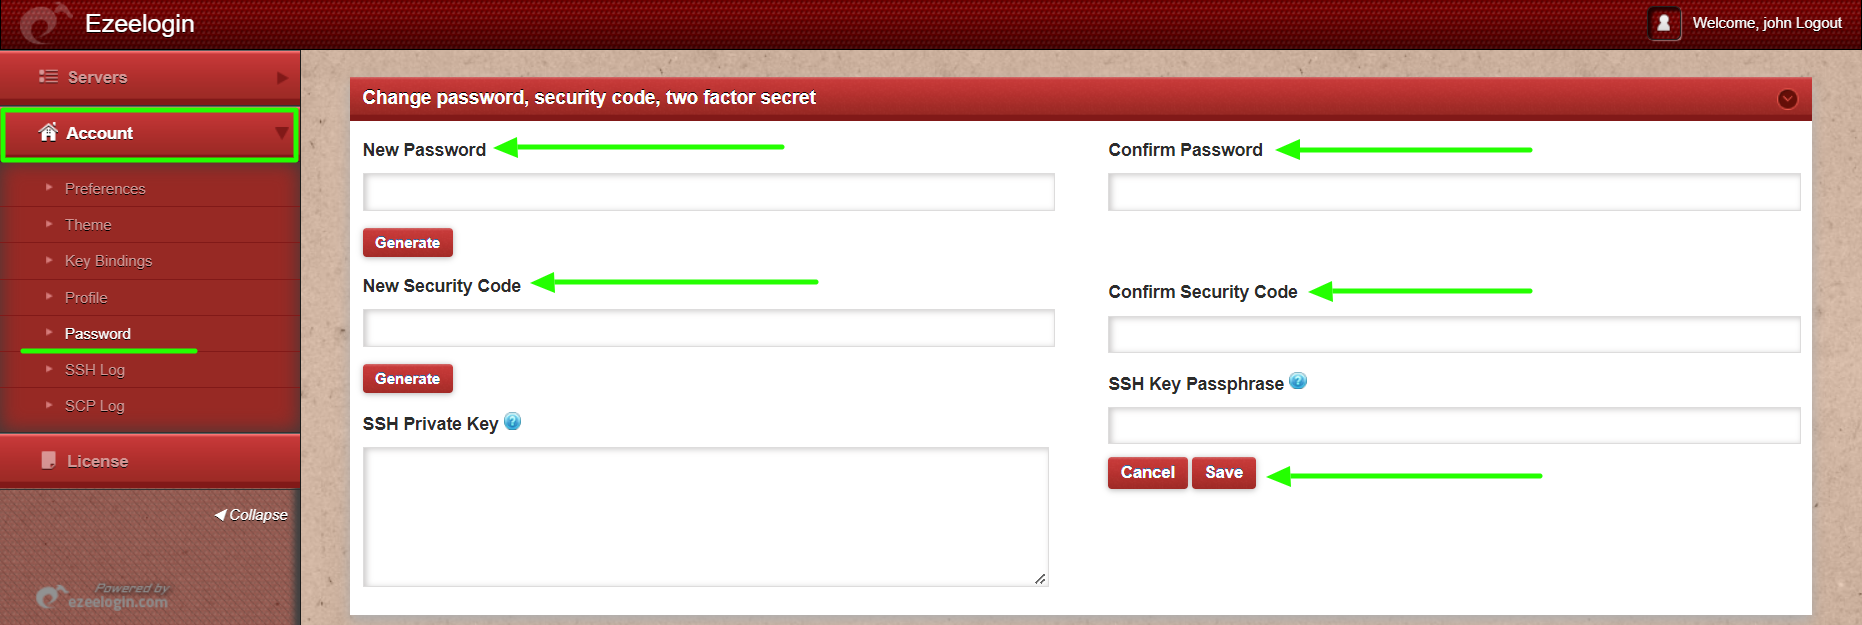
Step 19: After logging into GUI, you need to reset the password and security code of the SAML user under Account -> Password in order to SSH to the EZSH shell.
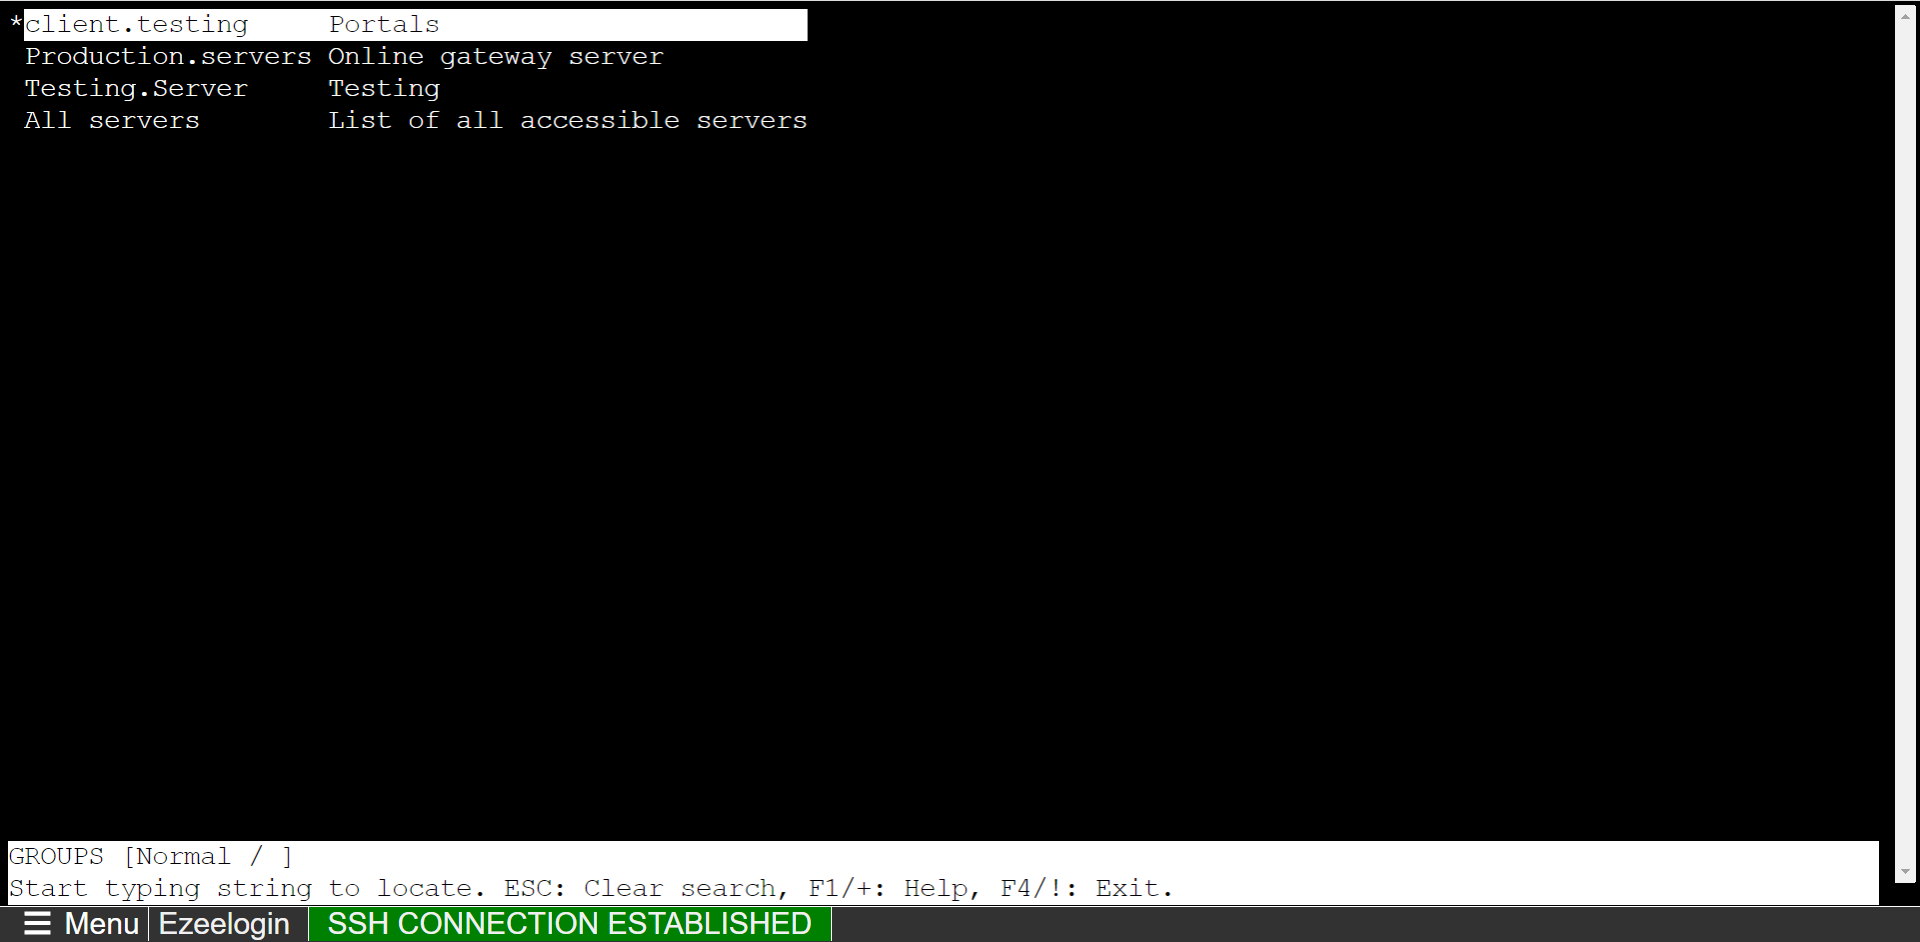
Step 15:. Login to Ezeelogin shell via Webssh shell or using any SSH client such as Putty or terminal etc. WebSSH: Click on the 'Open Web SSH Console' icon to SSH via the browser.

WebSSH terminal will open like below. Users can navigate the server group with the Up and Down arrow buttons and enter to login into the server.
Common error while accessing Ezeelogin with Authentik SSO login.
Bad Request Verification Certificate configured, but request is not signed.
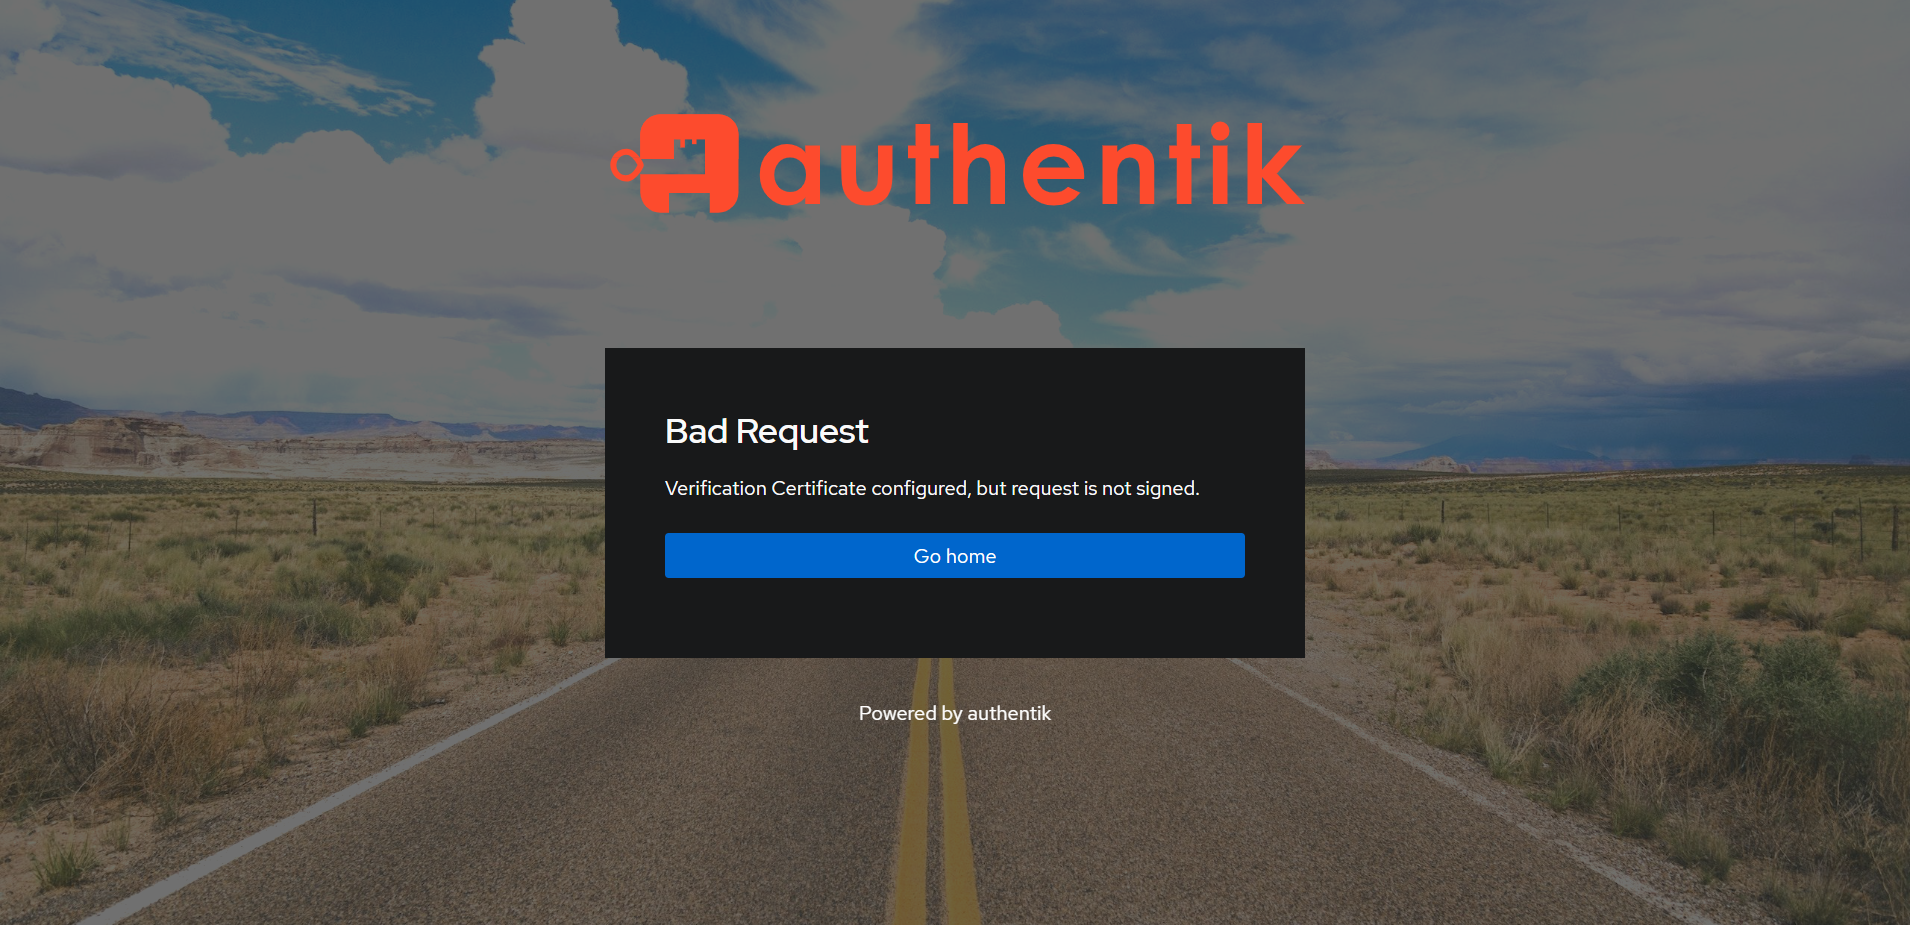
Verify Ezeelogin settings with step 11 and 12 from above steps to fix the above error.
Related Articles: