As cyber threats become increasingly sophisticated, it is paramount to ensure that your outbound SSH connections are both secure and reliable. This month, we’re diving into how you can fortify your SSH access using a powerful combination of Ezeelogin SSH Jump Server and Cloudflare Zero Trust Network Access (ZTNA).
By integrating Cloudflare Tunnel with Ezeelogin jump server, you can create a robust security framework that routes your SSH connections through a public hostname, effectively shielding your SSH jump server from potential threats. This approach not only enhances server security of endpoint devices but also simplifies server access management.
To get started, you’ll need to install Cloudflared tunnel daemon on the SSH jump server and cloudflared agent daemon on client machines, and configure an active zone on Cloudflare. With these steps, you’ll be equipped to leverage the benefits of a Zero Trust model, ensuring that your SSH access is both secure and seamlessly accessible.
In this edition, we’ll guide you through the setup process, highlight best practices, and explore how this integration can transform your approach to network security. Let’s secure the remote SSH connections!
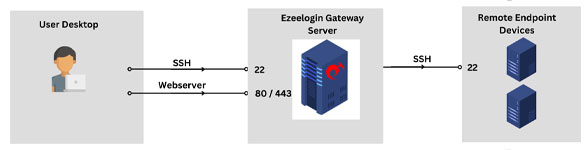
Concept Diagram
Ezeelogin with Cloudflare ZTNA
Ezeelogin without Cloudflare ZTNA
Benefits
Enhanced Security: Hide your SSH jump server’s actual IP address by routing it through a secure Cloudflare Tunnel.
Simplified Access: Connect to Ezeelogin SSH jump server from any location without the need for a VPN.
Improved Reliability: Take advantage of Cloudflare’s robust network for consistently stable and reliable access.
Centralized Management: Manage access and configurations easily through Cloudflare’s dashboard.
Reduced Attack Surface: Minimize the risk of direct attacks on your server
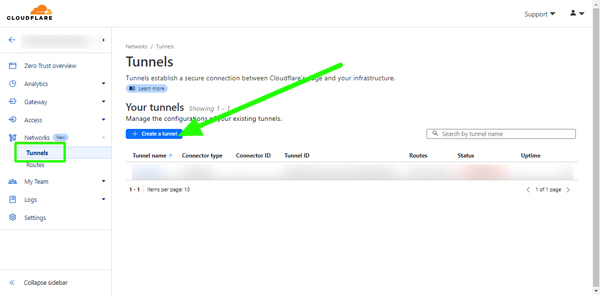
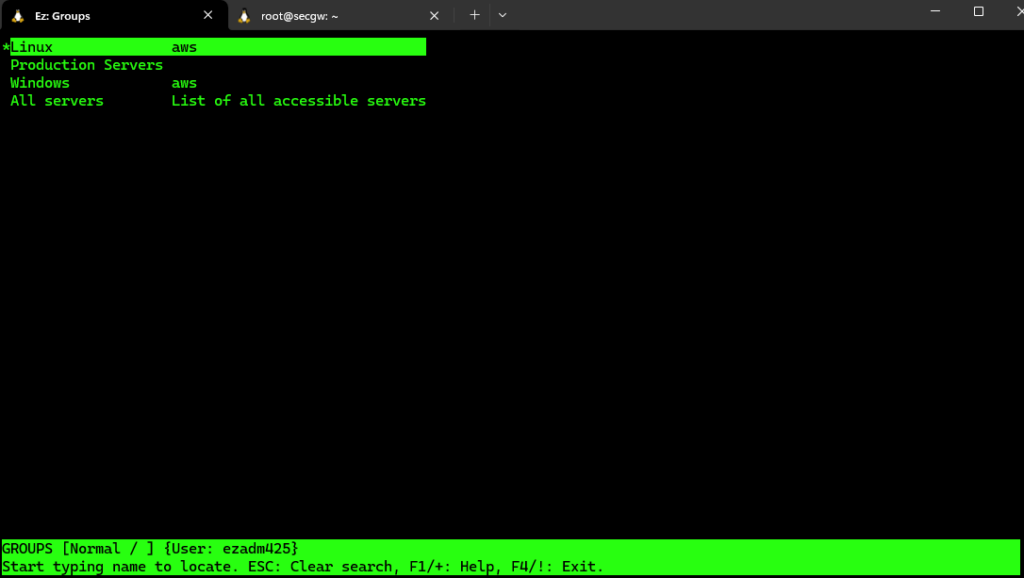
Step 1.2 Navigate to ‘Zero Trust’ -> Network -> Tunnels
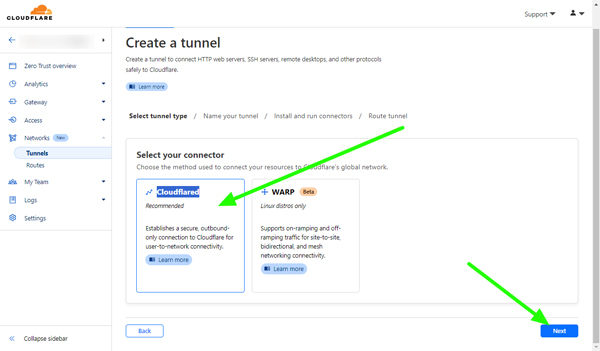
Step 1.3 Click and Create tunnel and select Cloudflared connector, then click next
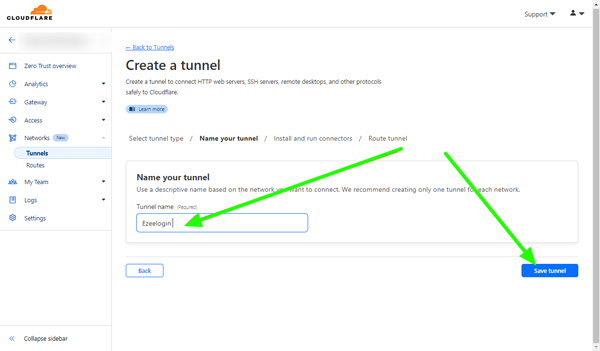
Step 1.4 Name your tunnel and save tunnel
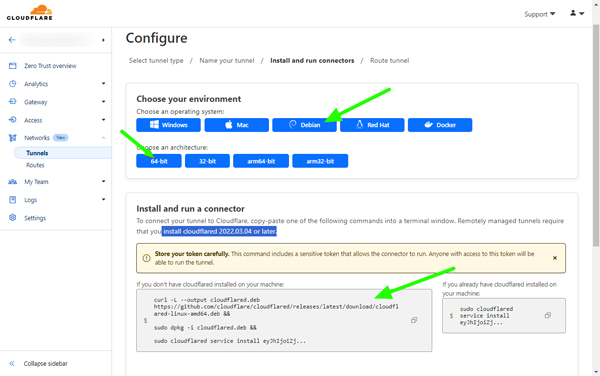
Step 2. Install Cloudflared on the Ezeelogin jump server.
Step 2.1. Select the operating system of the server and copy the corresponding installation command as follows:
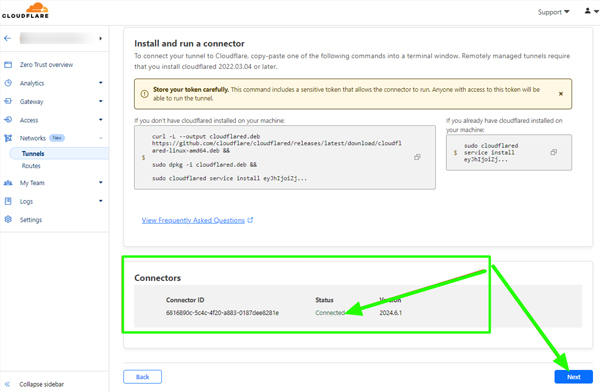
Steps 2.2. After installation, you can view the status as connected in the dashboard and click next
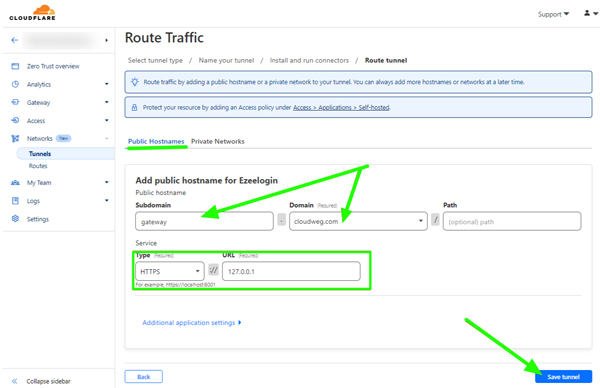
Step 3. Configure the Tunnel and route the traffic
Step 3.1. Choose a Domain and specify any subdomain (eg: gateway). Select HTTPS/HTTP and enter the URL 127.0.0.1 or localhost. You can select any domain which is already added to the Cloudflare account.
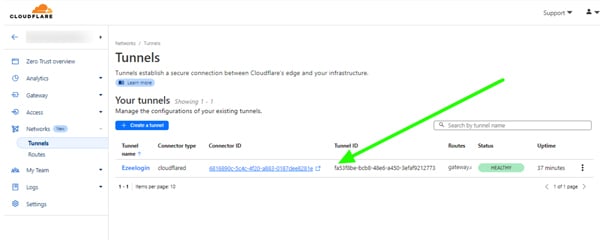
Step 3.2. Once saved, you can view the tunnel in the ‘Tunnels’ section of the dashboard.
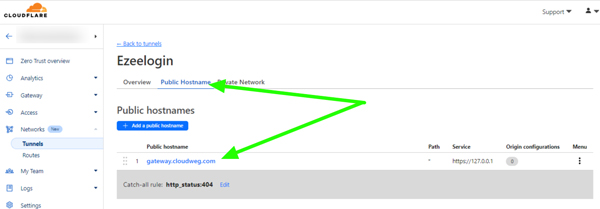
Step 3.3. To view the subdomain, navigate to the dashboard, then go to Configure > Public Hostname.
Step 4. Update the settings in ez.conf file
Add the following lines to /usr/local/etc/ezlogin/ez.conf:
root@gateway ~]# vim /usr/local/etc/ezlogin/ez.conf
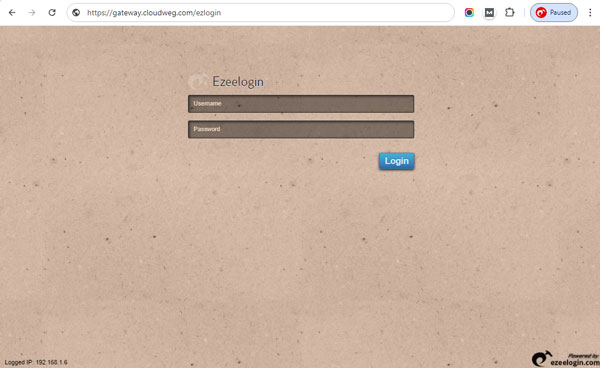
host_url http://gateway.cloudweg.com
cookie_match_ip 0
Note: If you’ve enabled HTTPS, make sure to include the host URL as https://your_domain_name.
Step 5. Route the SSH traffic via cloudflare
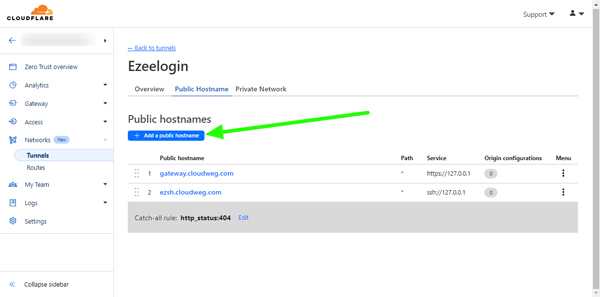
Step 5.1. Add a Public Hostname from dashboard > configure > public hostname > Add a Public Hostname
Step 5.2 Choose a domain from the drop-down menu and specify any subdomain (for example,ezsh.cloudweg.com).
Step 5.3 For Service, select SSH, enter 127.0.0.1 and click save hostname.
Step 6. Install Cloudflared on the client machine
To connect as an Ezeelogin gateway user from the Terminal using Cloudflare Zero Trust Network Access, ensure Cloudflared is installed on your client machine. Then, add the following lines to your SSH configuration file (~/.ssh/config):”
Substitute ‘ezsh.cloudweg.com’ with the hostname you created.
Note that the path to cloudflared may vary based on your operating system and package manager. For instance, if you installed cloudflared on macOS using Homebrew, the path would be /opt/homebrew/bin/cloudflared.
Step 7.1 Access the EZSH shell using Zero Trust Network Access (ZTNA), use the following command:
ssh <ezeelogin_username>@ezsh.cloudweg.com console.log( 'Code is Poetry' );ssh <ezeelogin_username>@ezsh.cloudweg.com </ezeelogin_username></ezeelogin_username>
Be sure to replace ezsh.cloudweg.com with the hostname you have created.
Conclusion
Implementing Cloudflare Zero Trust Network Access (ZTNA) with Ezeelogin SSH Jump Server significantly enhances the security and management of SSH access to your endpoint devices. This integration not only protects your server’s IP address but also minimizes the risk of direct attacks, providing a streamlined and effective approach to managing your IT infrastructure.